Overview
The Tradie Application enables customers to provide controlled mobile device access to their BusinessCraft systems.
When installed and with authorised access, third parties such as subcontractors can use the Tradie App to :
View/search for available jobs
View contact details for those jobs
Find Job Addresses and get directions using integration to Maps app
Make phone calls using integration to Phone app
Send emails using integration to default Email app
View Job Scope of Works and link new or existing photos to Job Scope
View and add Notes to jobs
Take photos and link to Jobs using integration to Camera app
Link existing Photos to Jobs using integration to Photos app
System Requirements
iOS8.0 or later
A compatible device as specified in the App Store for the application
Installing BusinessCraft Tradie on an iOS Device
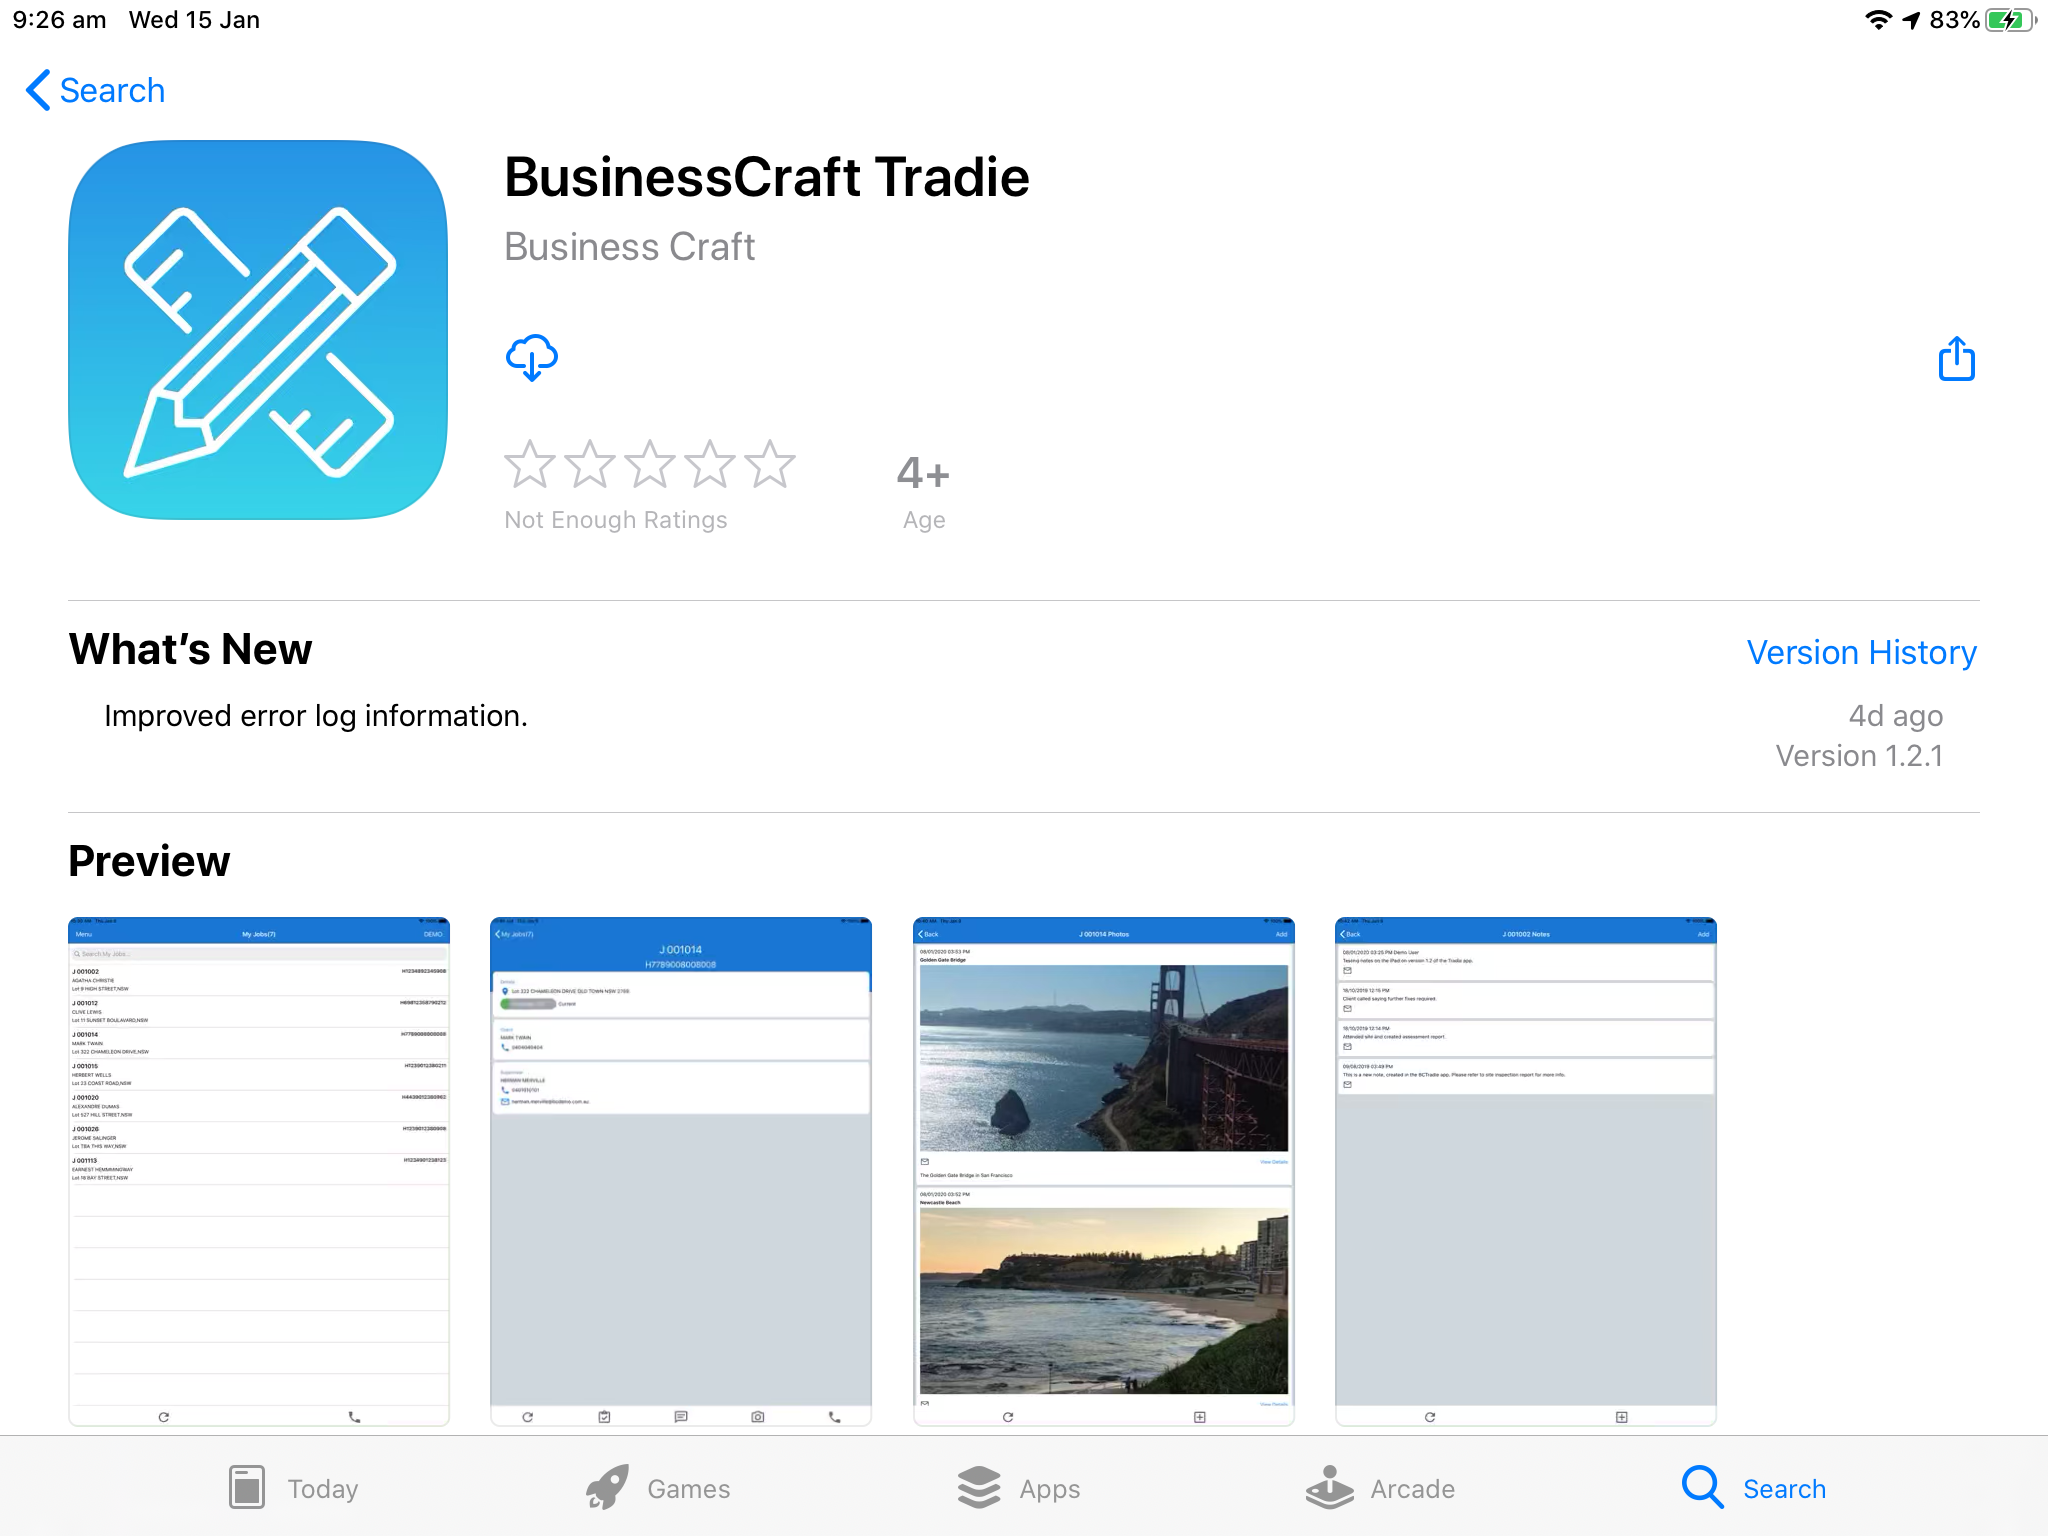
Using the mobile device that will be used to run the application, go to the App Store and search for BusinessCraft Tradie (https://apps.apple.com/au/app/businesscraft-tradie/id1266158038)
Check the compatibility section to ensure the mobile device is supported.
Tap Get to install the app, following any App Store prompts required (if BusinessCraft Tradie has been previously installed and removed from the device, the Get icon will instead be a Cloud Download icon)
Once installed, the Get Button changes to Open
Tap Open to open BusinessCraft Tradie
Opening BusinessCraft Tradie on a Mobile Device
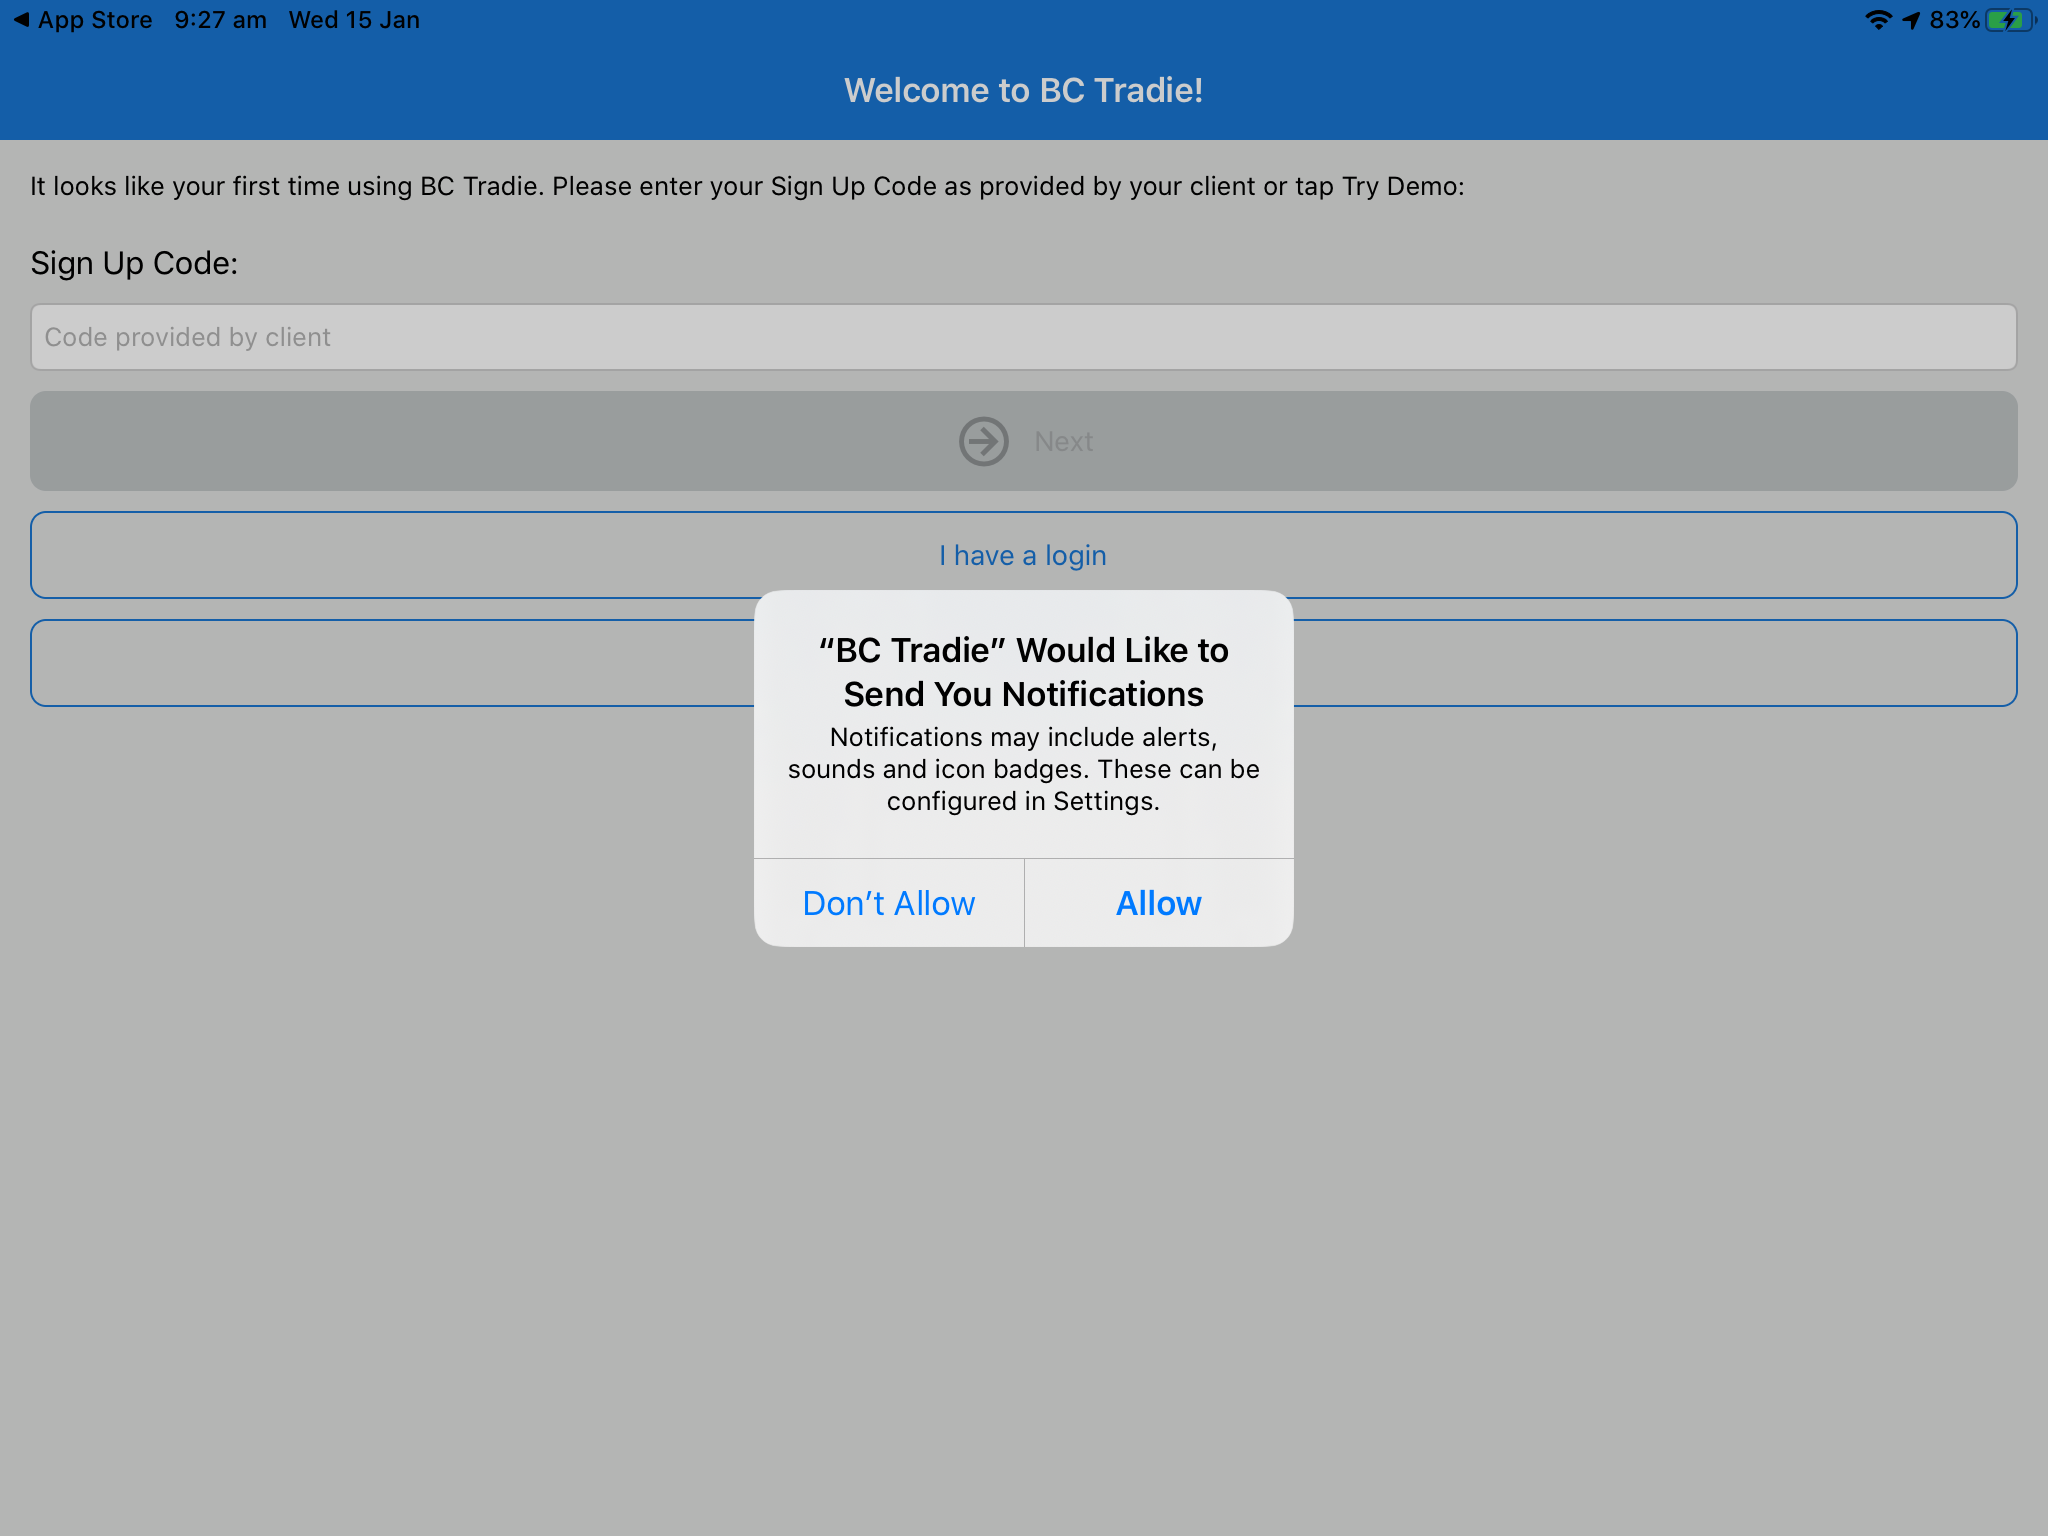
After tapping Open, the BusinessCraft Tradie app starts and on the first occasion will provide a prompt to allow notifications (this can be changed subsequently as required in iOS settings:
Signing Up and/or Logging in to a Dataset
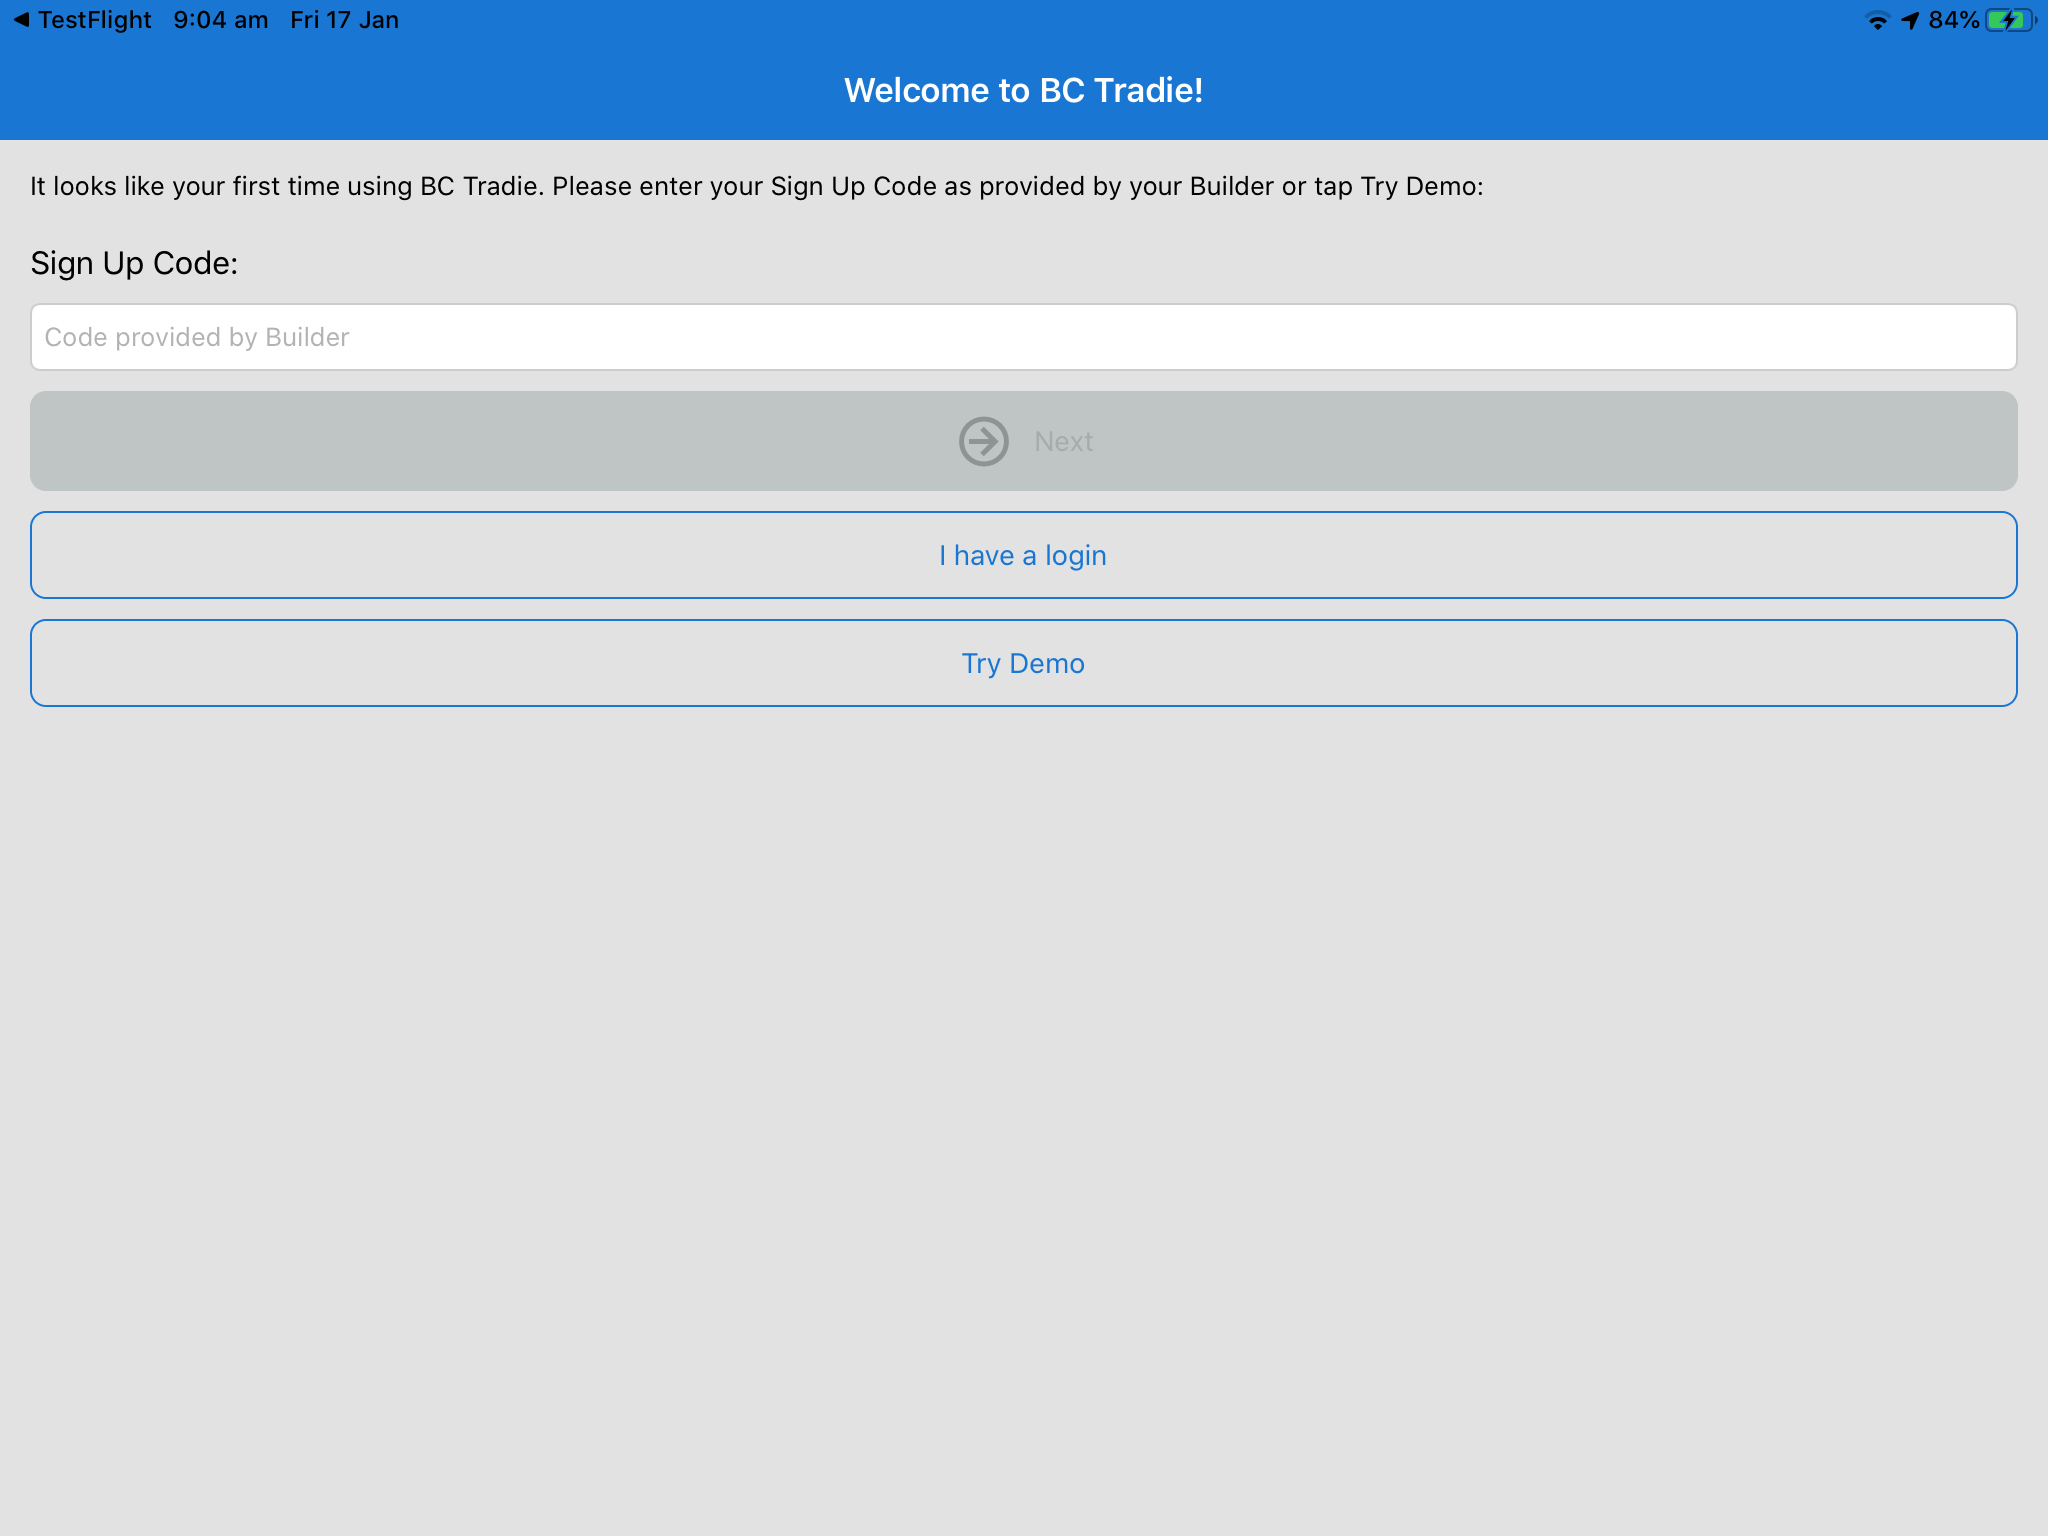
After responding to the Notifications prompt, the Welcome screen is displayed providing the option to login to a builders dataset, login to a demo dataset or to sign up to be authorised to login to a builder’s dataset:
Signing Up
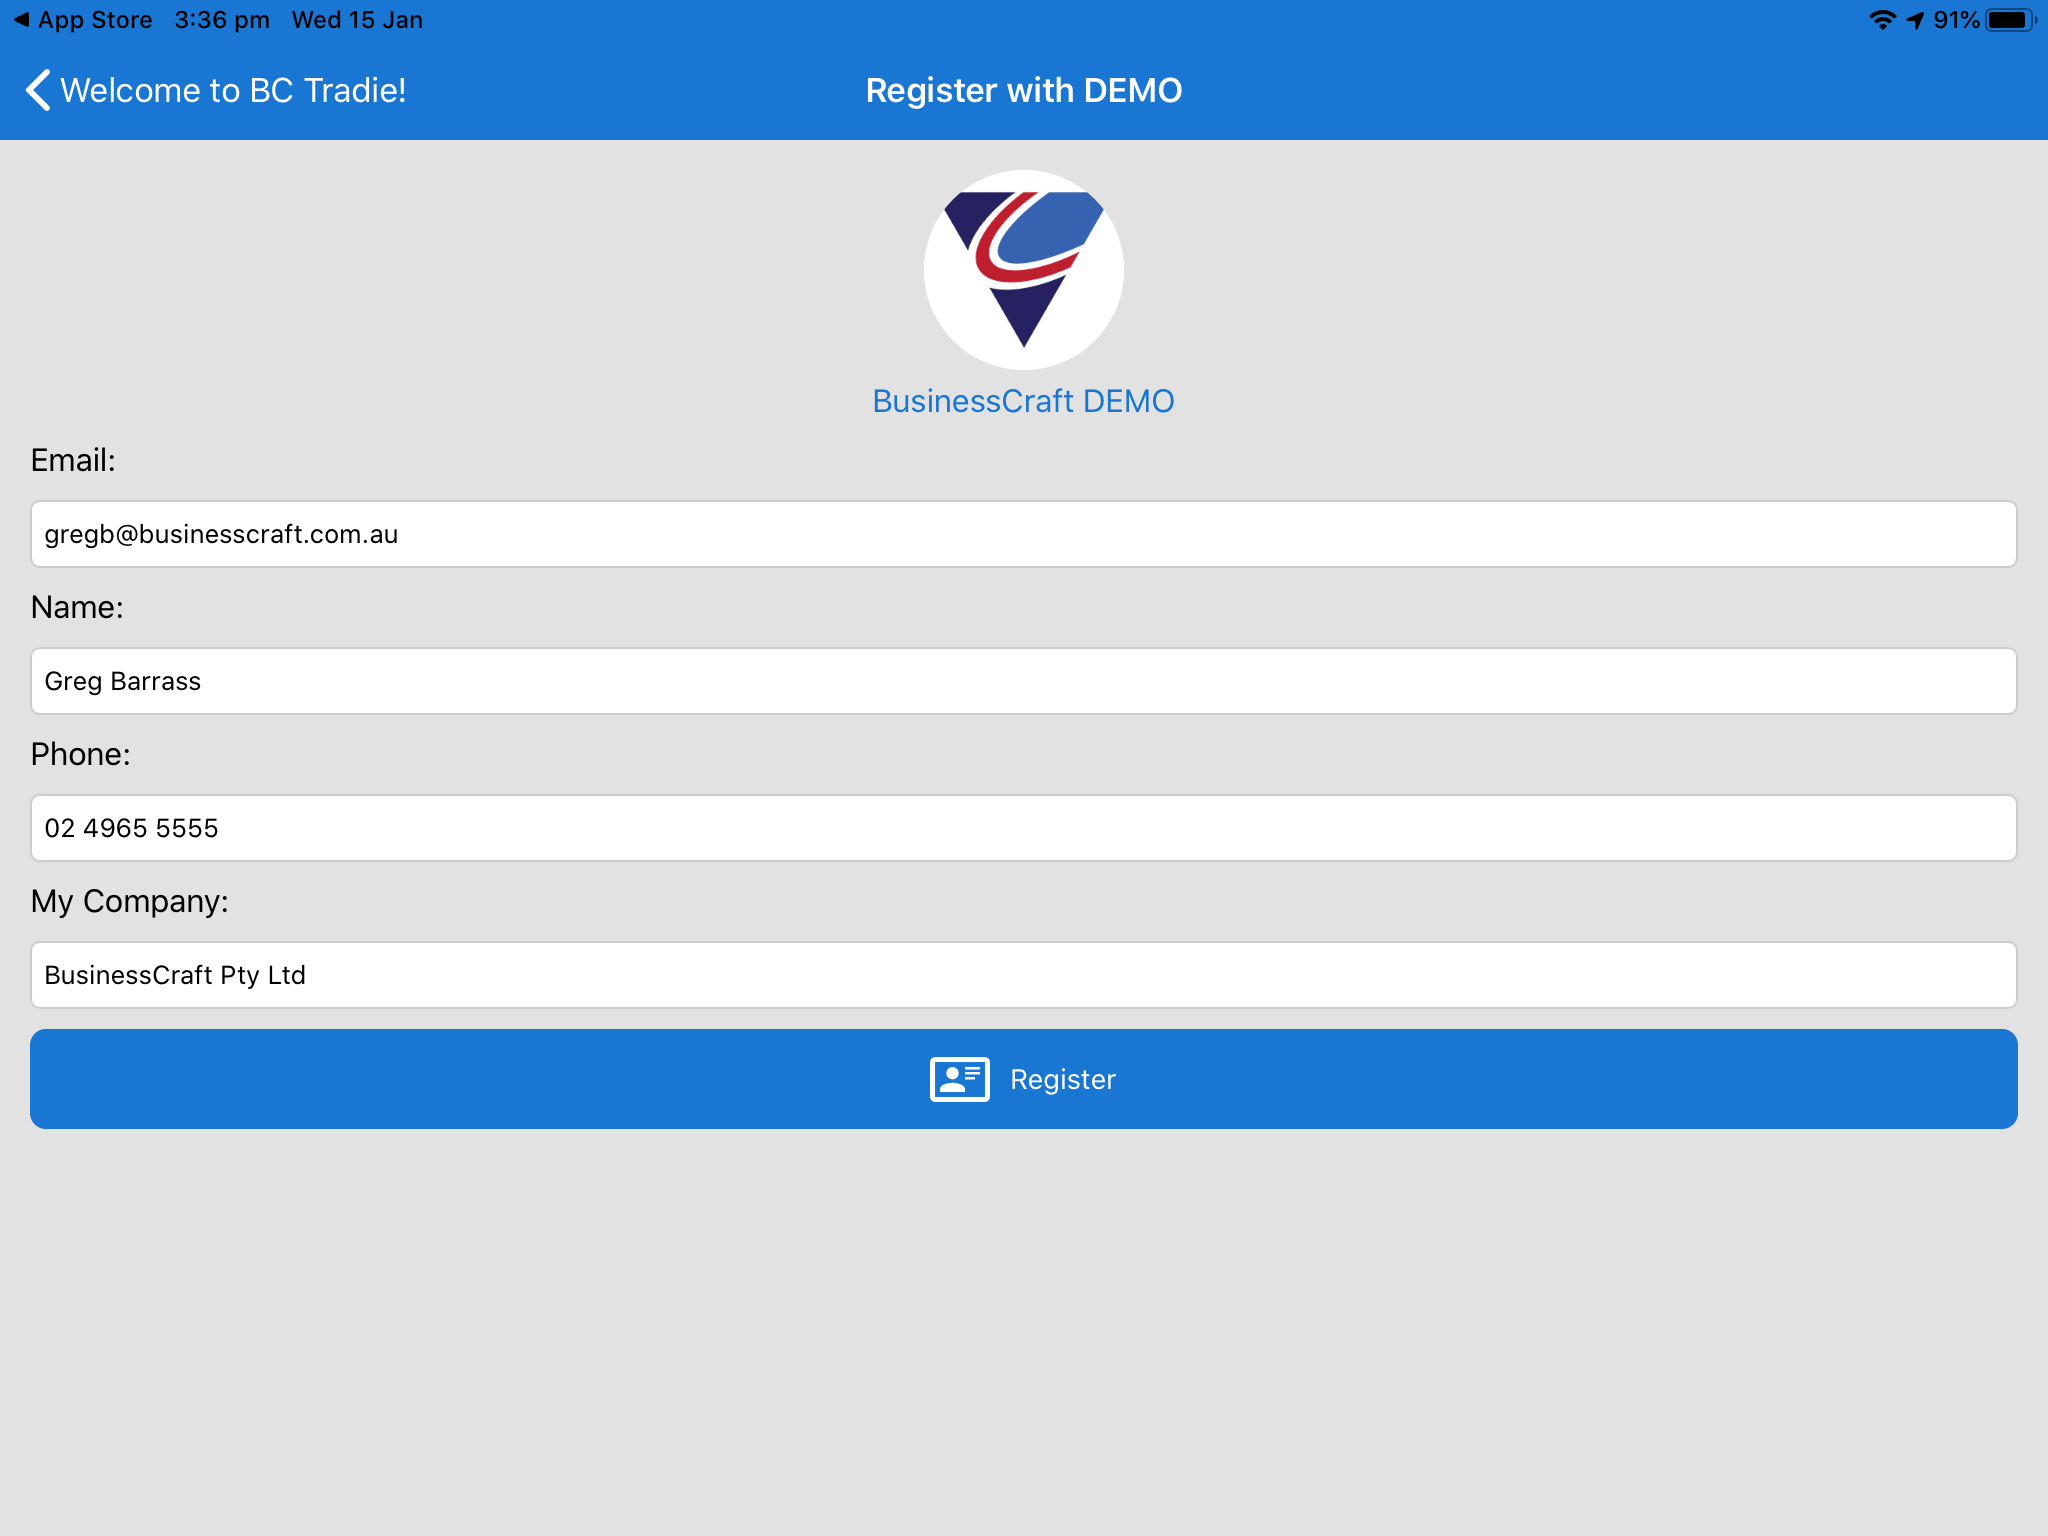
With the exception of accessing the Demo dataset, you must sign up to gain access to a Builder’s Dataset. Enter the Sign Up Code provided to you by the builder and click Next to display the Register With screen:
Complete the required fields and click Register. An email will be sent to the Builder advising that access has been requested to the dataset.
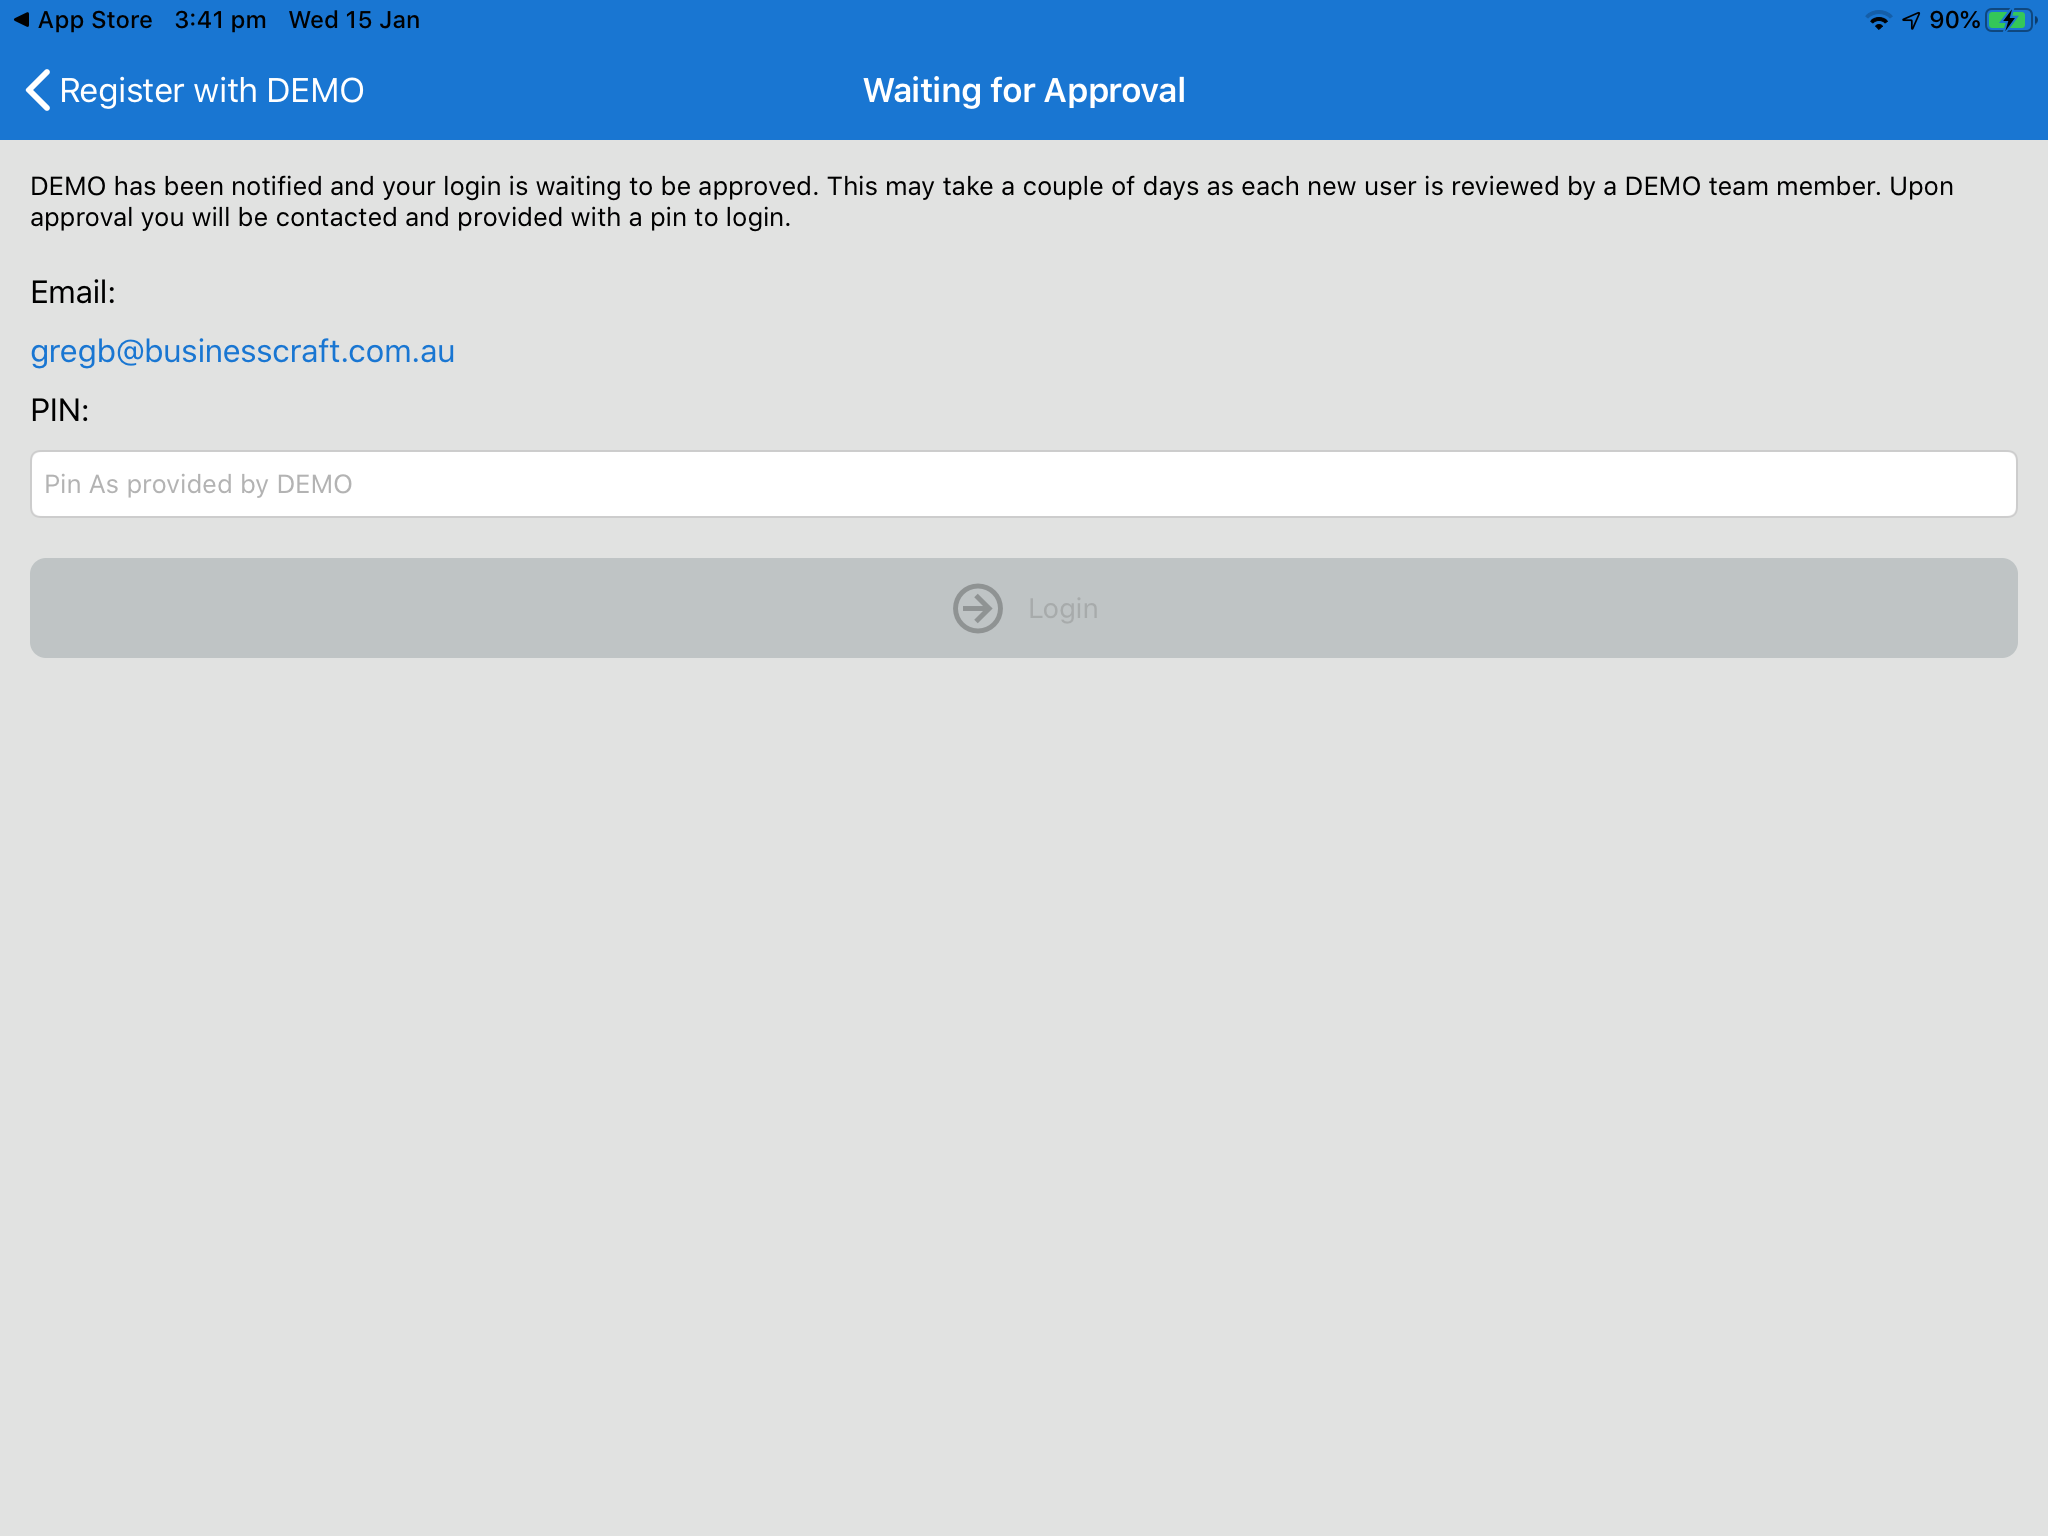
The Waiting for Approval screen is displayed automatically:
Exit BusinessCraft Tradie until a Pin Code is received or alternatively click the Register With Breadcrumb in the Top Left Hand corner of the screen to return back to the Welcome screen to login in to another dataset or to the demo dataset.
If you exit BusinessCraft Tradie, when you next start the app, it will remember the screen that you last accessed.
Logging in to a Builder’s Dataset
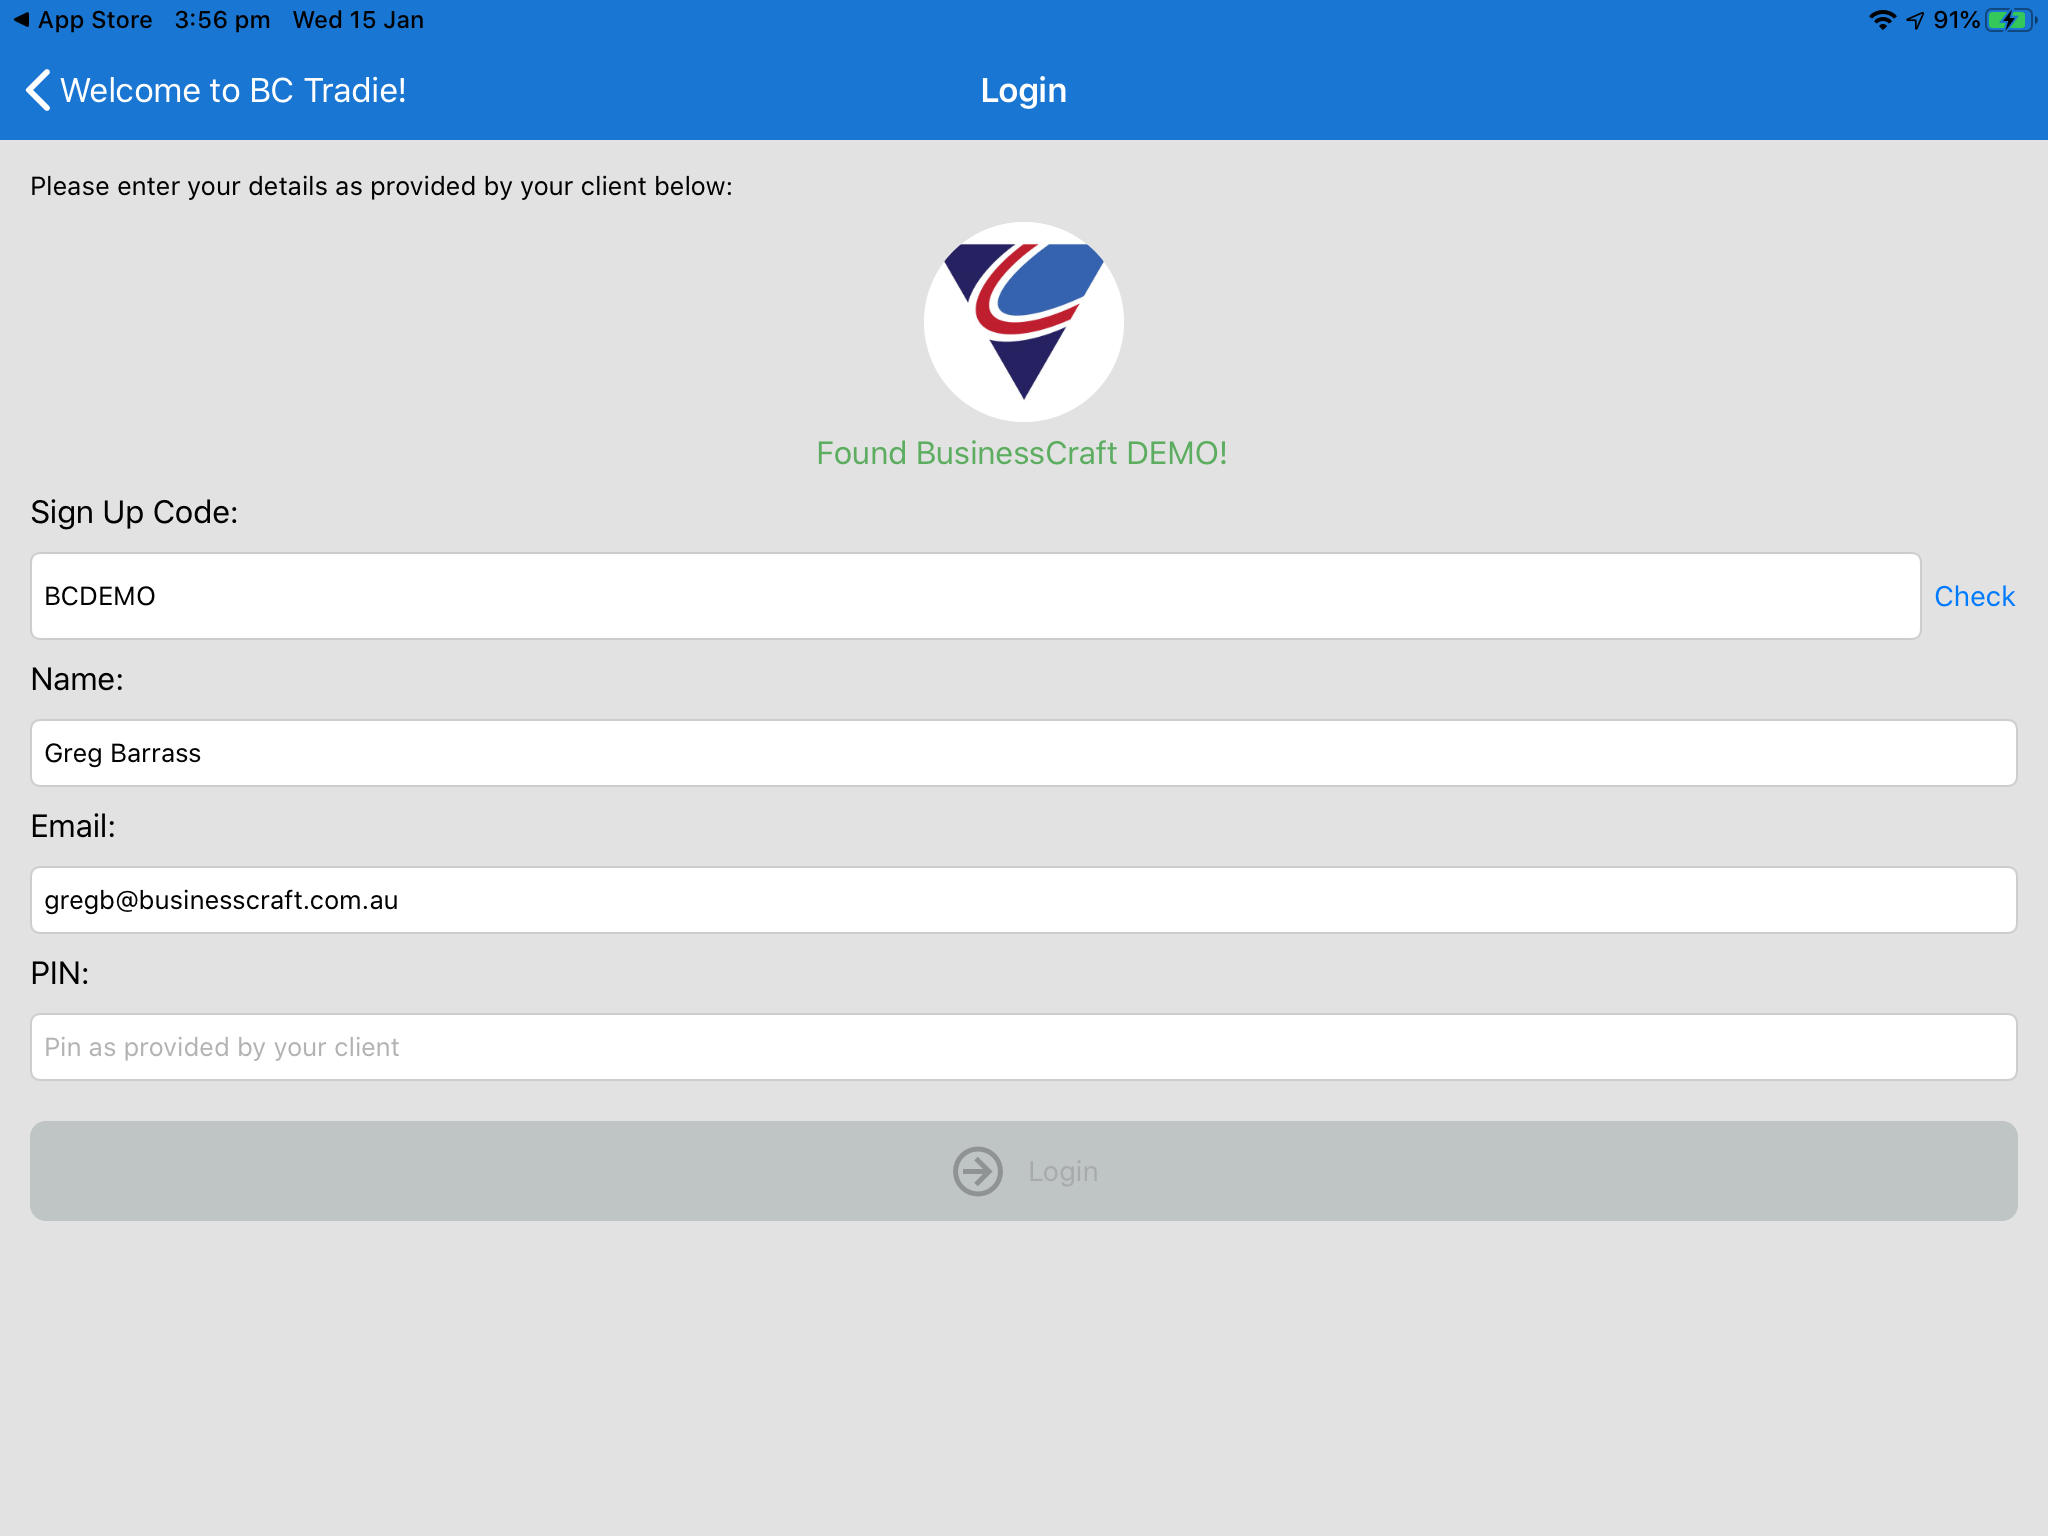
On receipt of the Pin Code from the Builder, open BusinessCraft Tradie and at the Welcome Screen enter the Sign Up Code for the Builder and then tap - I have a login and the Login screen is displayed with the previously entered details:
Enter the Pin Code provided by the Builder and tap Login. The My Jobs screen will be displayed for the logged in dataset with available jobs displayed for the logged in user’s business.
Logging in to the Demo Dataset
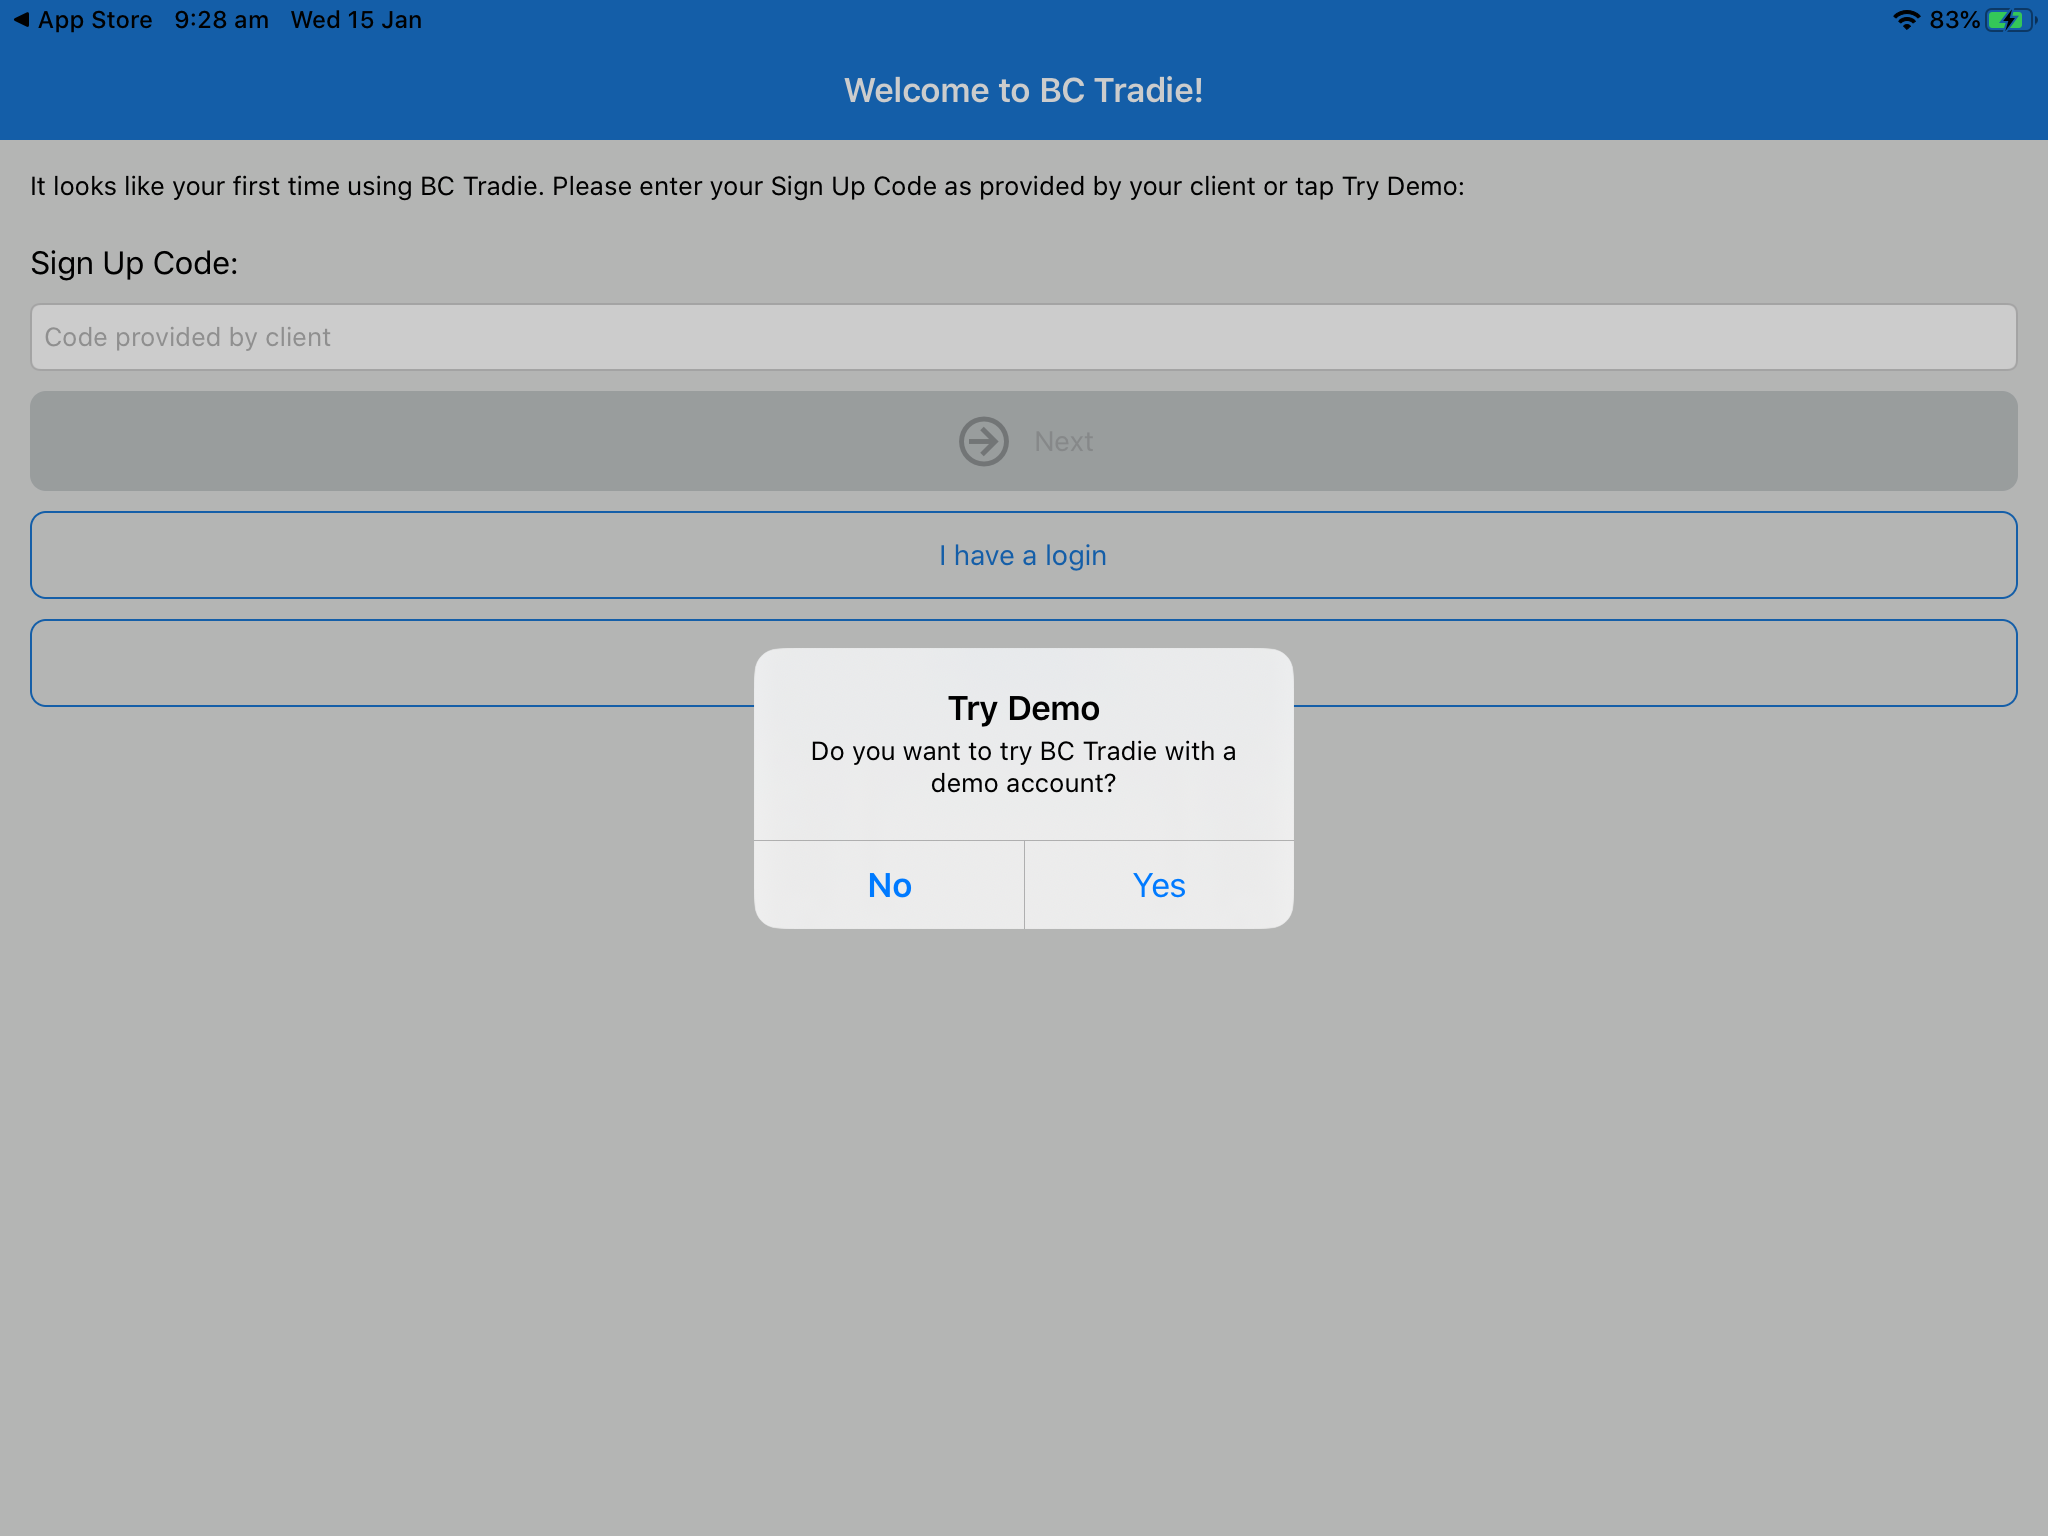
In the Welcome Screen, tap Try Demo and a confirmation prompt is displayed to login to the demo dataset:
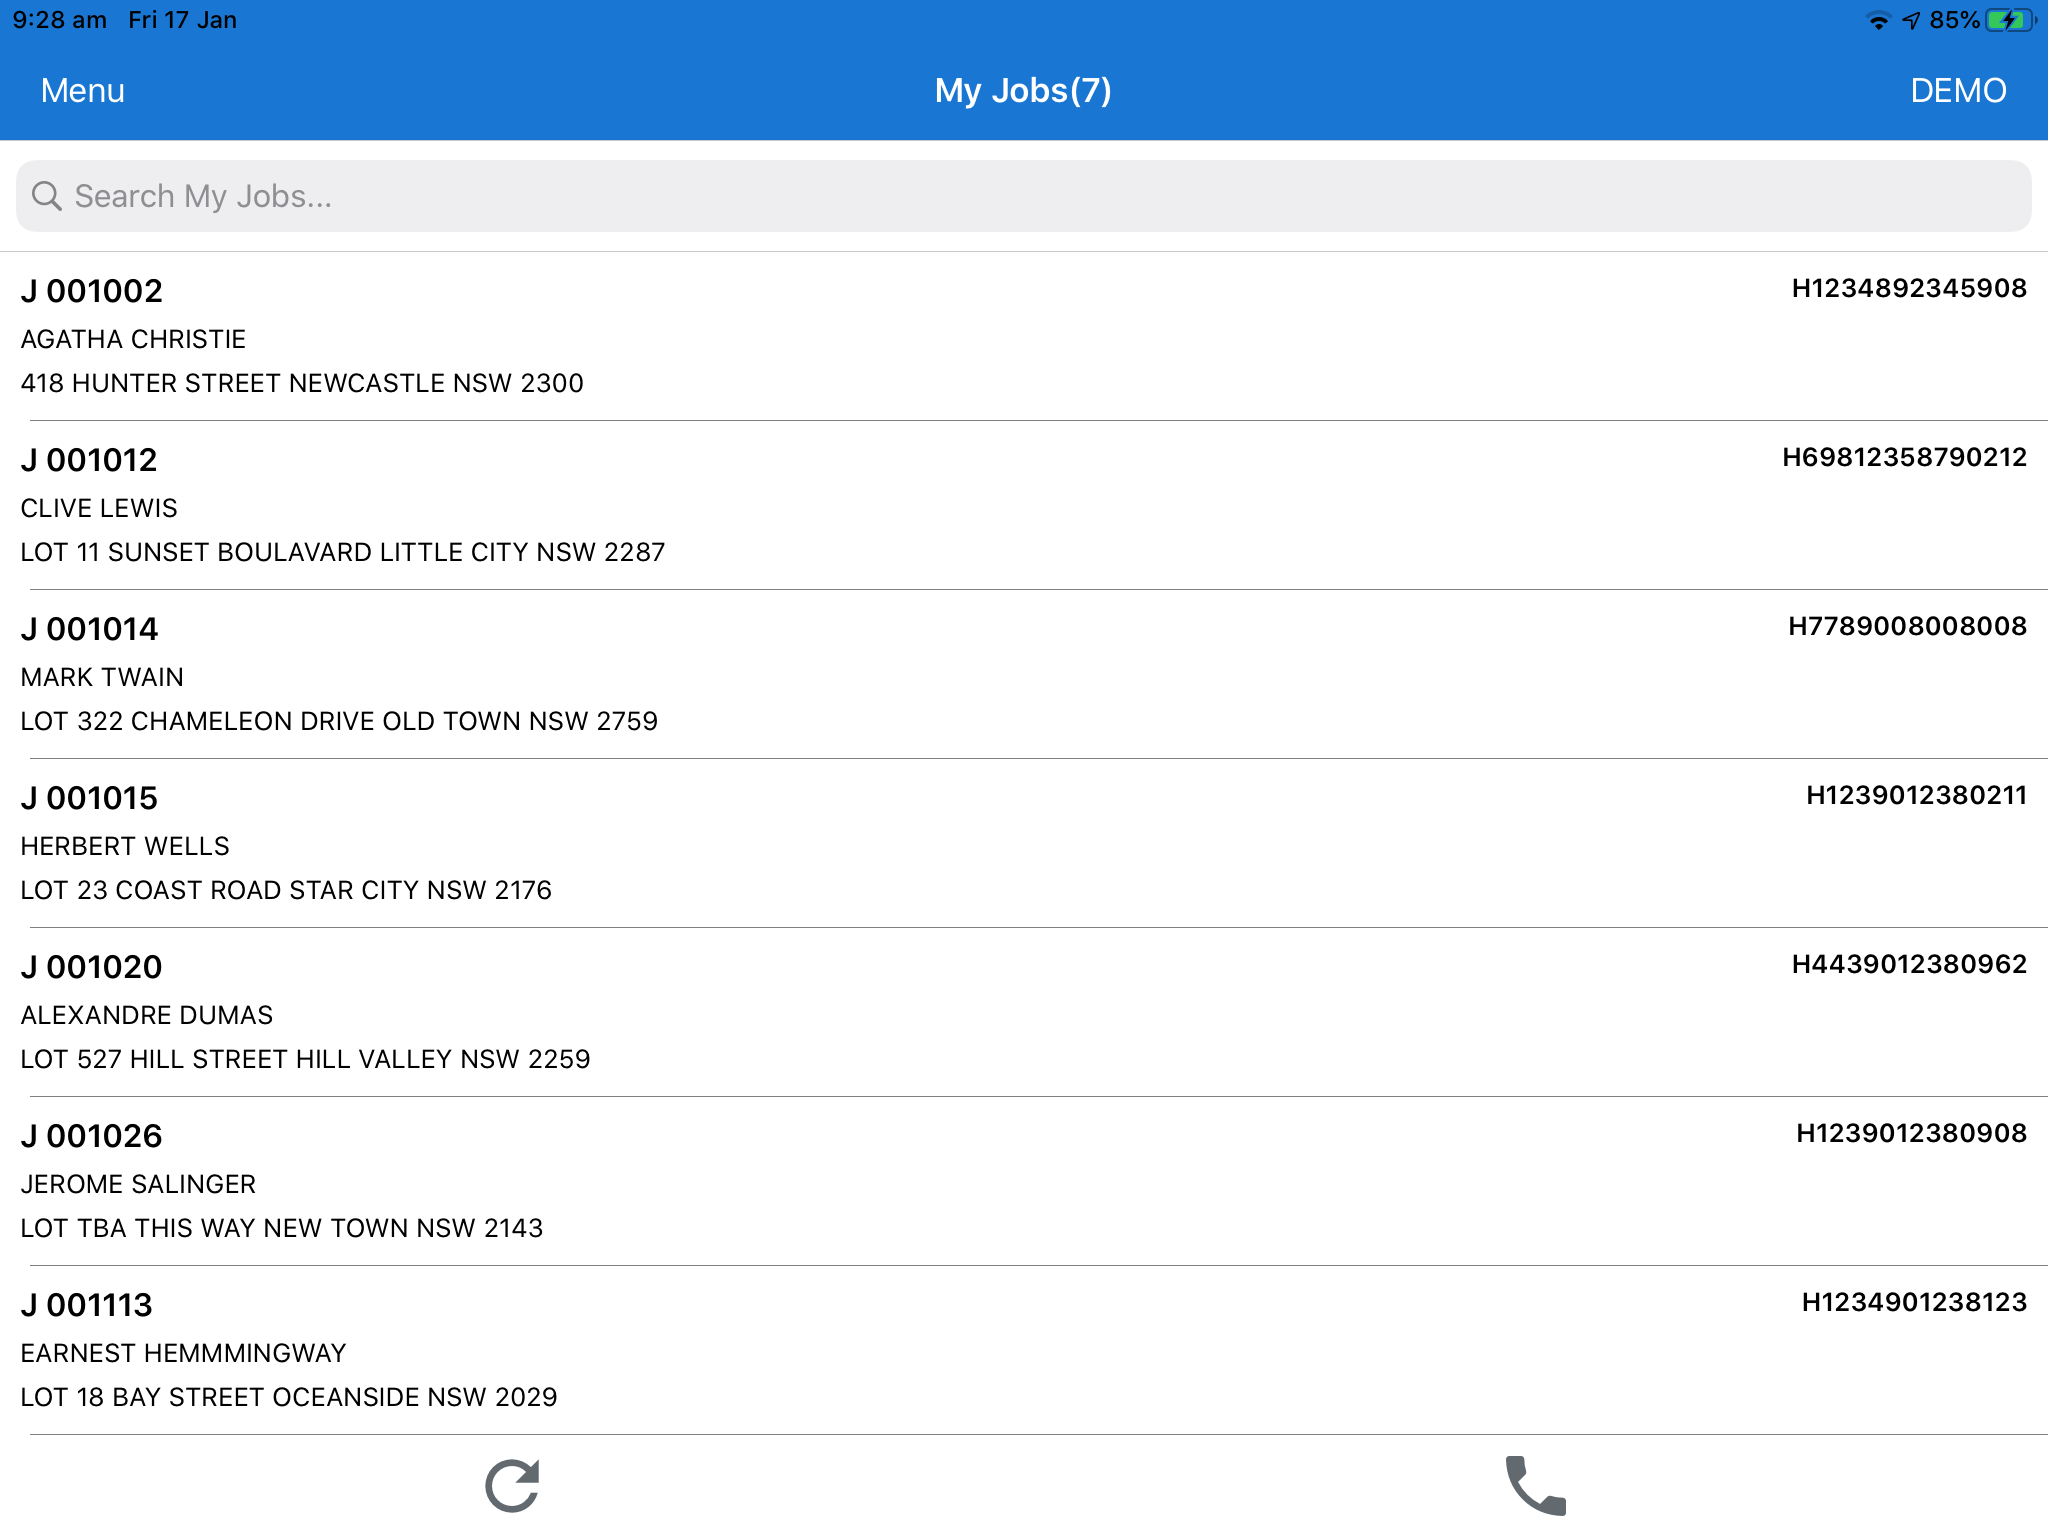
After tapping Yes, the My Jobs screen is displayed, showing a list of available jobs in the dataset:
My Jobs
The My Jobs screen displays a list of the current jobs available to be worked on for the dataset for the logged in user’s business:
My Jobs Banner
The Banner across the top of the My Jobs screen comprises 3 components:

| Menu | Tap on Menu to open the Menu Sidebar providing access to the My Jobs, My Builders, Settings, Error Logs and Help screens. |
| My Jobs | The screen name and the number of jobs that can be accessed in the list. |
| Dataset Name | The name of the currently logged in dataset. Tap on the Dataset Name to open the Edit Builder screen for the dataset. The Edit Builder screen is explained in detail in the My Builders section of this document. |
My Jobs Search
Below the screen banner is a Search field providing wild card searching capability of the jobs in the list:

As search criteria are entered, the list is refined. Click the x in the search field or Cancel to clear the search and for the list to refresh.
My Jobs Grid
Below the Search field is the My Jobs Grid providing a list of Jobs including the Job Number, the Insured, the Job Address and the Claim Number (subject to server configuration):

My Jobs Shortcuts
Below the My Jobs Grid are shortcuts to refresh the data displayed in the app from the dataset server and another to call the builder for the logged in dataset:

When logging back into a dataset, to save loading time, the Tradie App loads cached data. If the most recent data needs to be viewed, use the refresh icon or drag down on the grid to refresh the data.
When using the call icon to call the Builder, please note that iOS will display the Builder Name in a pop up, click on that pop up to display the Call/Cancel pop up to make the call.
Job Screen
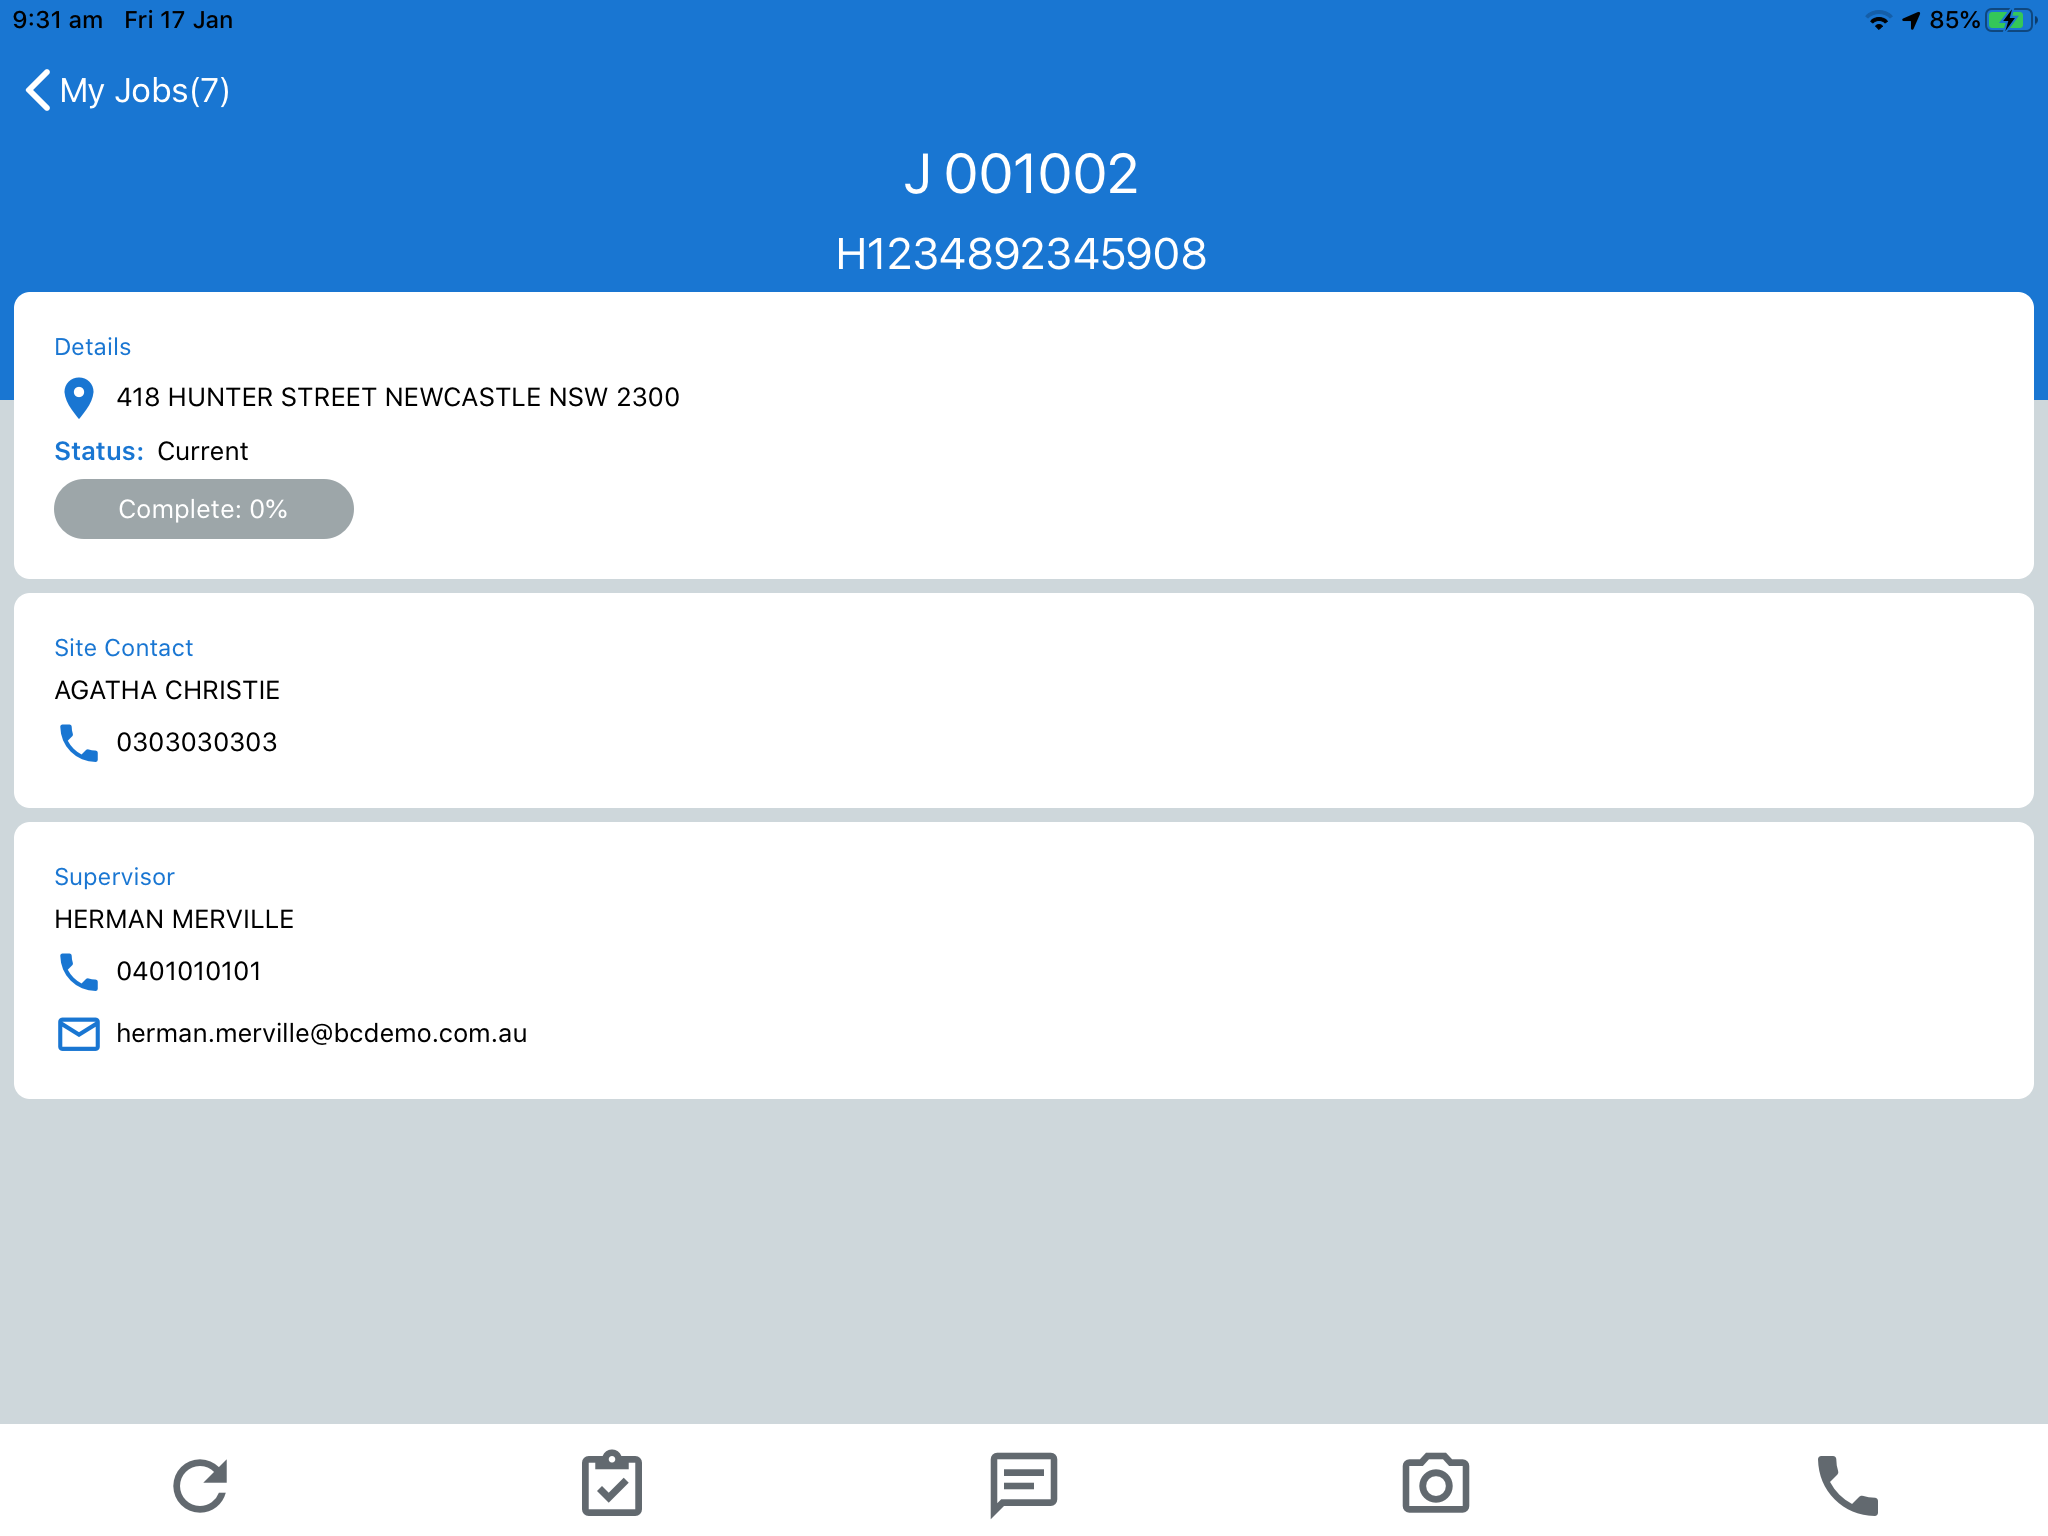
After tapping on a job in the My Jobs screen, the Job screen is displayed. Subject to server configuration, the Banner displays the Job Number and the Claim Number. Tap the My Jobs breadcrumb in the top left hand corner of the screen to return to the My Jobs screen.
The Job screen comprises 3 panels with 5 shortcut icons across the bottom of the page:
| Details |
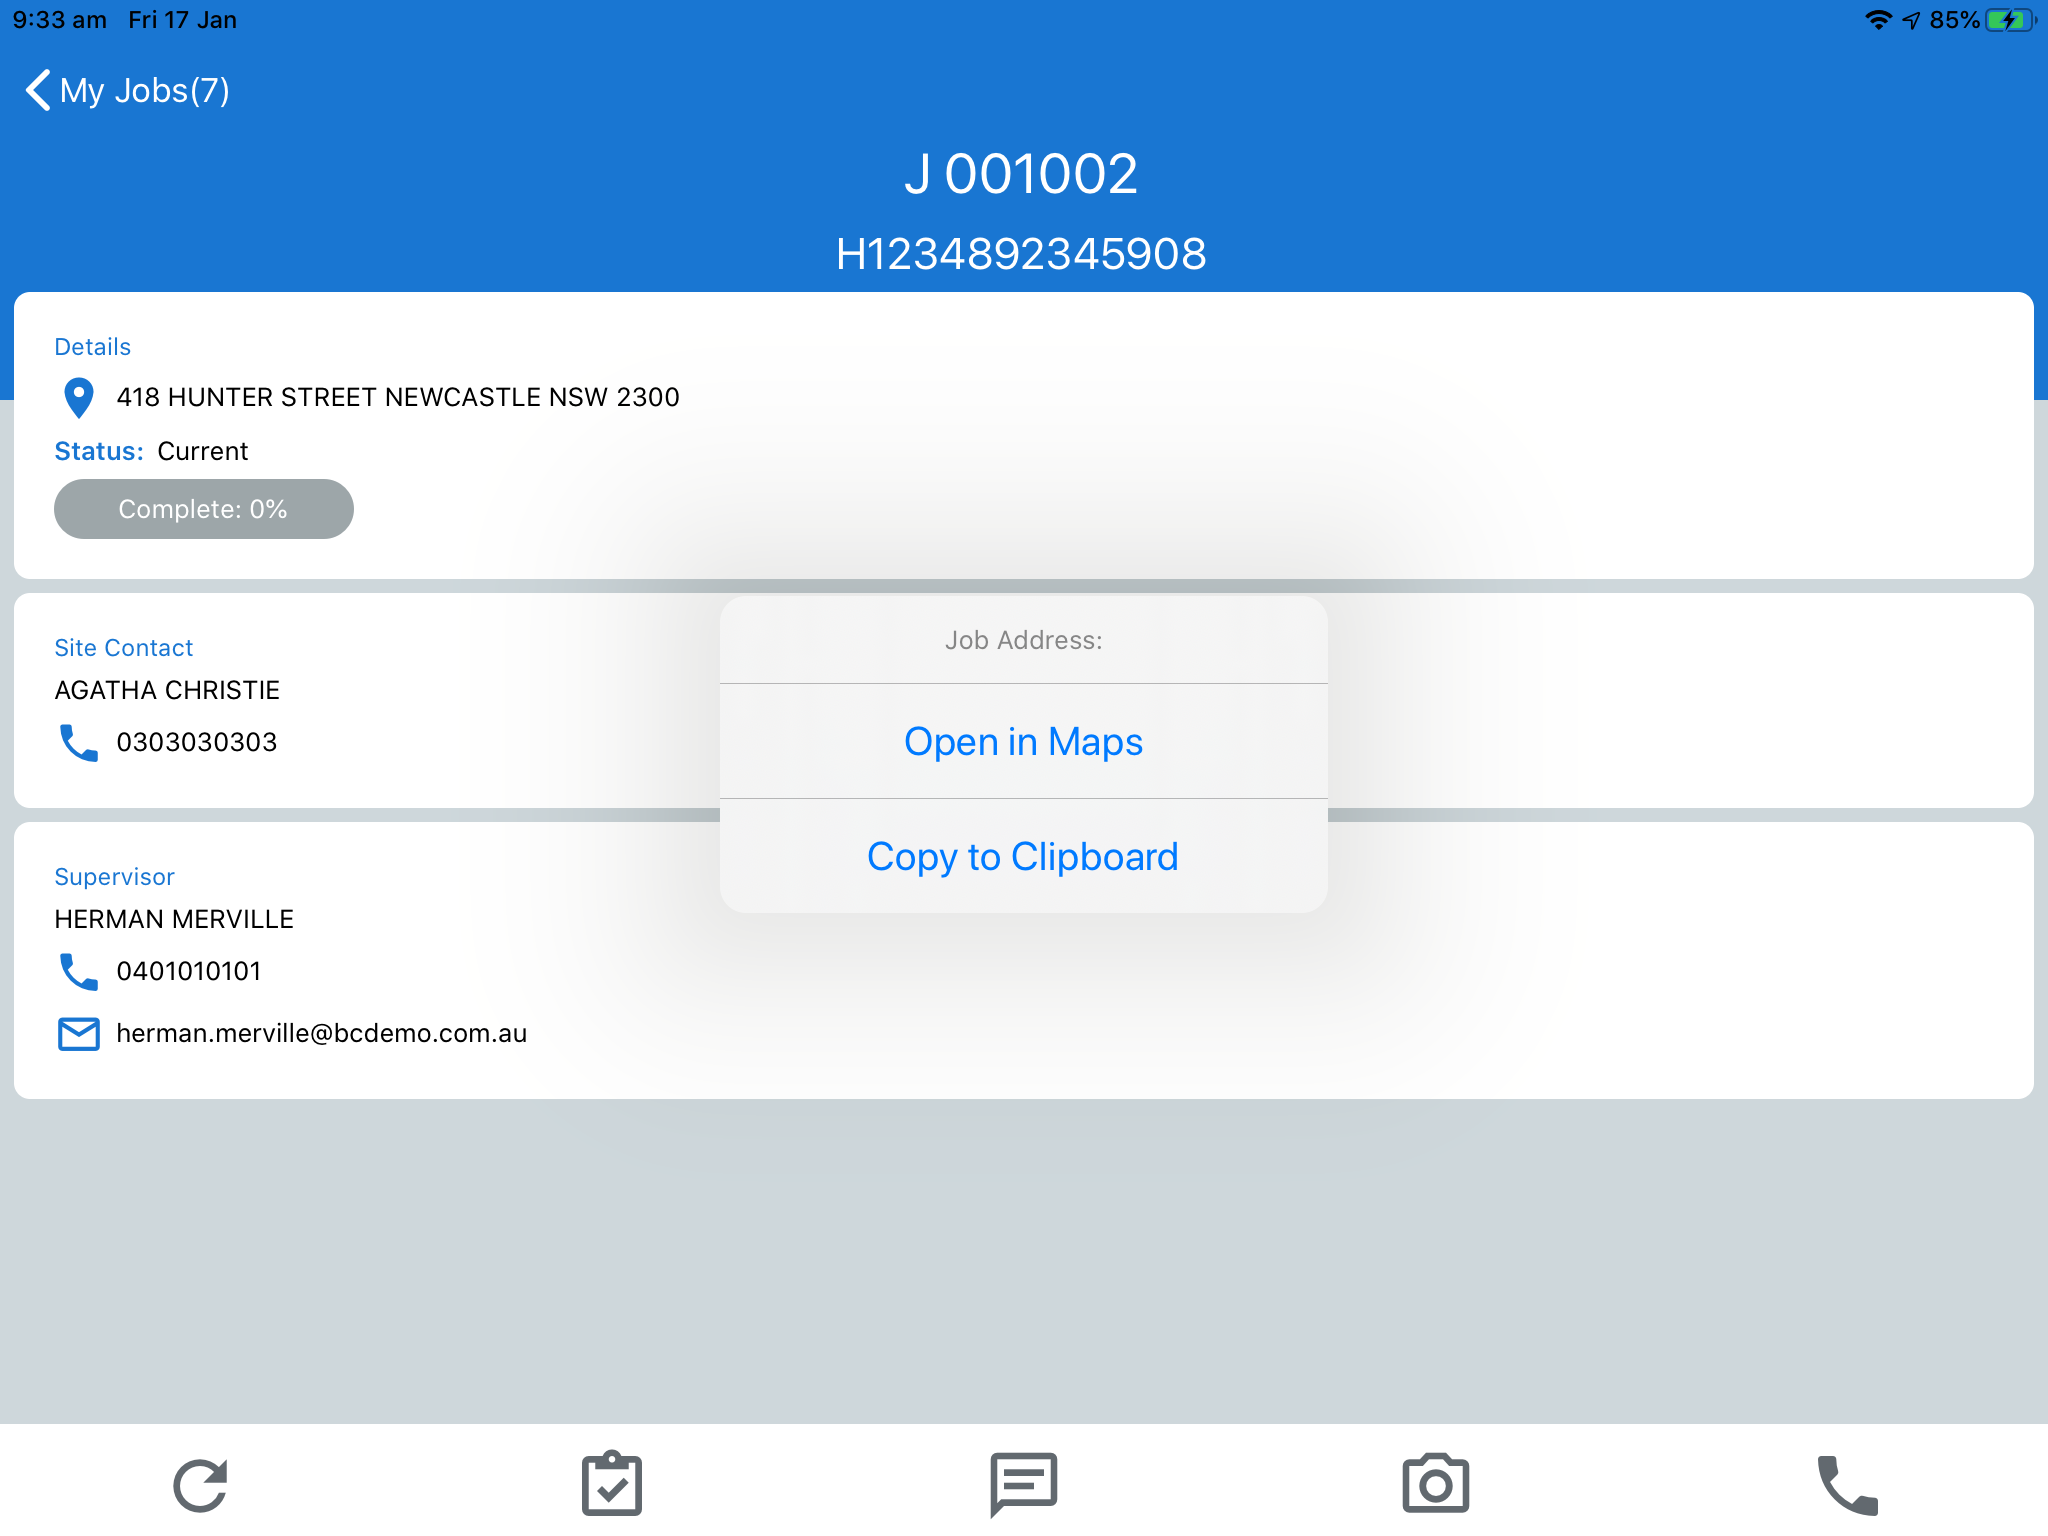
Subject to server configuration, the Job Details panel displays the Job Address, the Job Percentage Complete and the Job Status. Tap on the Job Address and a pop up menu provides the option to either open the address in Maps or copy the address to the Clipboard. |
| Site Contact |
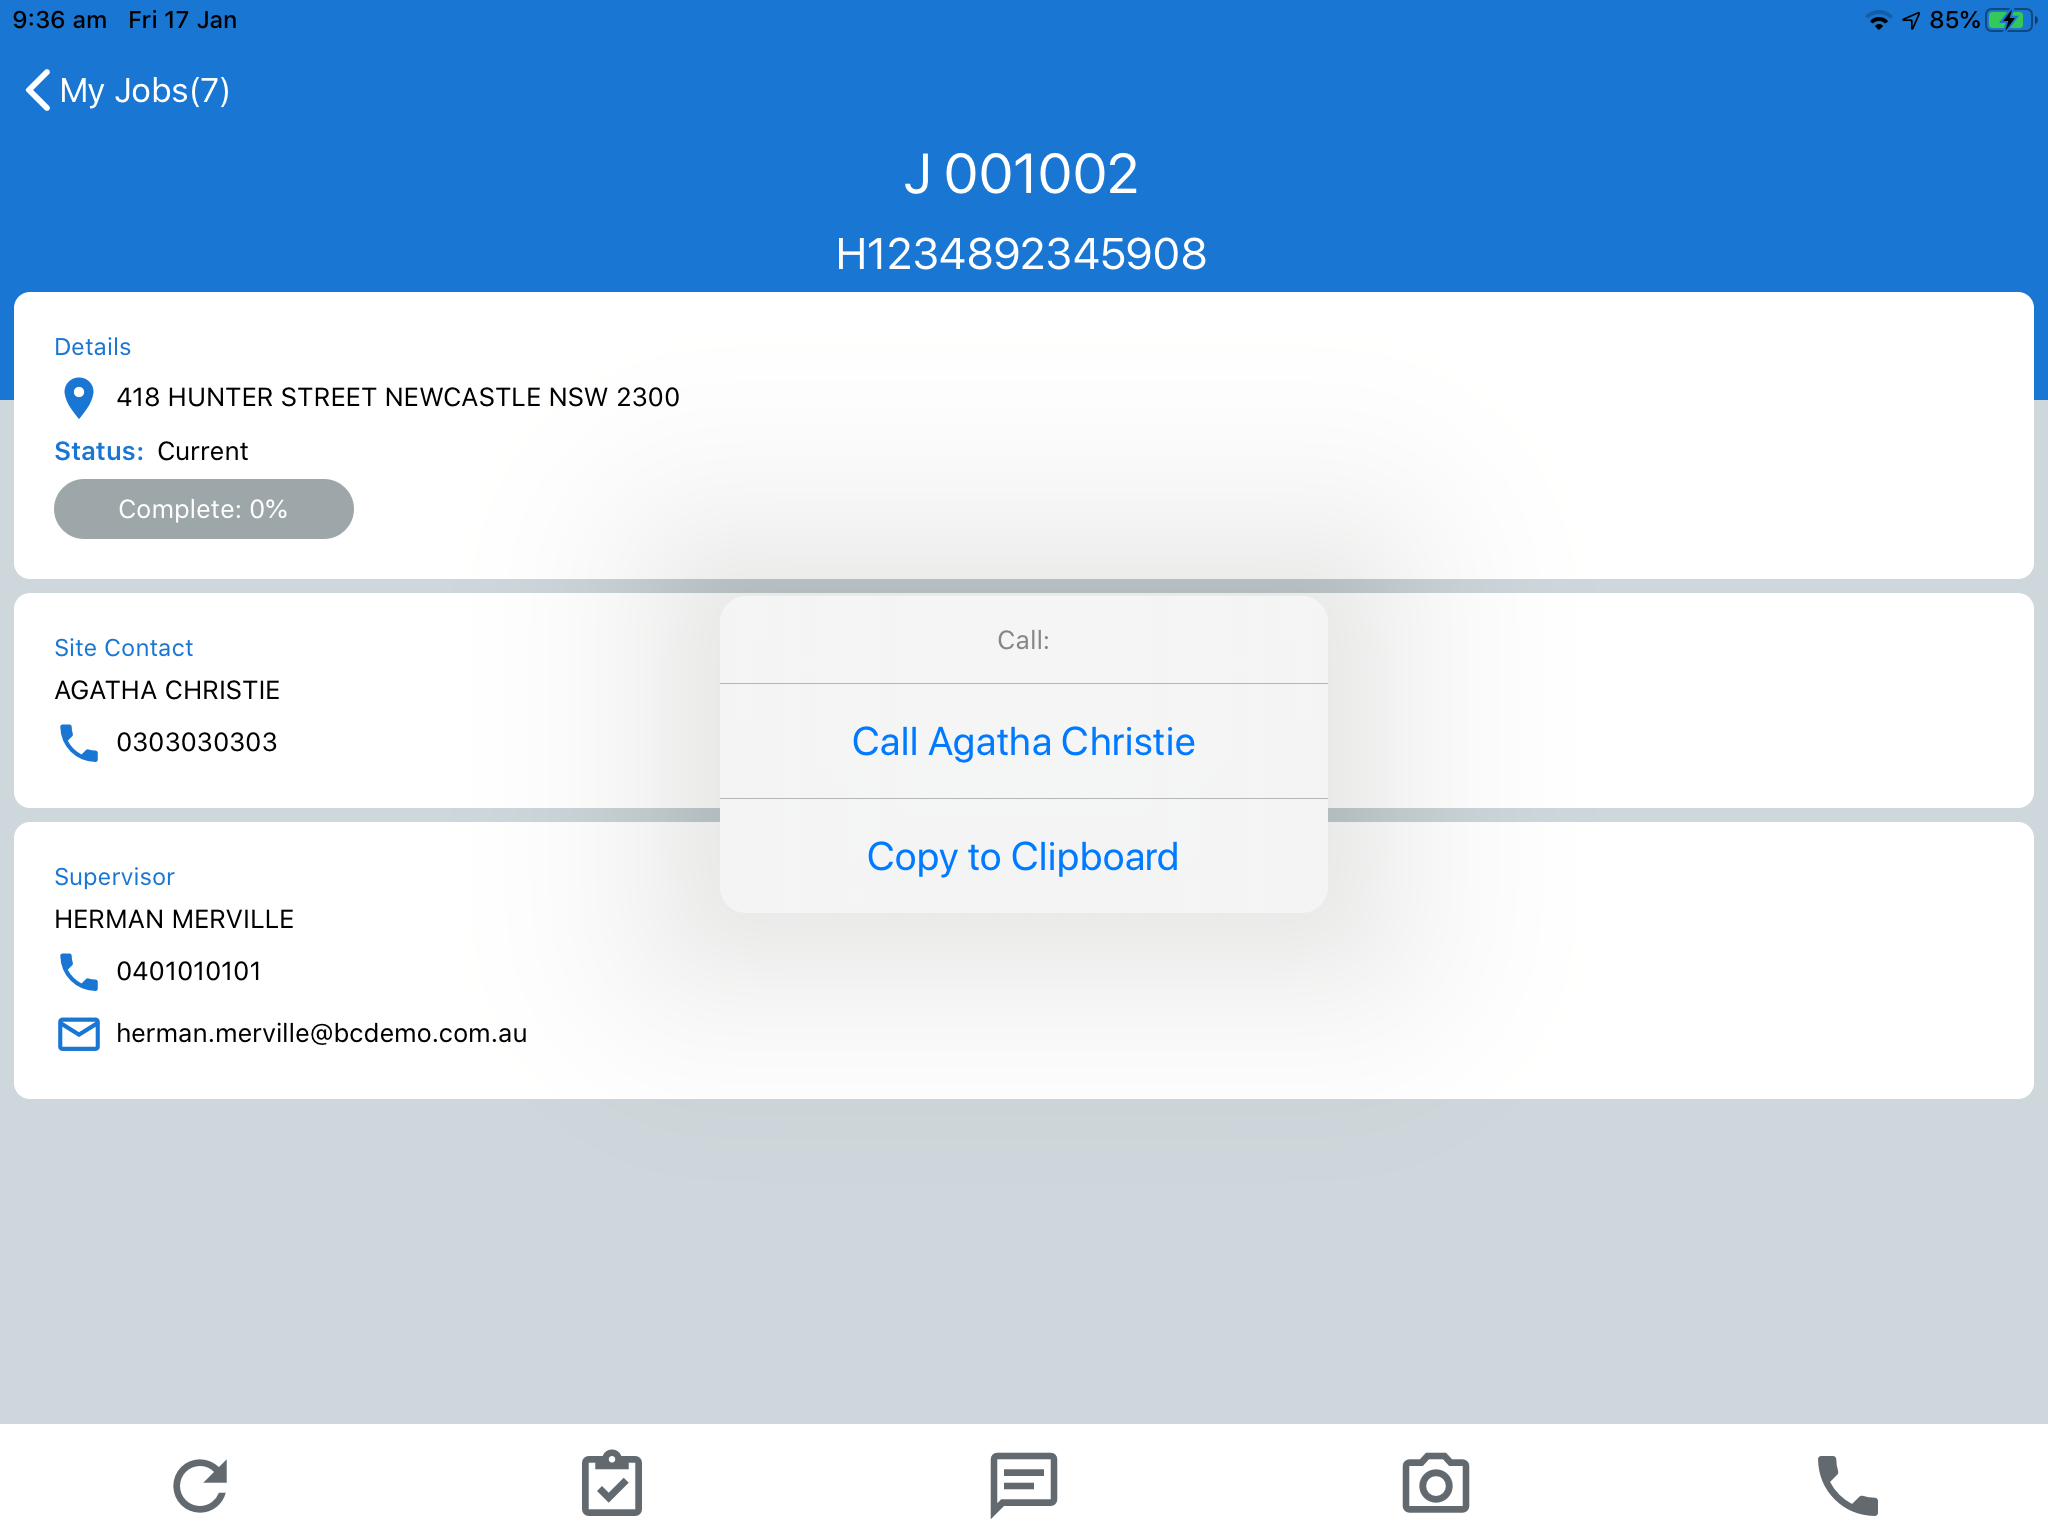
The Site Contact panel displays the Site Contact Name and Phone Number. Tap on the Phone Number and a pop up menu provides the option to either call the Site Contact or copy the phone number to the Clipboard. |
| Supervisor Details |
The Supervisor Details panel displays the Job Supervisor’s Name, Phone Number and Email Address. Tap on the Phone Number and a pop up menu provides the option to either call the supervisor or copy the phone number to the Clipboard. Tap on the Email Address and a pop menu up provides the option to either email the supervisor or copy the email address to the Clipboard. |
Using Job Address Details
After tapping on a Job Address, a Job Address pop up menu is displayed with the option to open the address in Maps or copy the Job Address to the Clipboard:
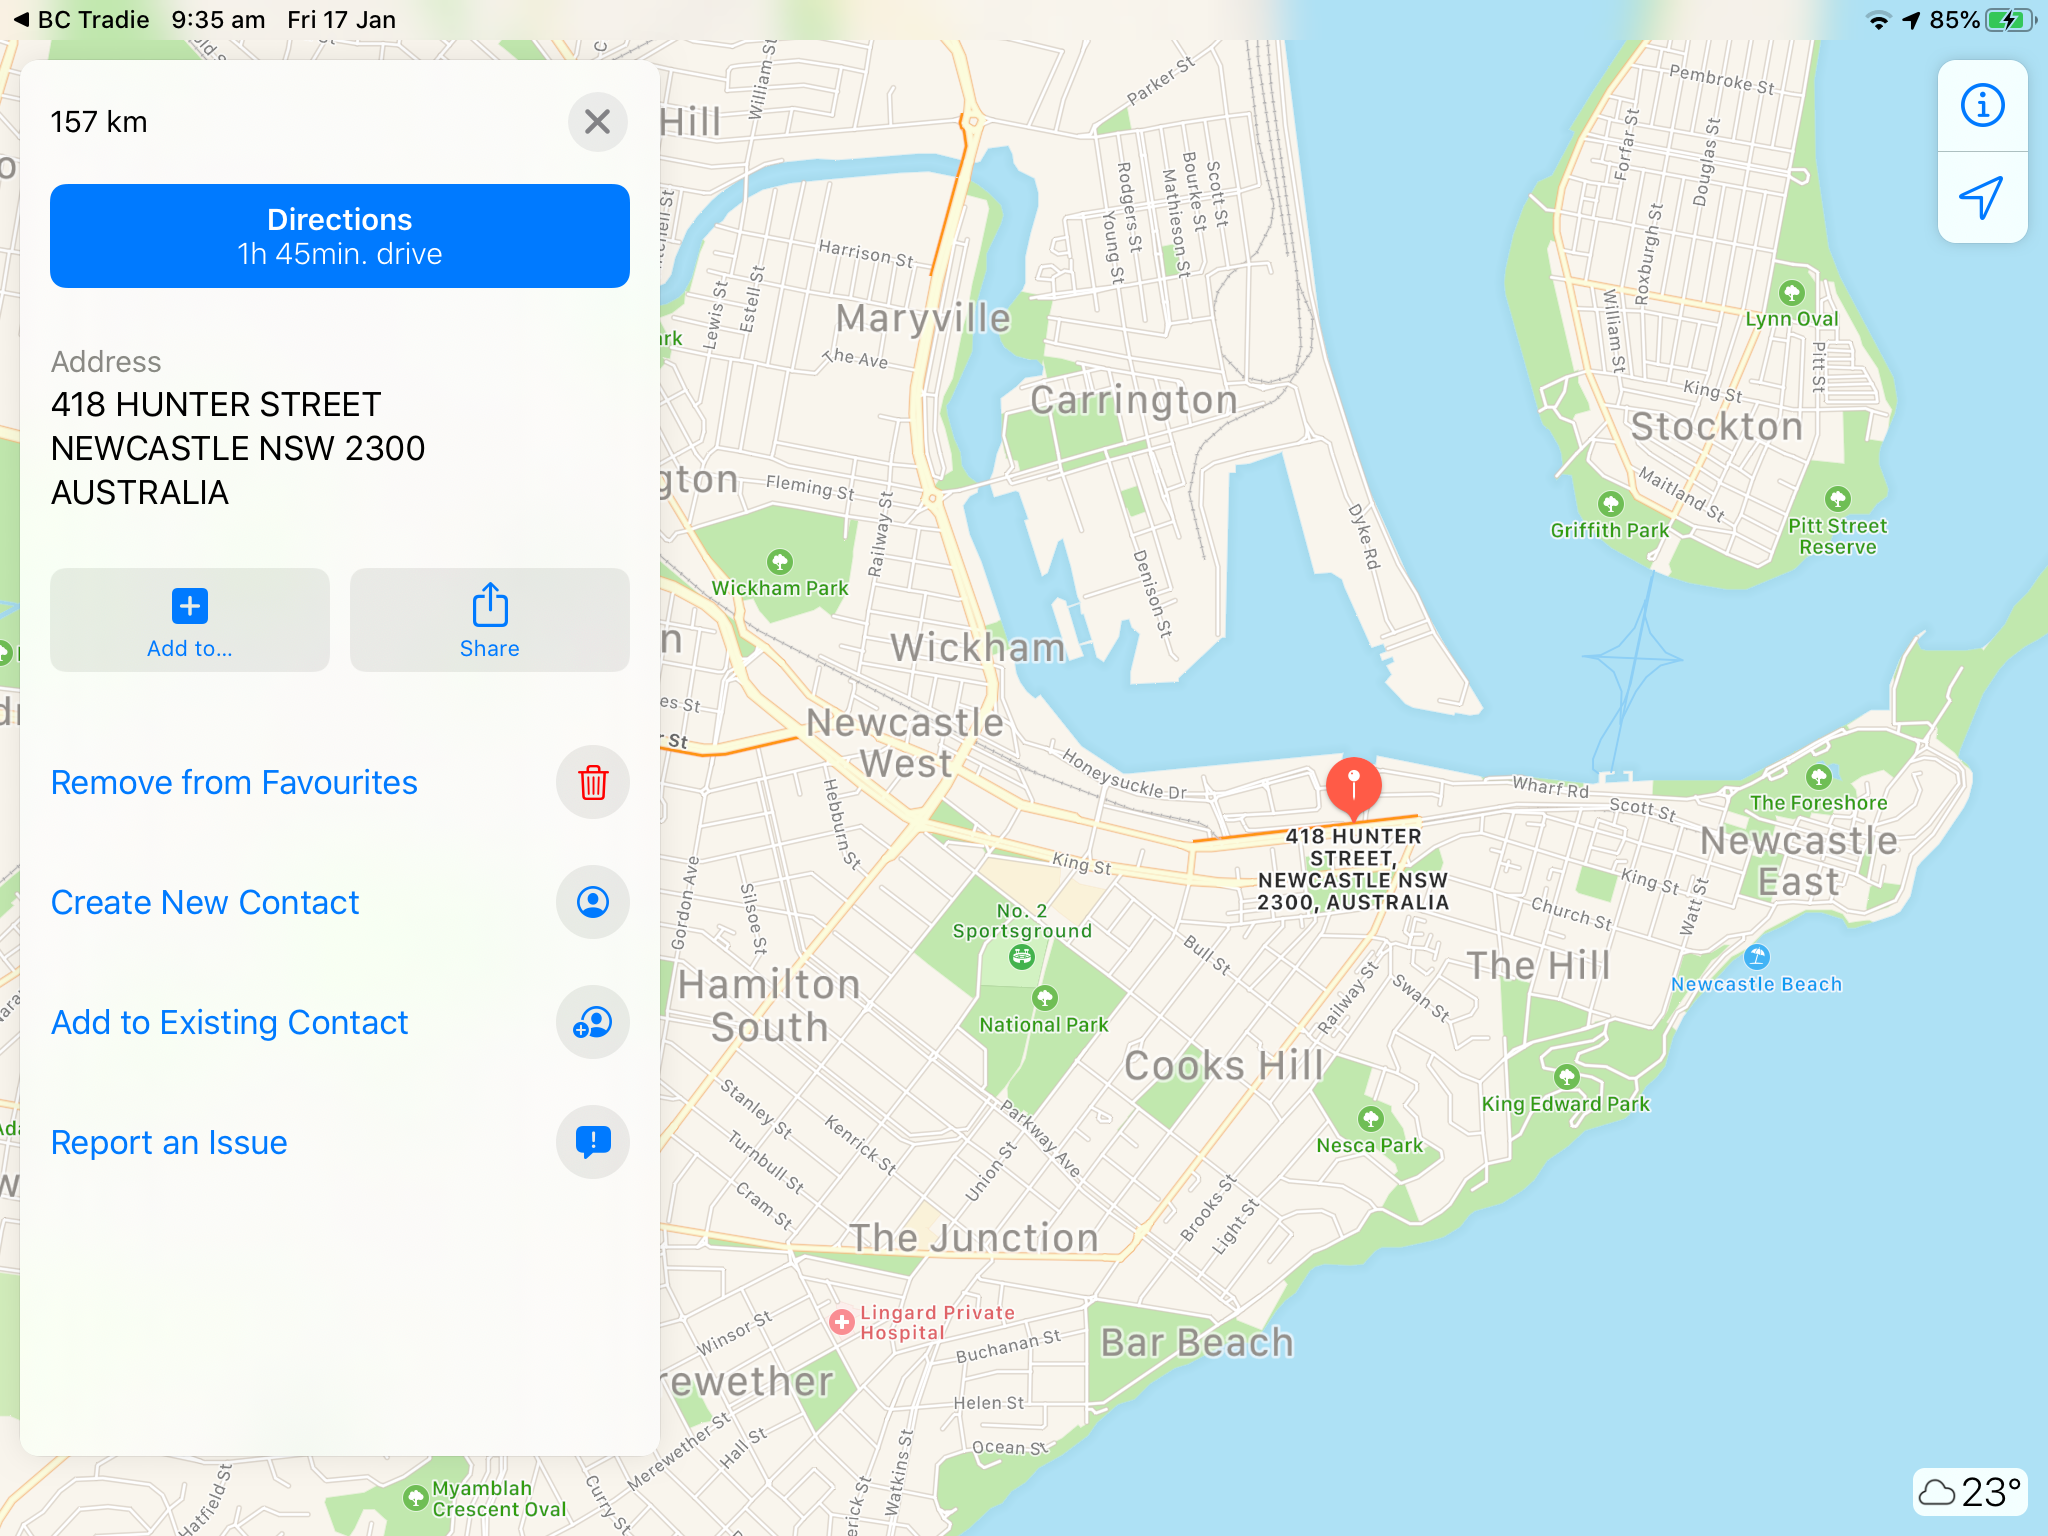
Tapping Open in Maps, will locate the address in Maps:
Tap the BC Tradie breadcrumb in the Top Left Hand Corner to return to the Job screen.
Tapping Copy to Clipboard will copy the Job Address to the clipboard for use in other applications.
Using Site Contact Details
After tapping on a Site Contact Phone Number, a Call menu is displayed with the option to call the site contact or copy the phone number to the Clipboard:
When using the call menu selection to call the contact, please note that iOS will display the Phone Number in a pop up, click on that pop up to make the call. After completing the call, the Job will be displayed in the Job screen.
Tapping Copy to Clipboard will copy the Phone Number to the clipboard for use in other applications.
Using Supervisor Details
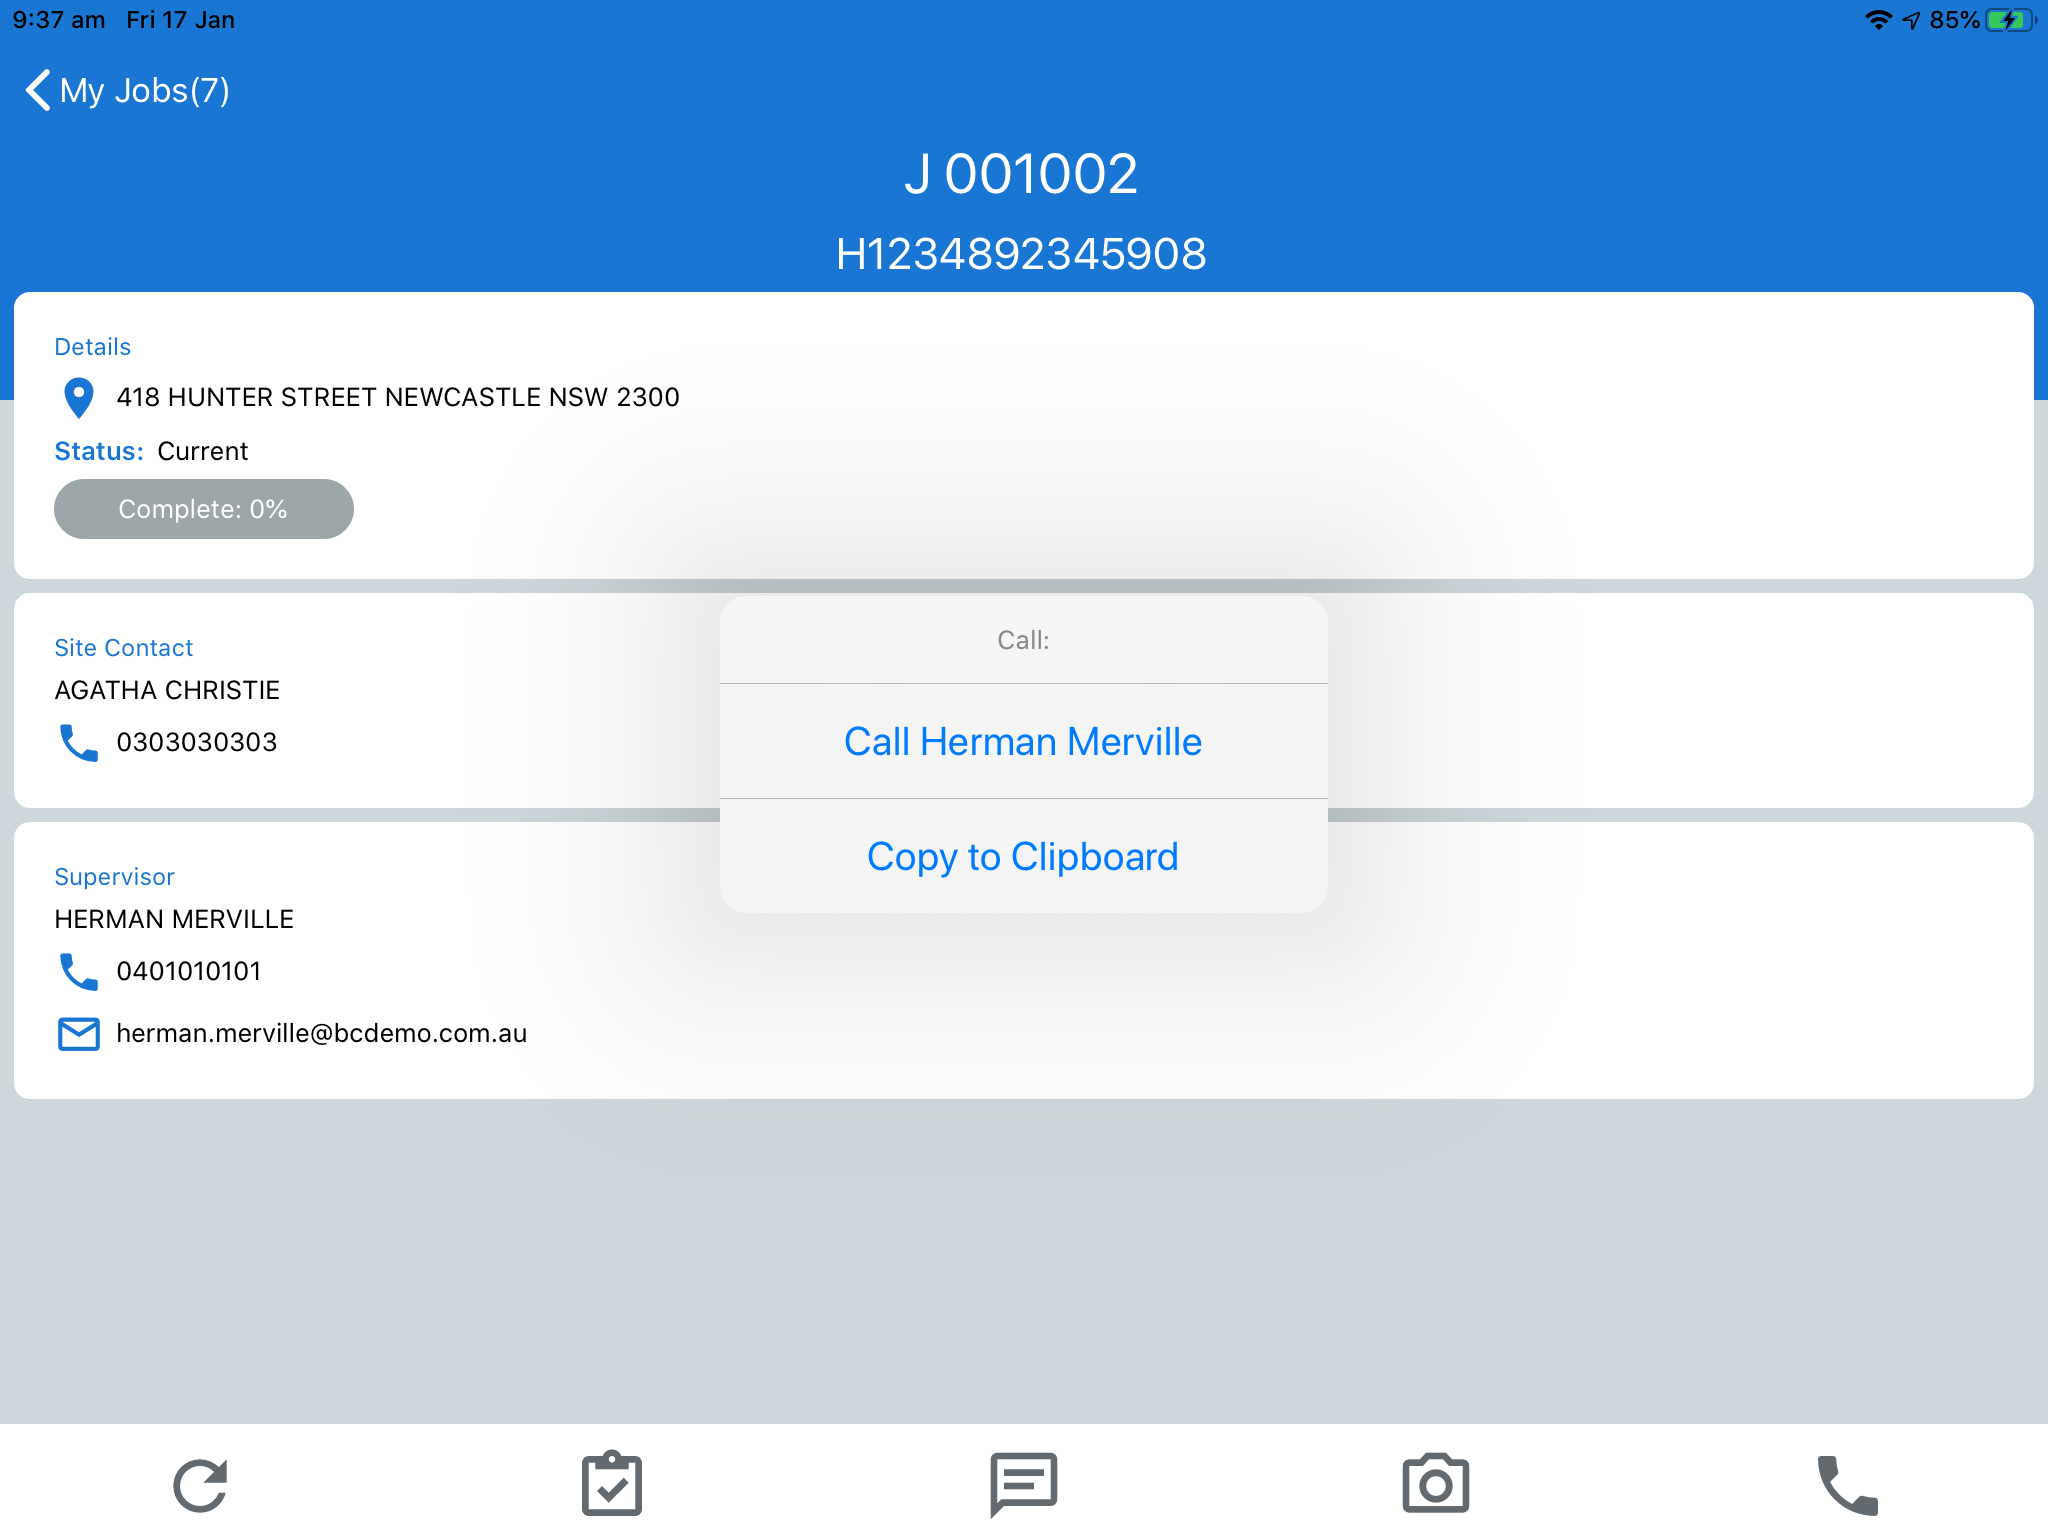
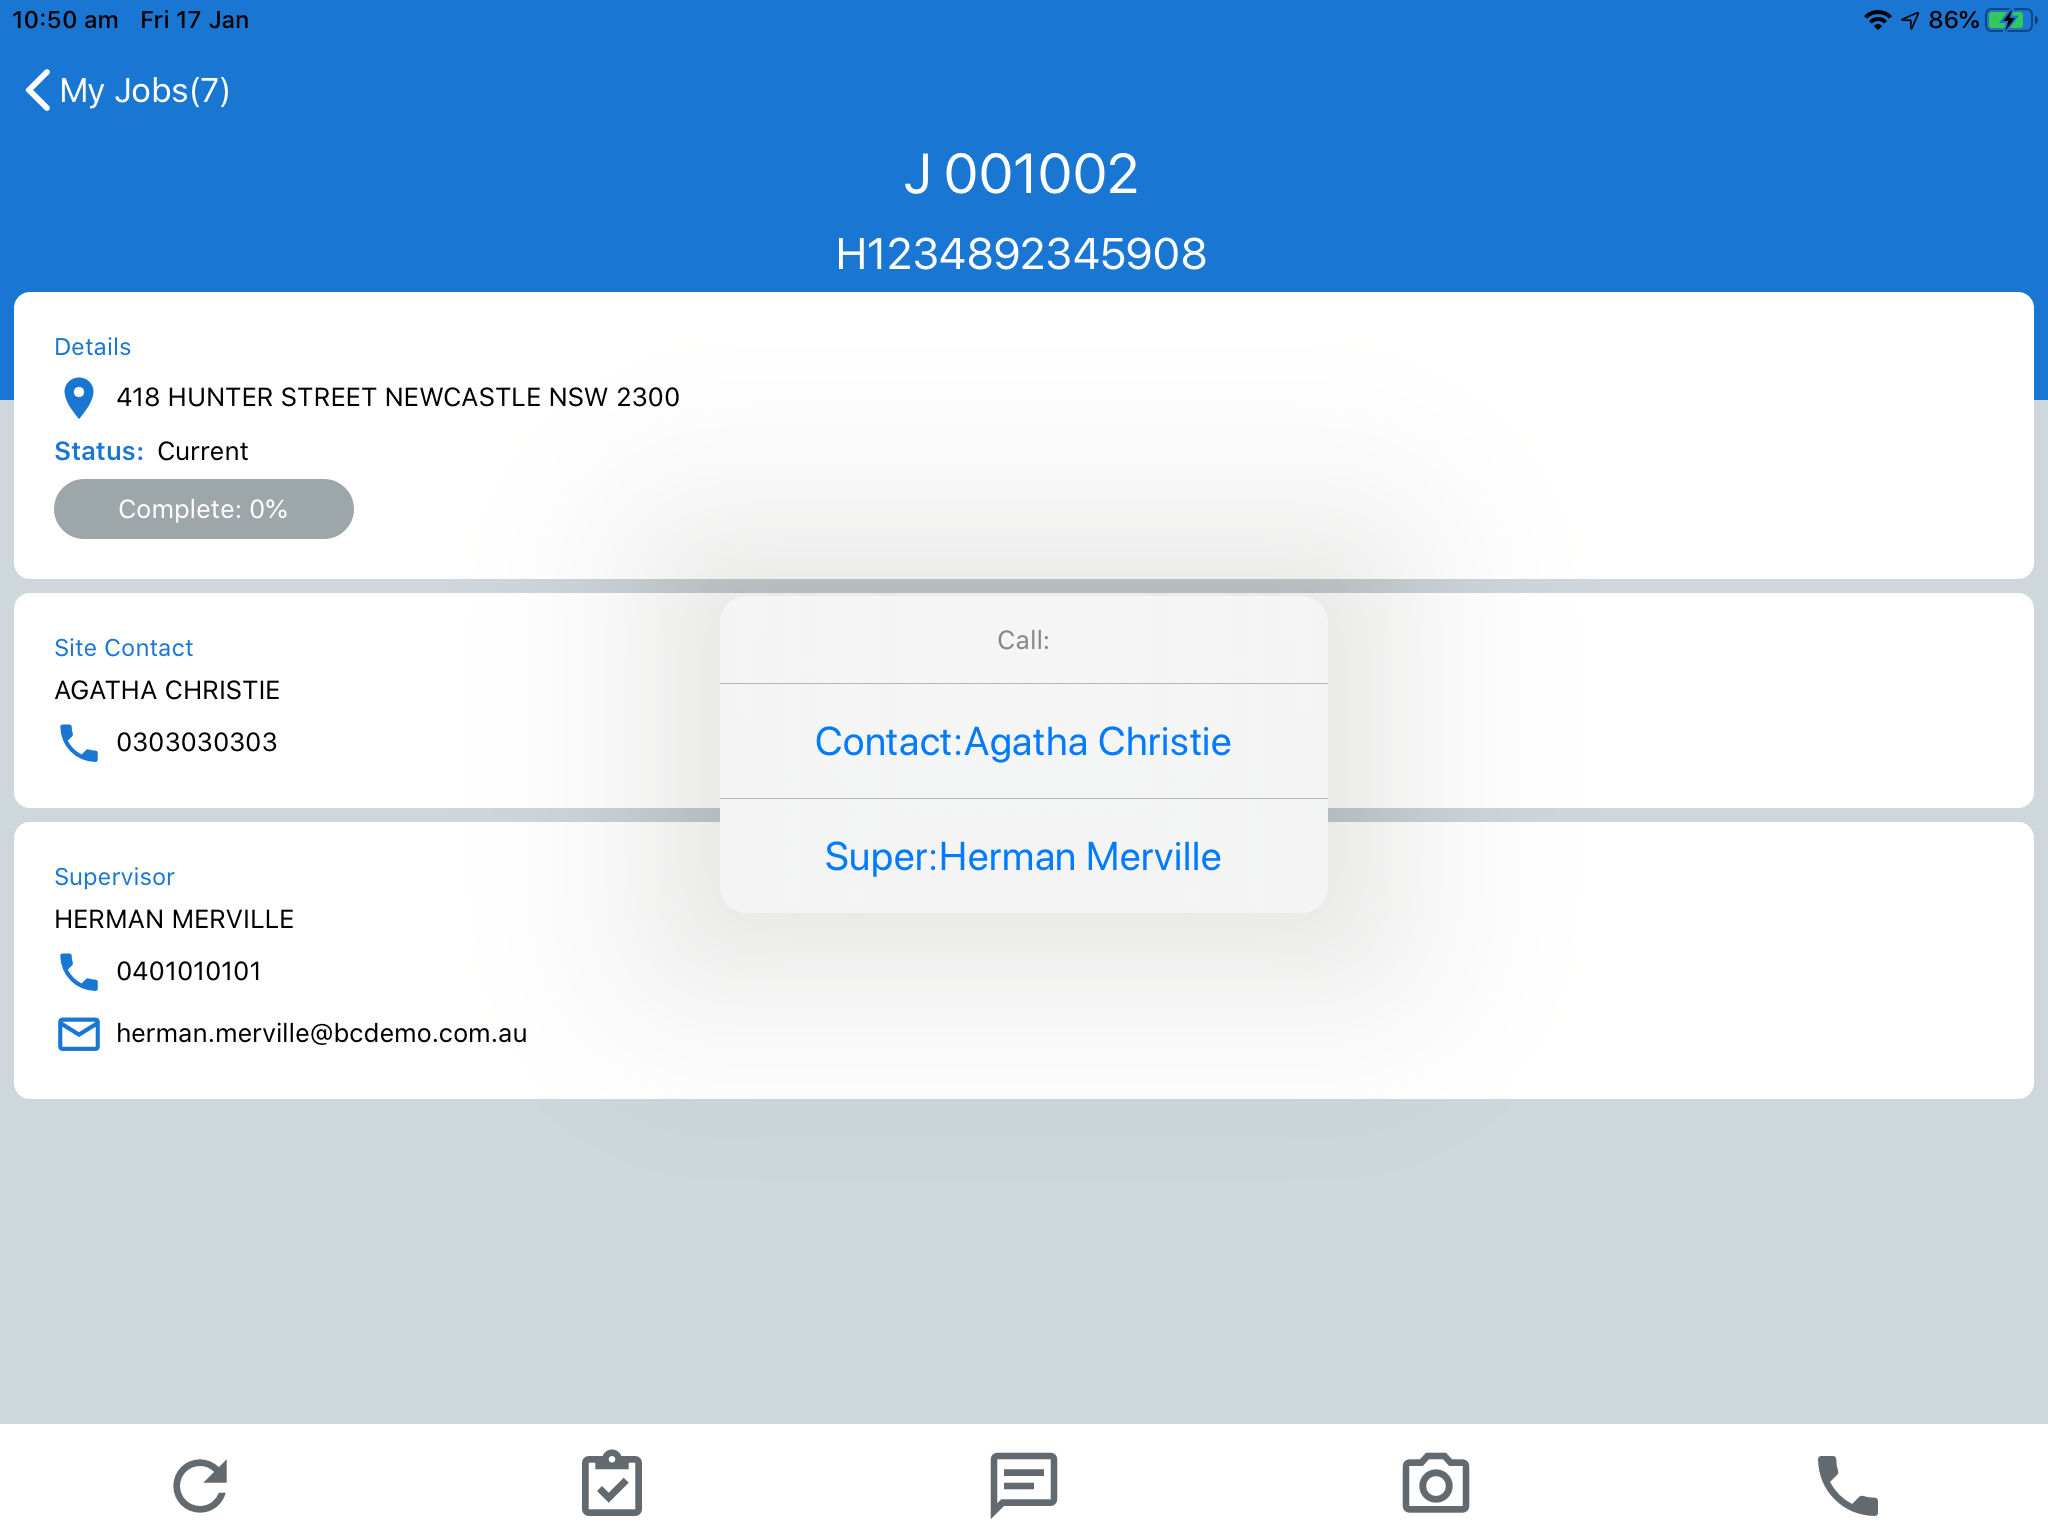
After tapping on a Supervisor’s Phone Number, a Call menu is displayed with the option to call the Supervisor or copy the phone number to the Clipboard:
When using the call menu selection to call the Supervisor, please note that iOS will display the Phone Number in a pop up, click on that pop up to make the call. After completing the call, the Job will be displayed in the Job screen.
Tapping Copy to Clipboard will copy the Phone Number to the clipboard for use in other applications.
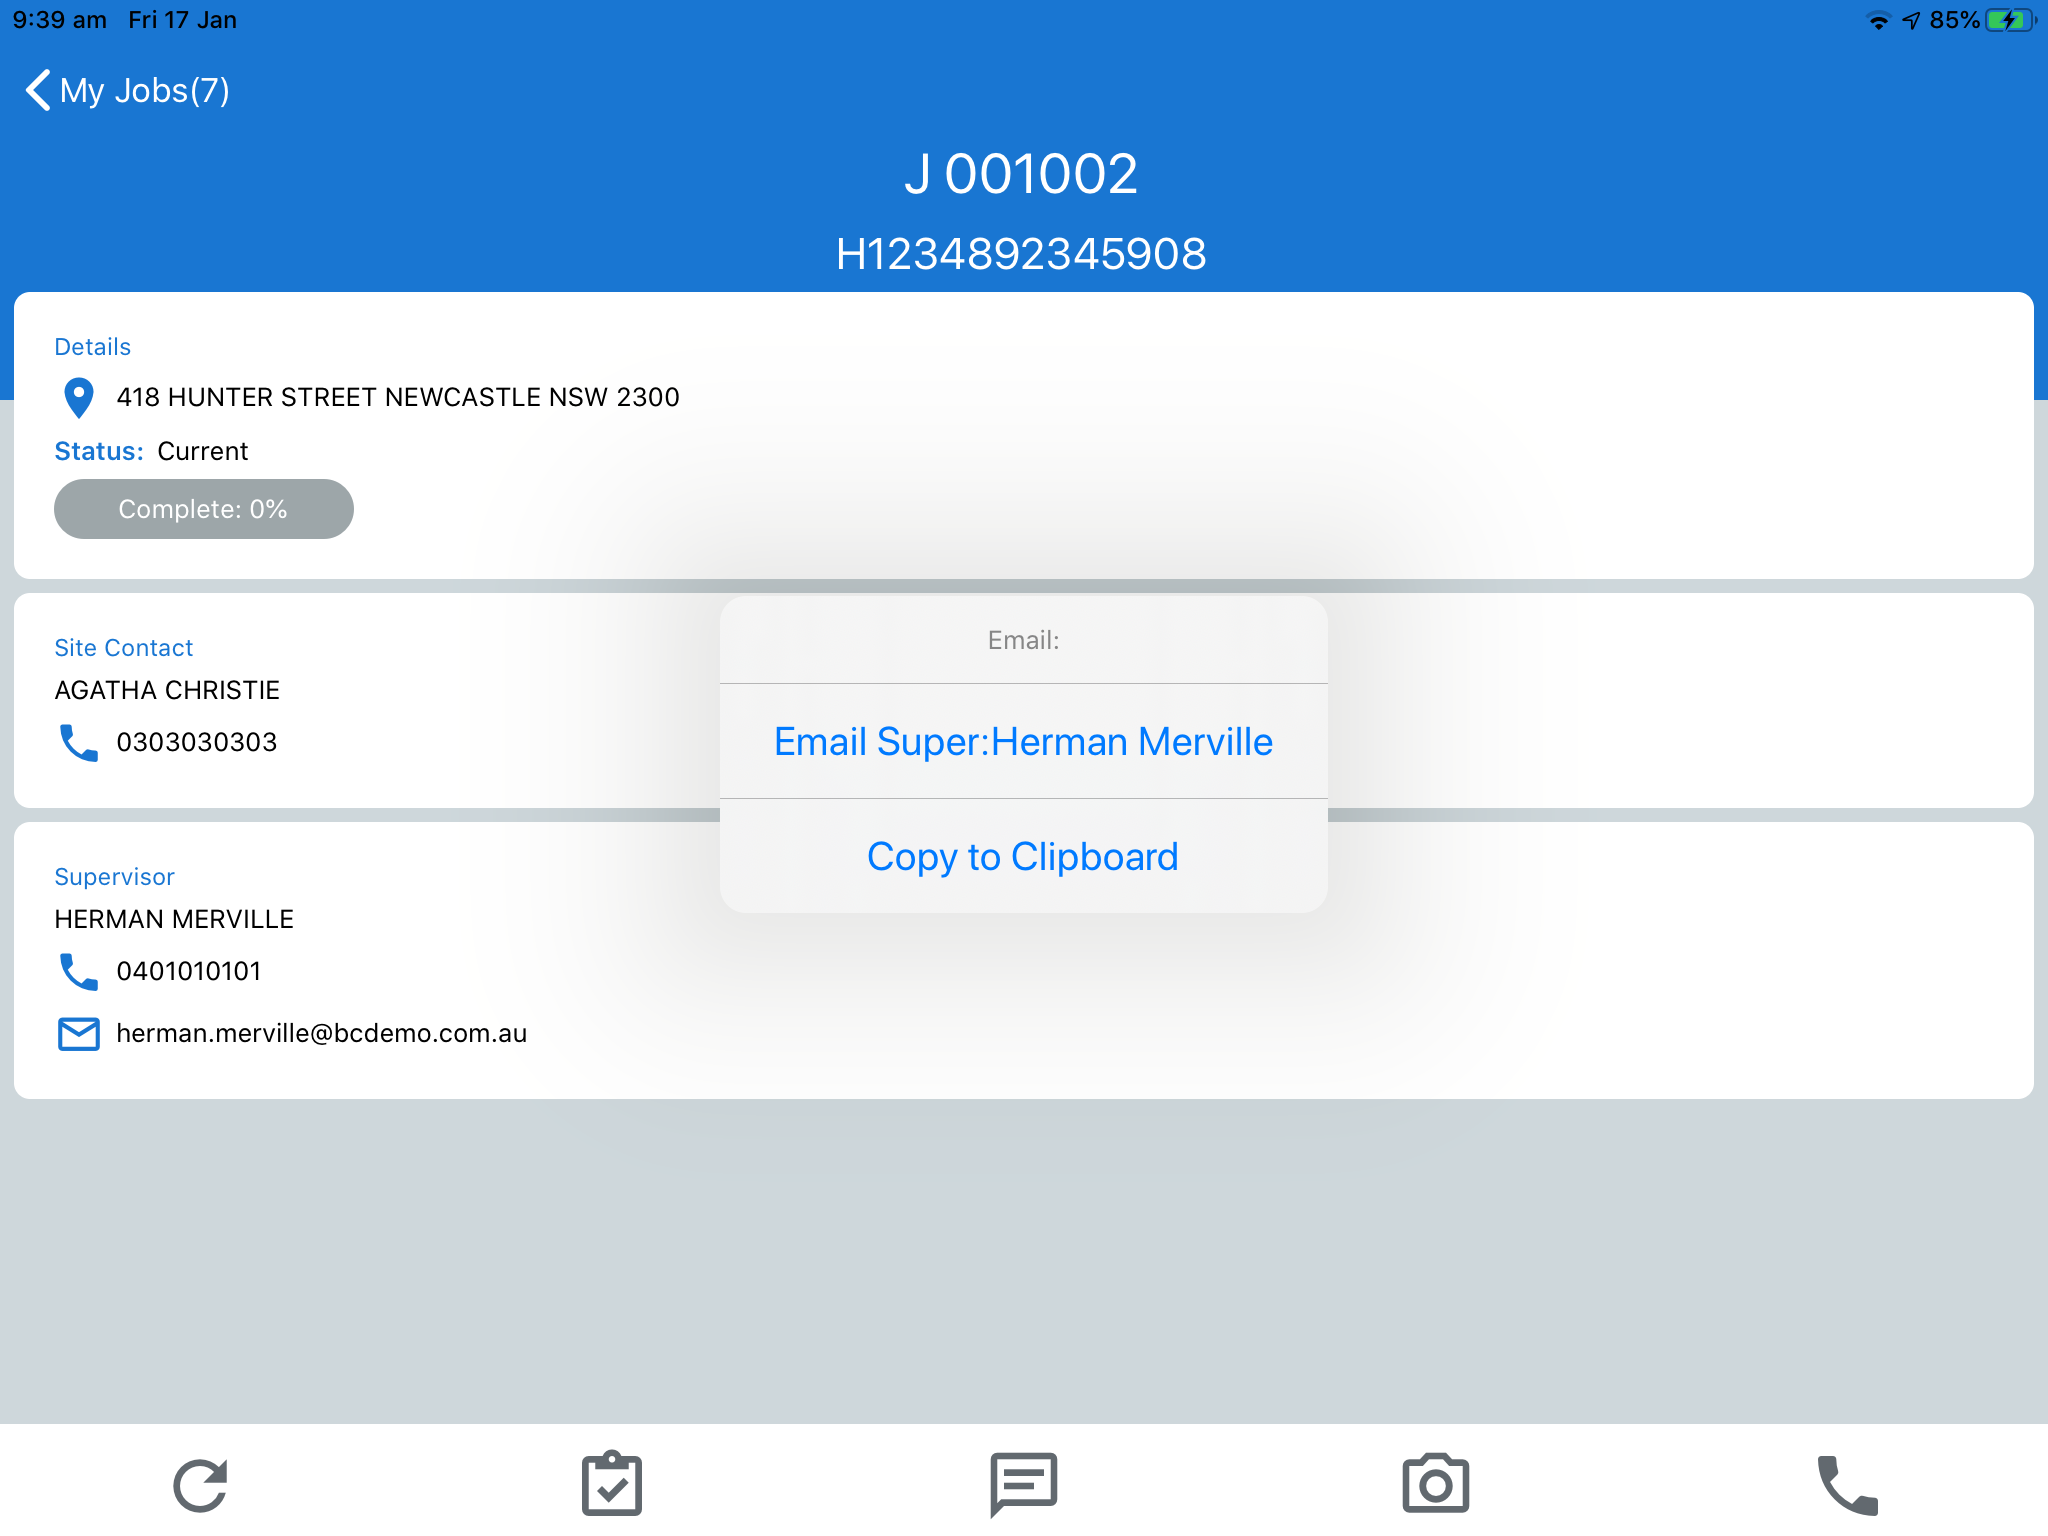
After tapping on a Supervisor’s Email Address, an Email menu is displayed with the option to email the Supervisor or copy the email address to the Clipboard:
When using the email menu selection to email the Supervisor, the default email application will open with the From and To Email Addresses populated. The Job Number will be shown in the Subject. After ending the Email, the screen will remain in the Email Application. Switching back to the BusinessCraft Tradie app will display the My Jobs screen not the Job screen.
Tapping Copy to Clipboard will copy the Email Address to the clipboard for use in other applications.
Job Screen Shortcuts
5 Shortcuts are provided at the bottom of the Job Screen:

Refresh
To save loading time, the Tradie App displays cached data. If the most recent data needs to be viewed, use the refresh icon to refresh the data from the server.
Scope
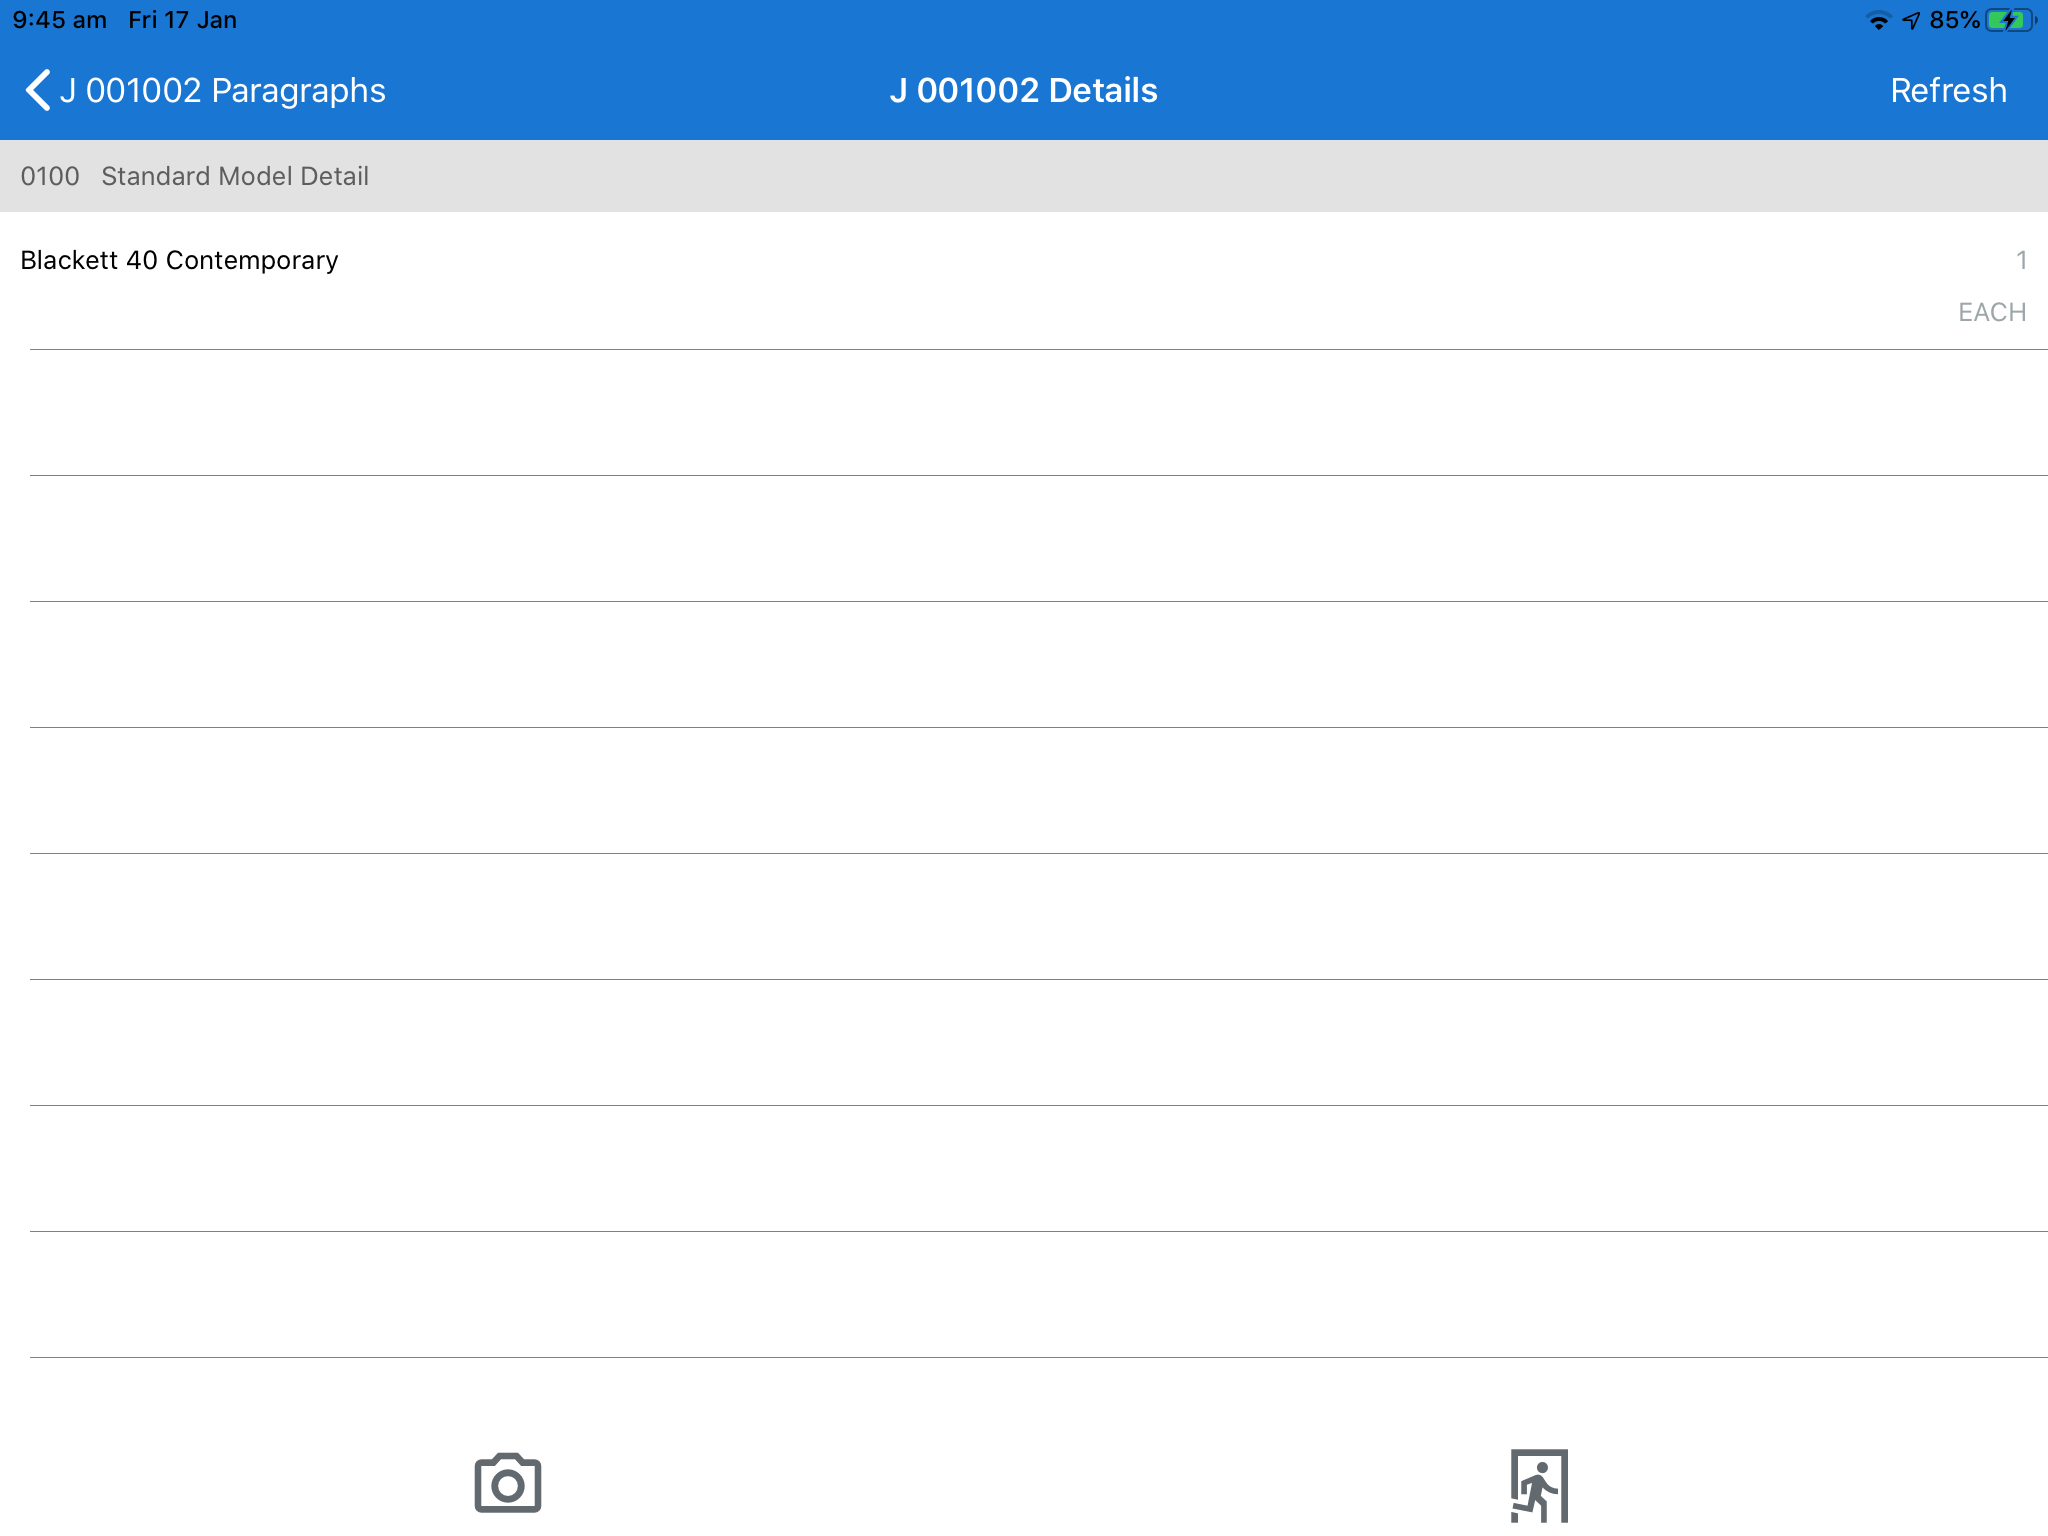
Subject to server configuration, the Job Scope will be available for review. Drill down through the Sections, Headings, Paragraphs and Details screens as needed.
The Detail Screen provides the ability to upload a photo either taken immediately or from the Photos App with a Subject and Details if required.
To add a photo, tap the Photos icon at the bottom of the screen:
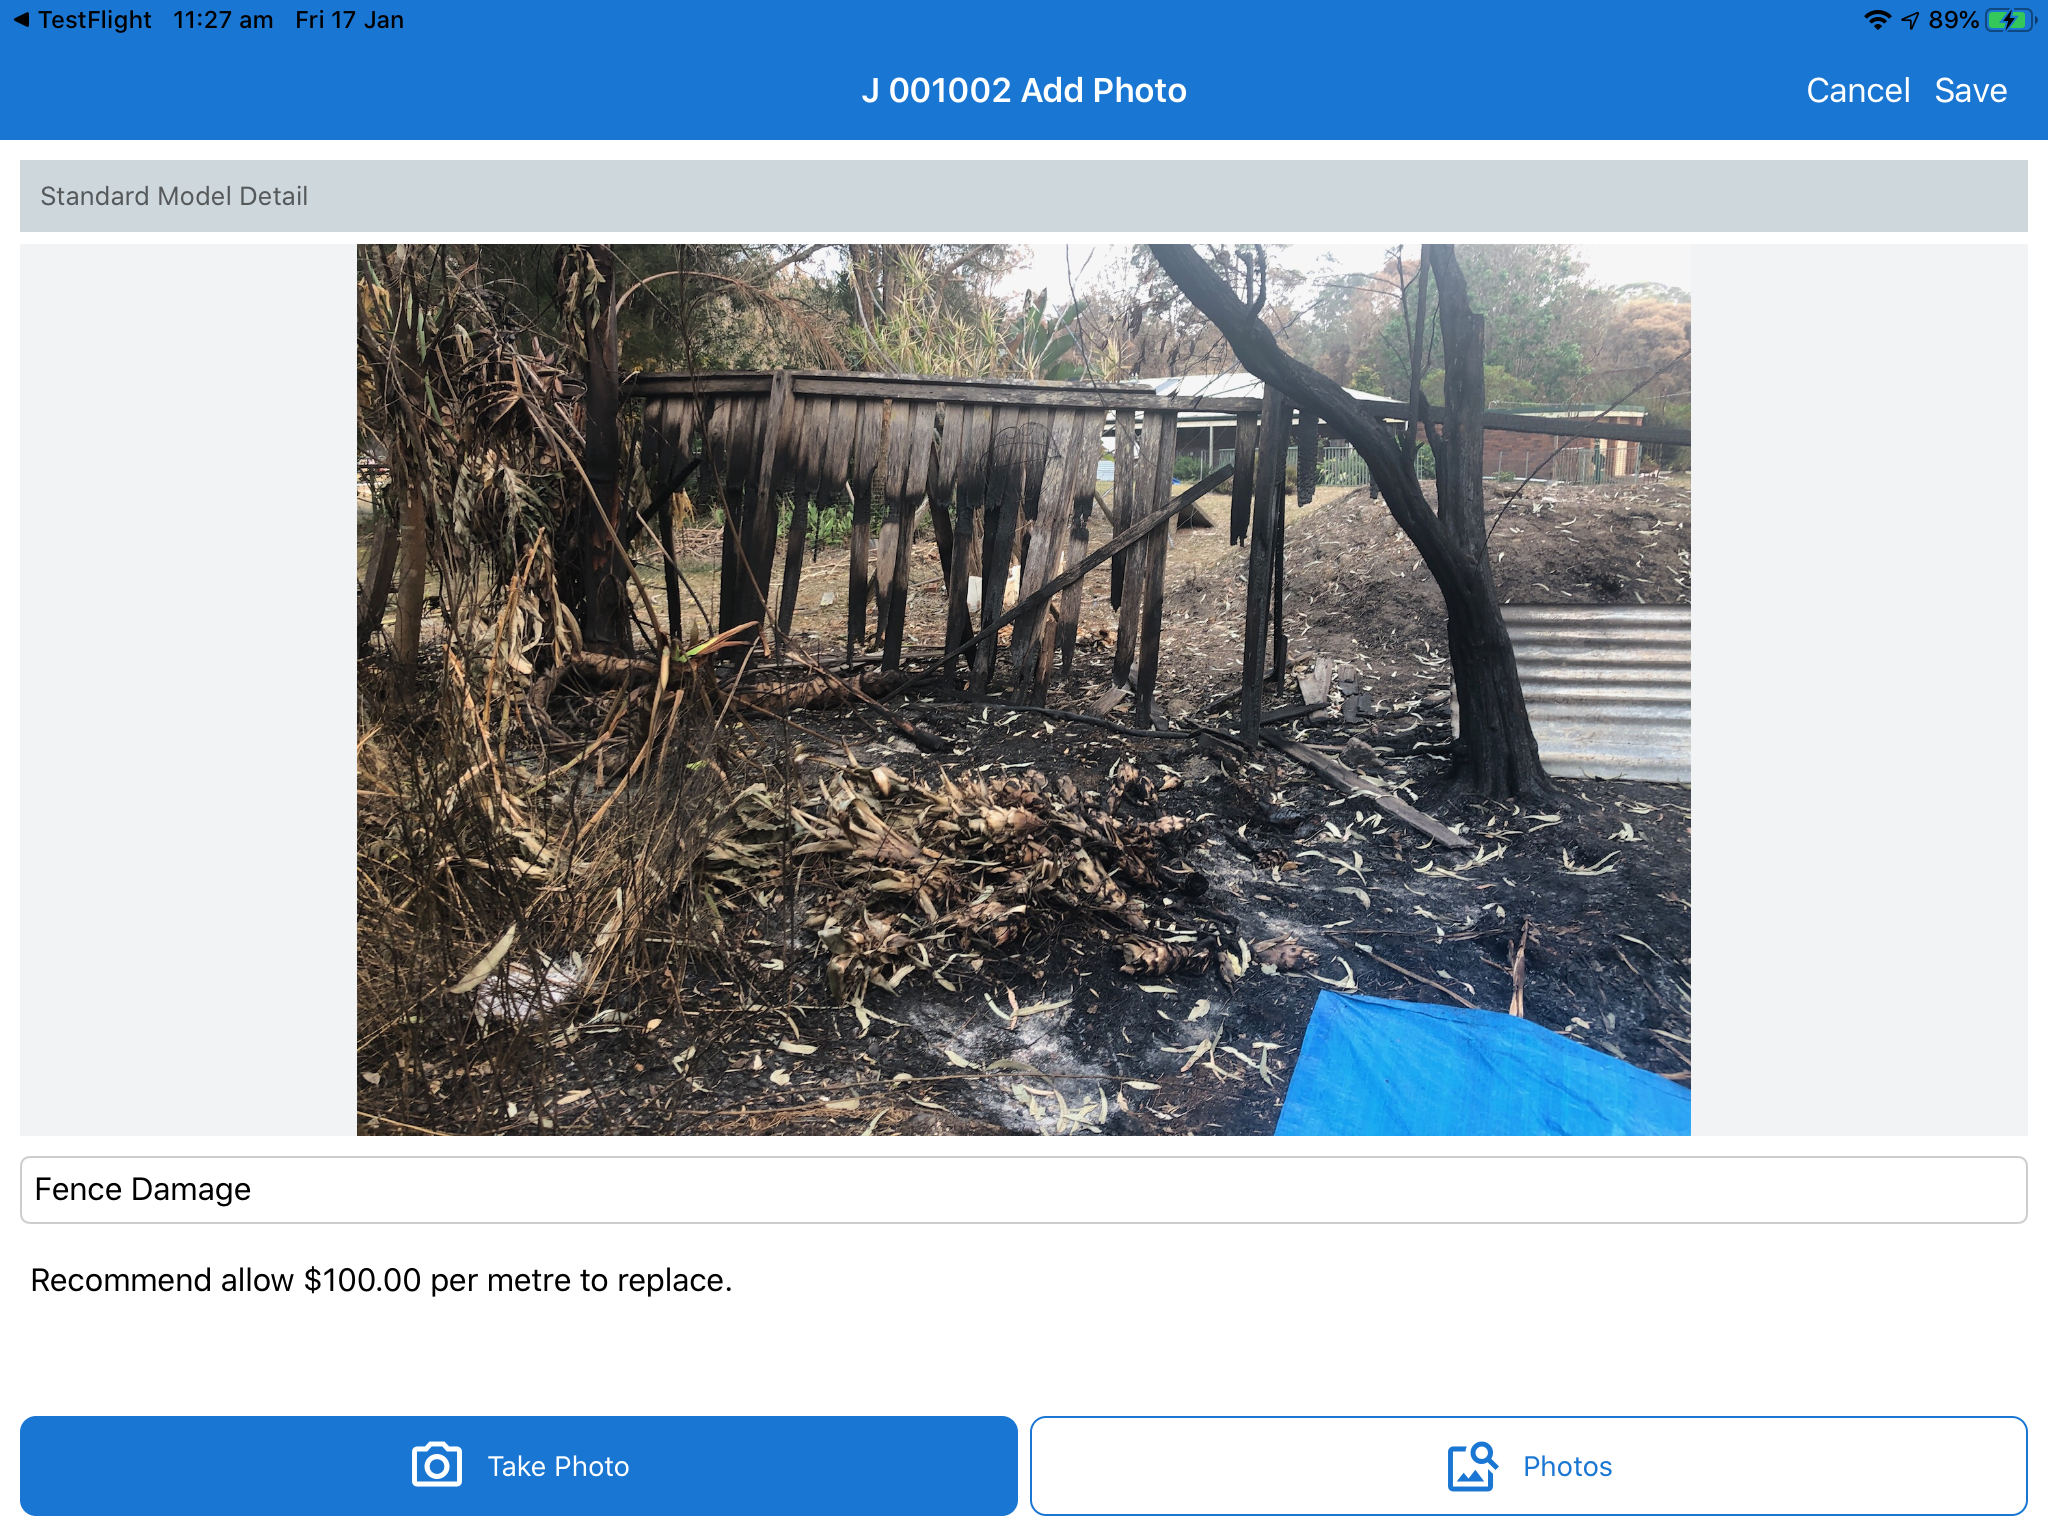
Tap the Camera icon and the Job Add Photo Screen opens. Tap Take Photo to take a photo or tap Photos to choose an existing Photo in both cases with the option to add a caption and notes:
After taking or selecting a photo, tap Save to upload it or Cancel to not upload.
Please note that after uploading the Photo it is not visible from within the Job Scope Details Screen, it is stored within the Job Photos area.
Click on the Running Man icon at the bottom of any of the scope screens to exit back to the Job screen.
Notes
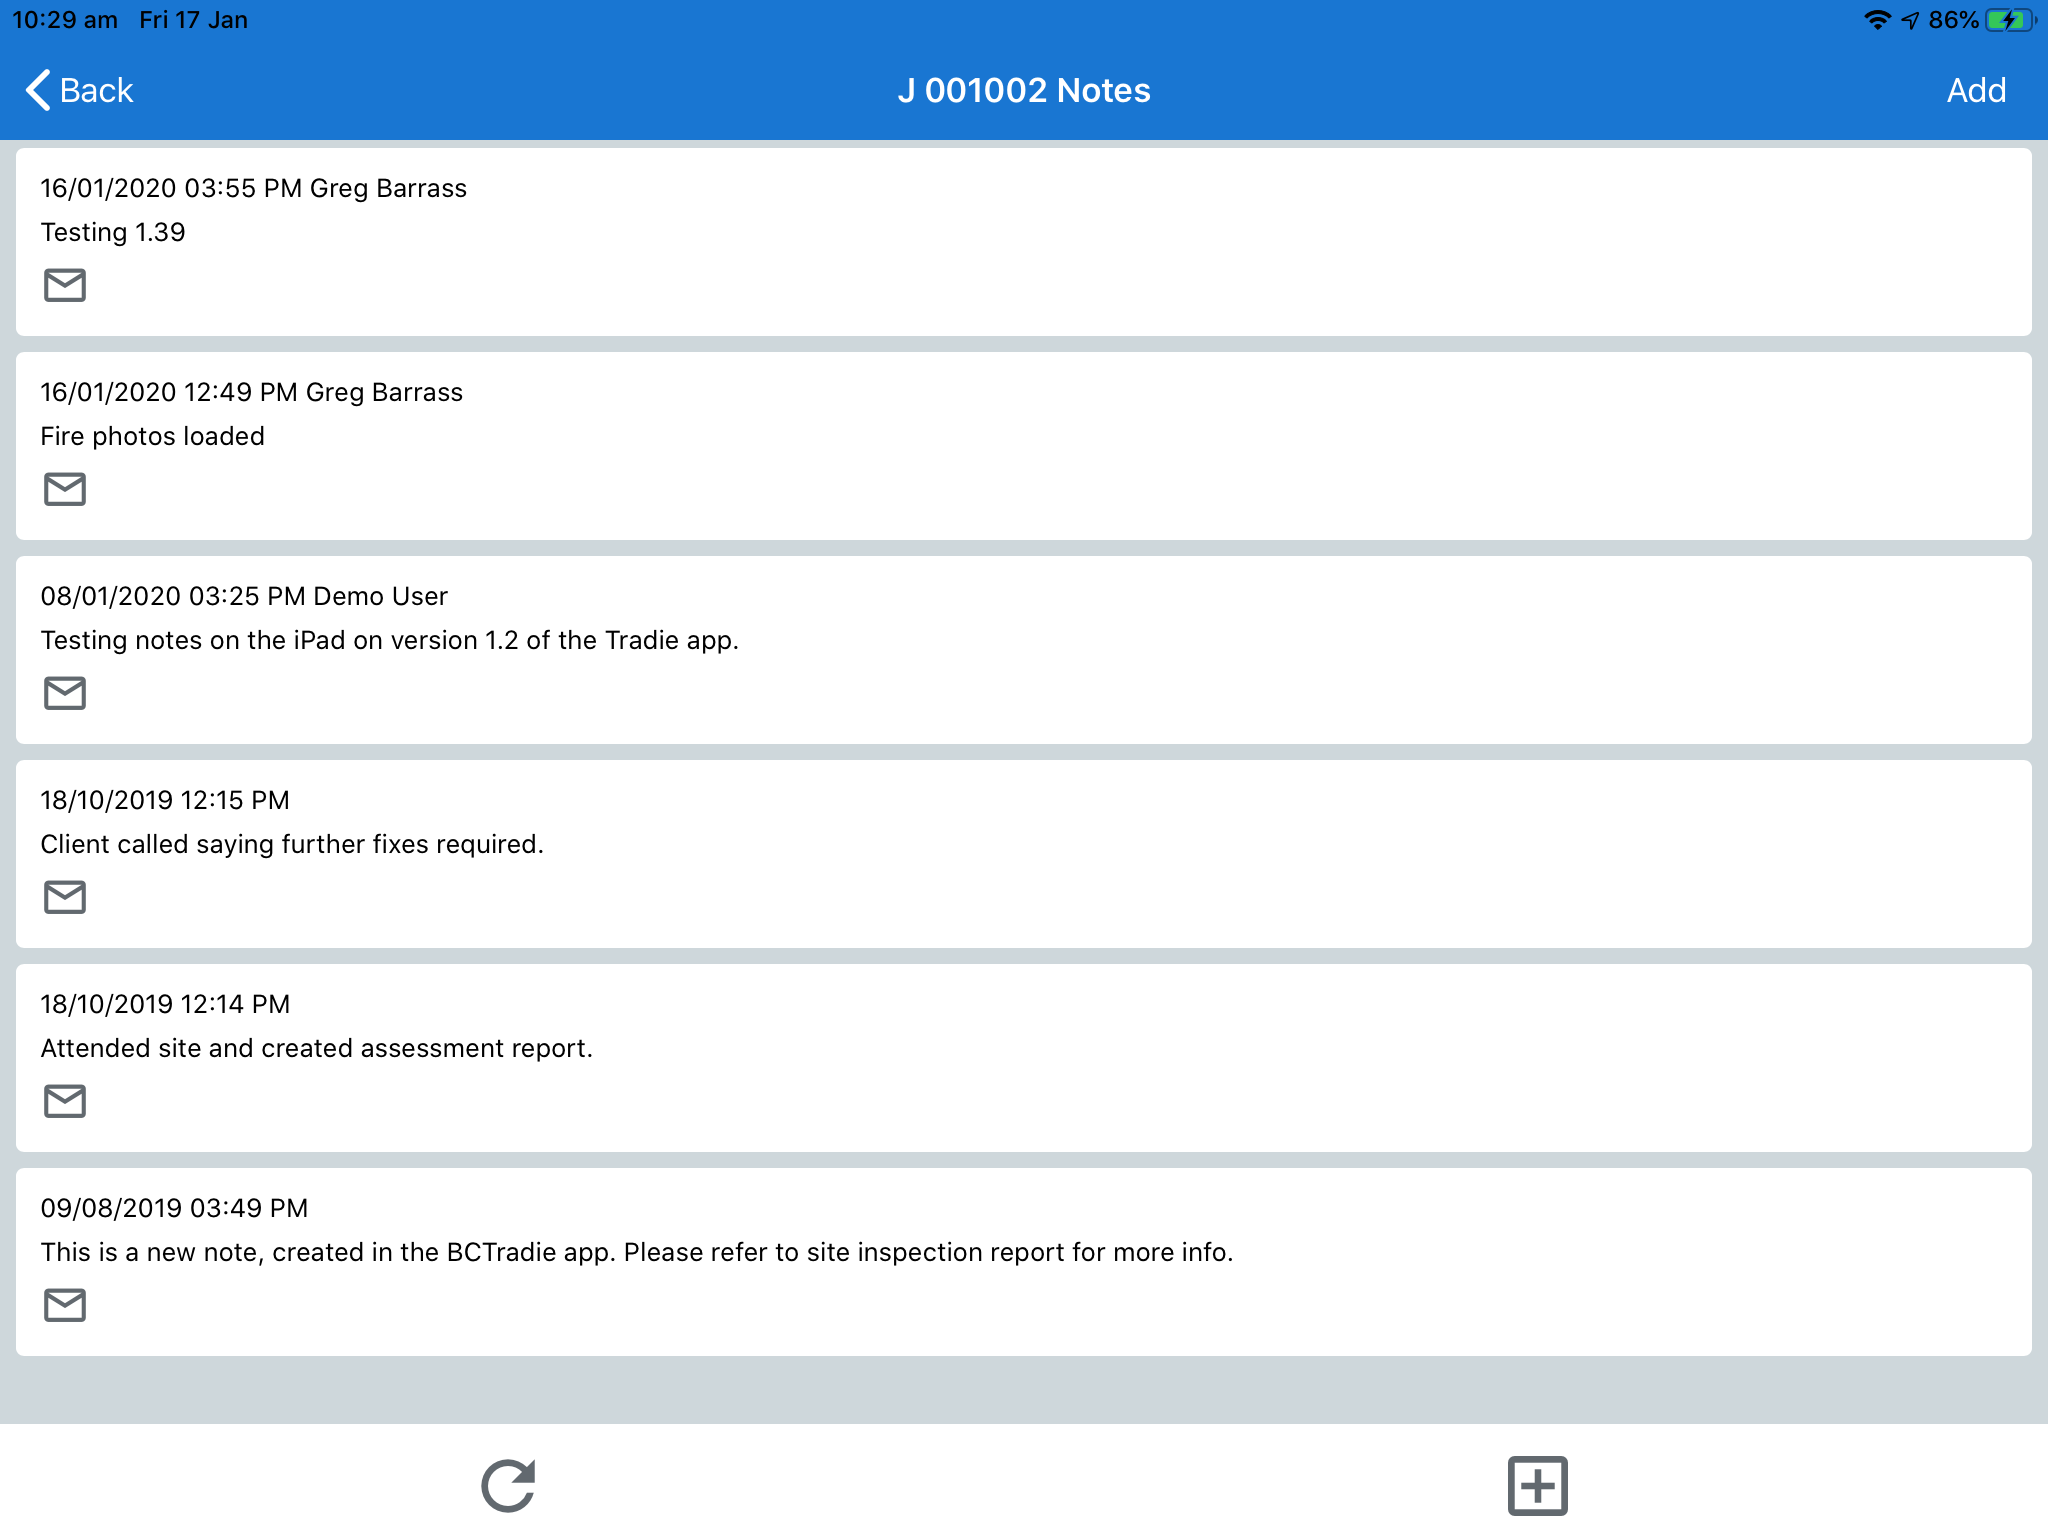
Tap the Notes icon to view existing Notes for the Job or use the + icon at the bottom of the Job Notes screen to add a Note to the Job.
The Job Notes screen displays a list of existing notes for the job including the Date and Time the note was added based on the viewing user’s Time Zone, the user who added the note and the Note Details.
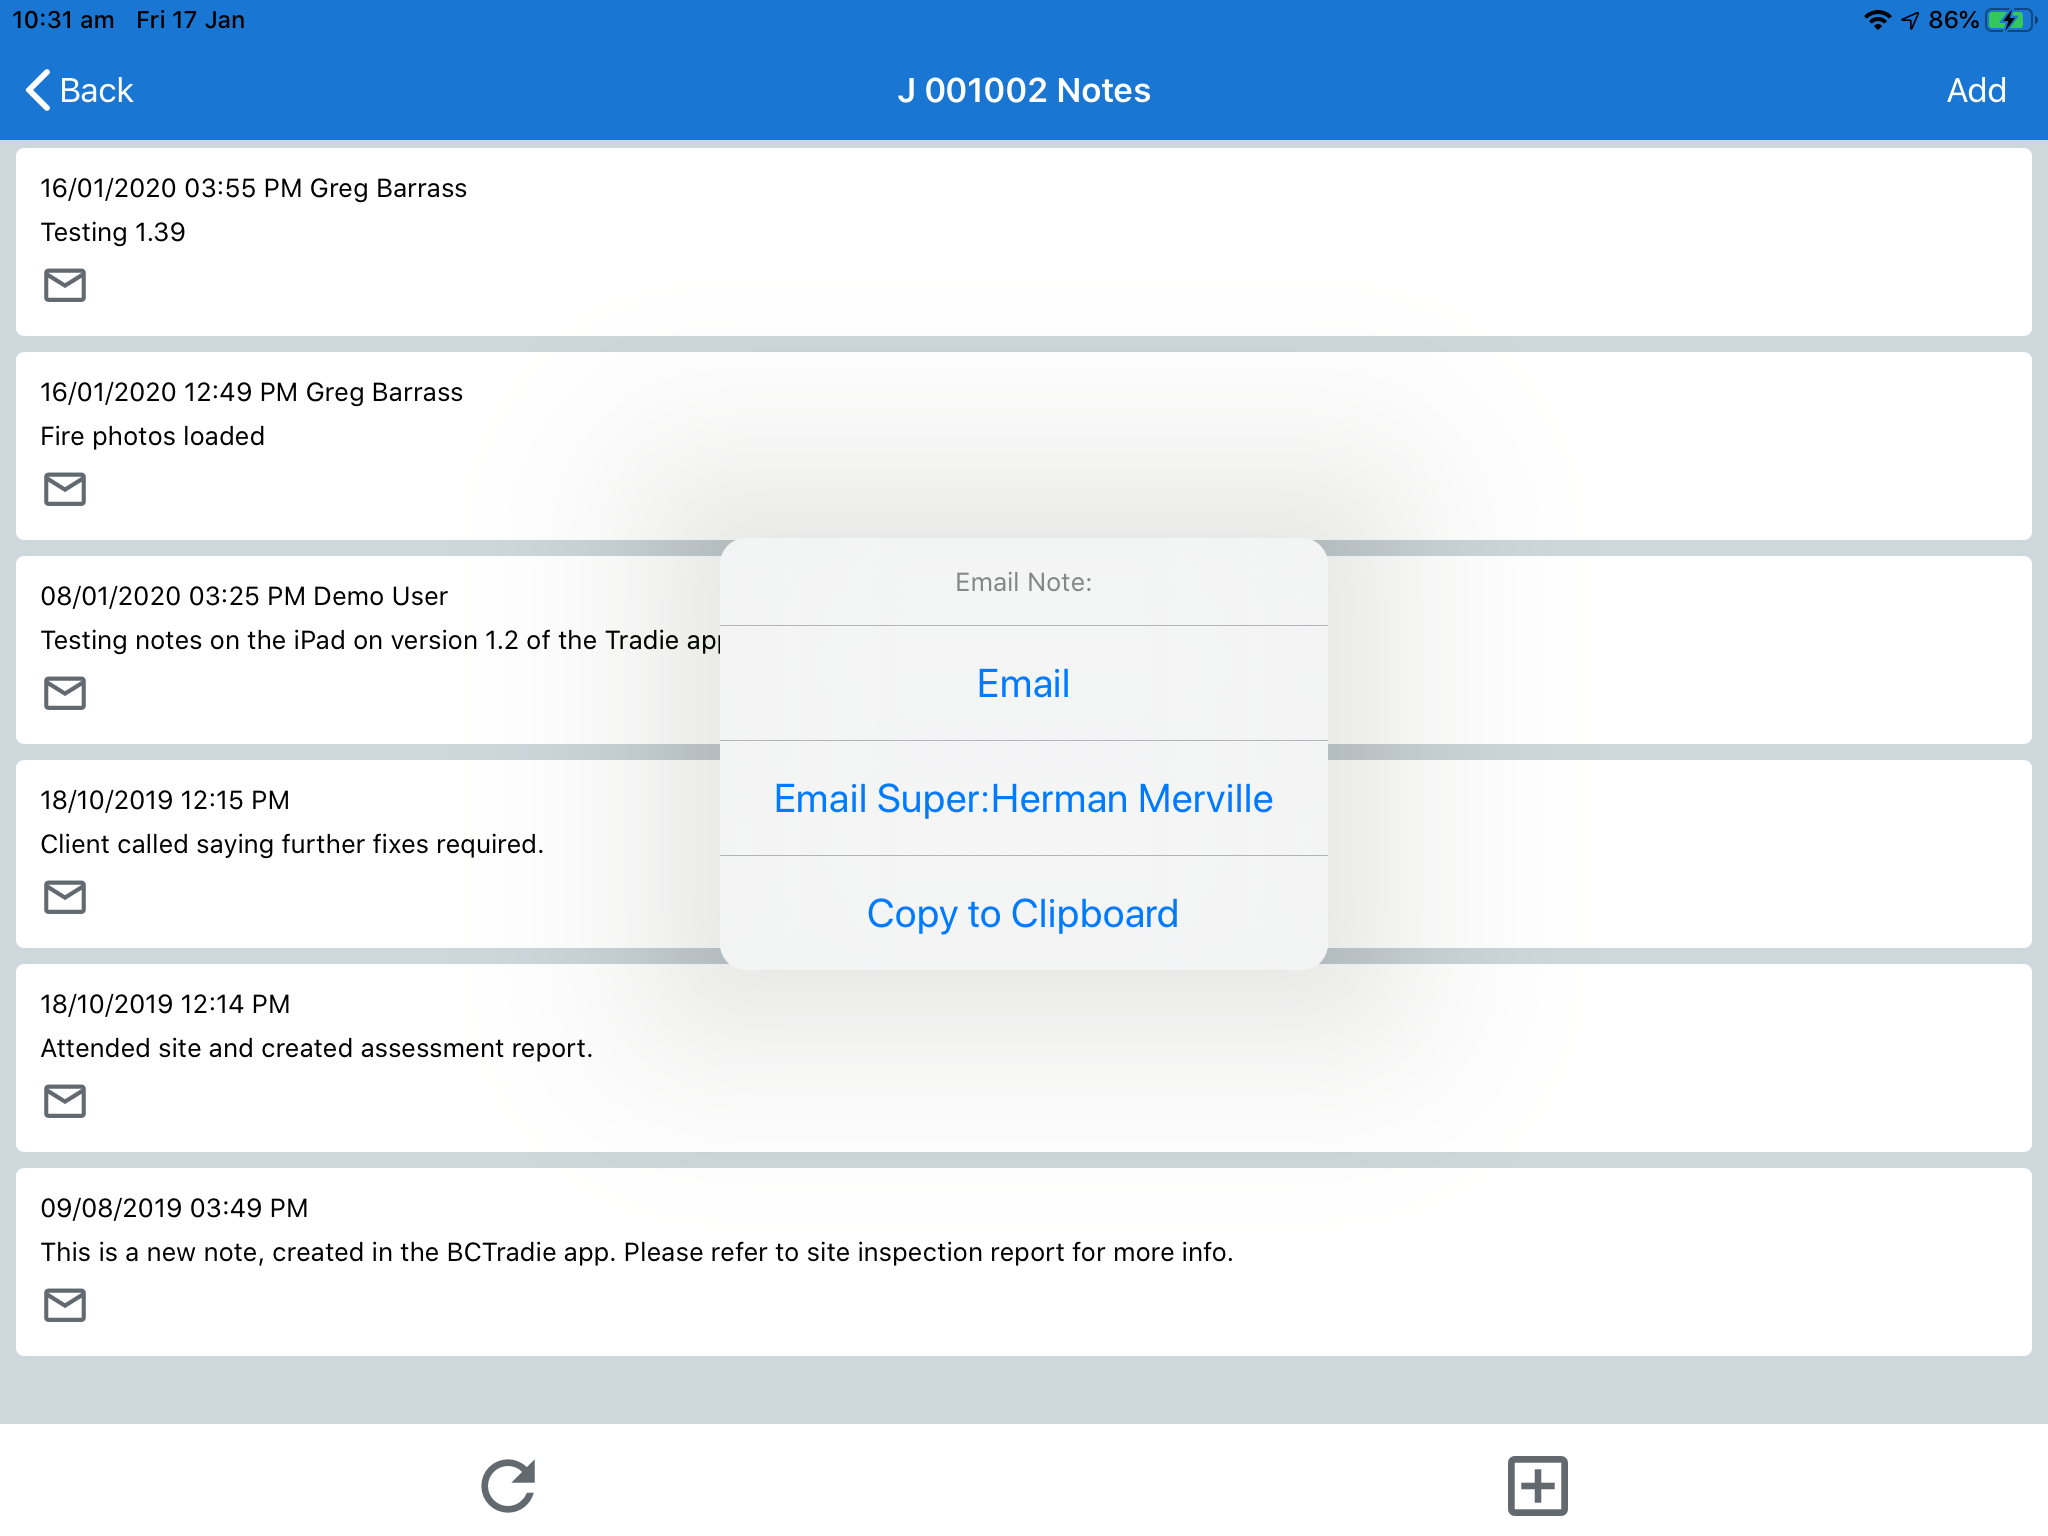
An option is provided to email an existing note, by tapping the Email icon shown on the Note. After tapping the Email icon for a Note, the Email Note menu is displayed, providing the option to email anyone, email the Job Supervisor or copy the Note Details to the Clipboard.
To save loading time, the Tradie App displays cached data. If the most recent data needs to be viewed, use the refresh icon to refresh the data from the server.
The + icon opens the New Note screen for the job and enables a note to be added to the job:

Tap Add and the Note will be added to the Job. After successfully adding the Note a prompt is displayed to email the Note either to the job Supervisor or someone else. The Job Notes screen will refresh automatically.
Photos
Tap the Camera icon to view existing Photos for the Job or use the + icon at the bottom of the Job Photos screen to add a Photo to the Job.
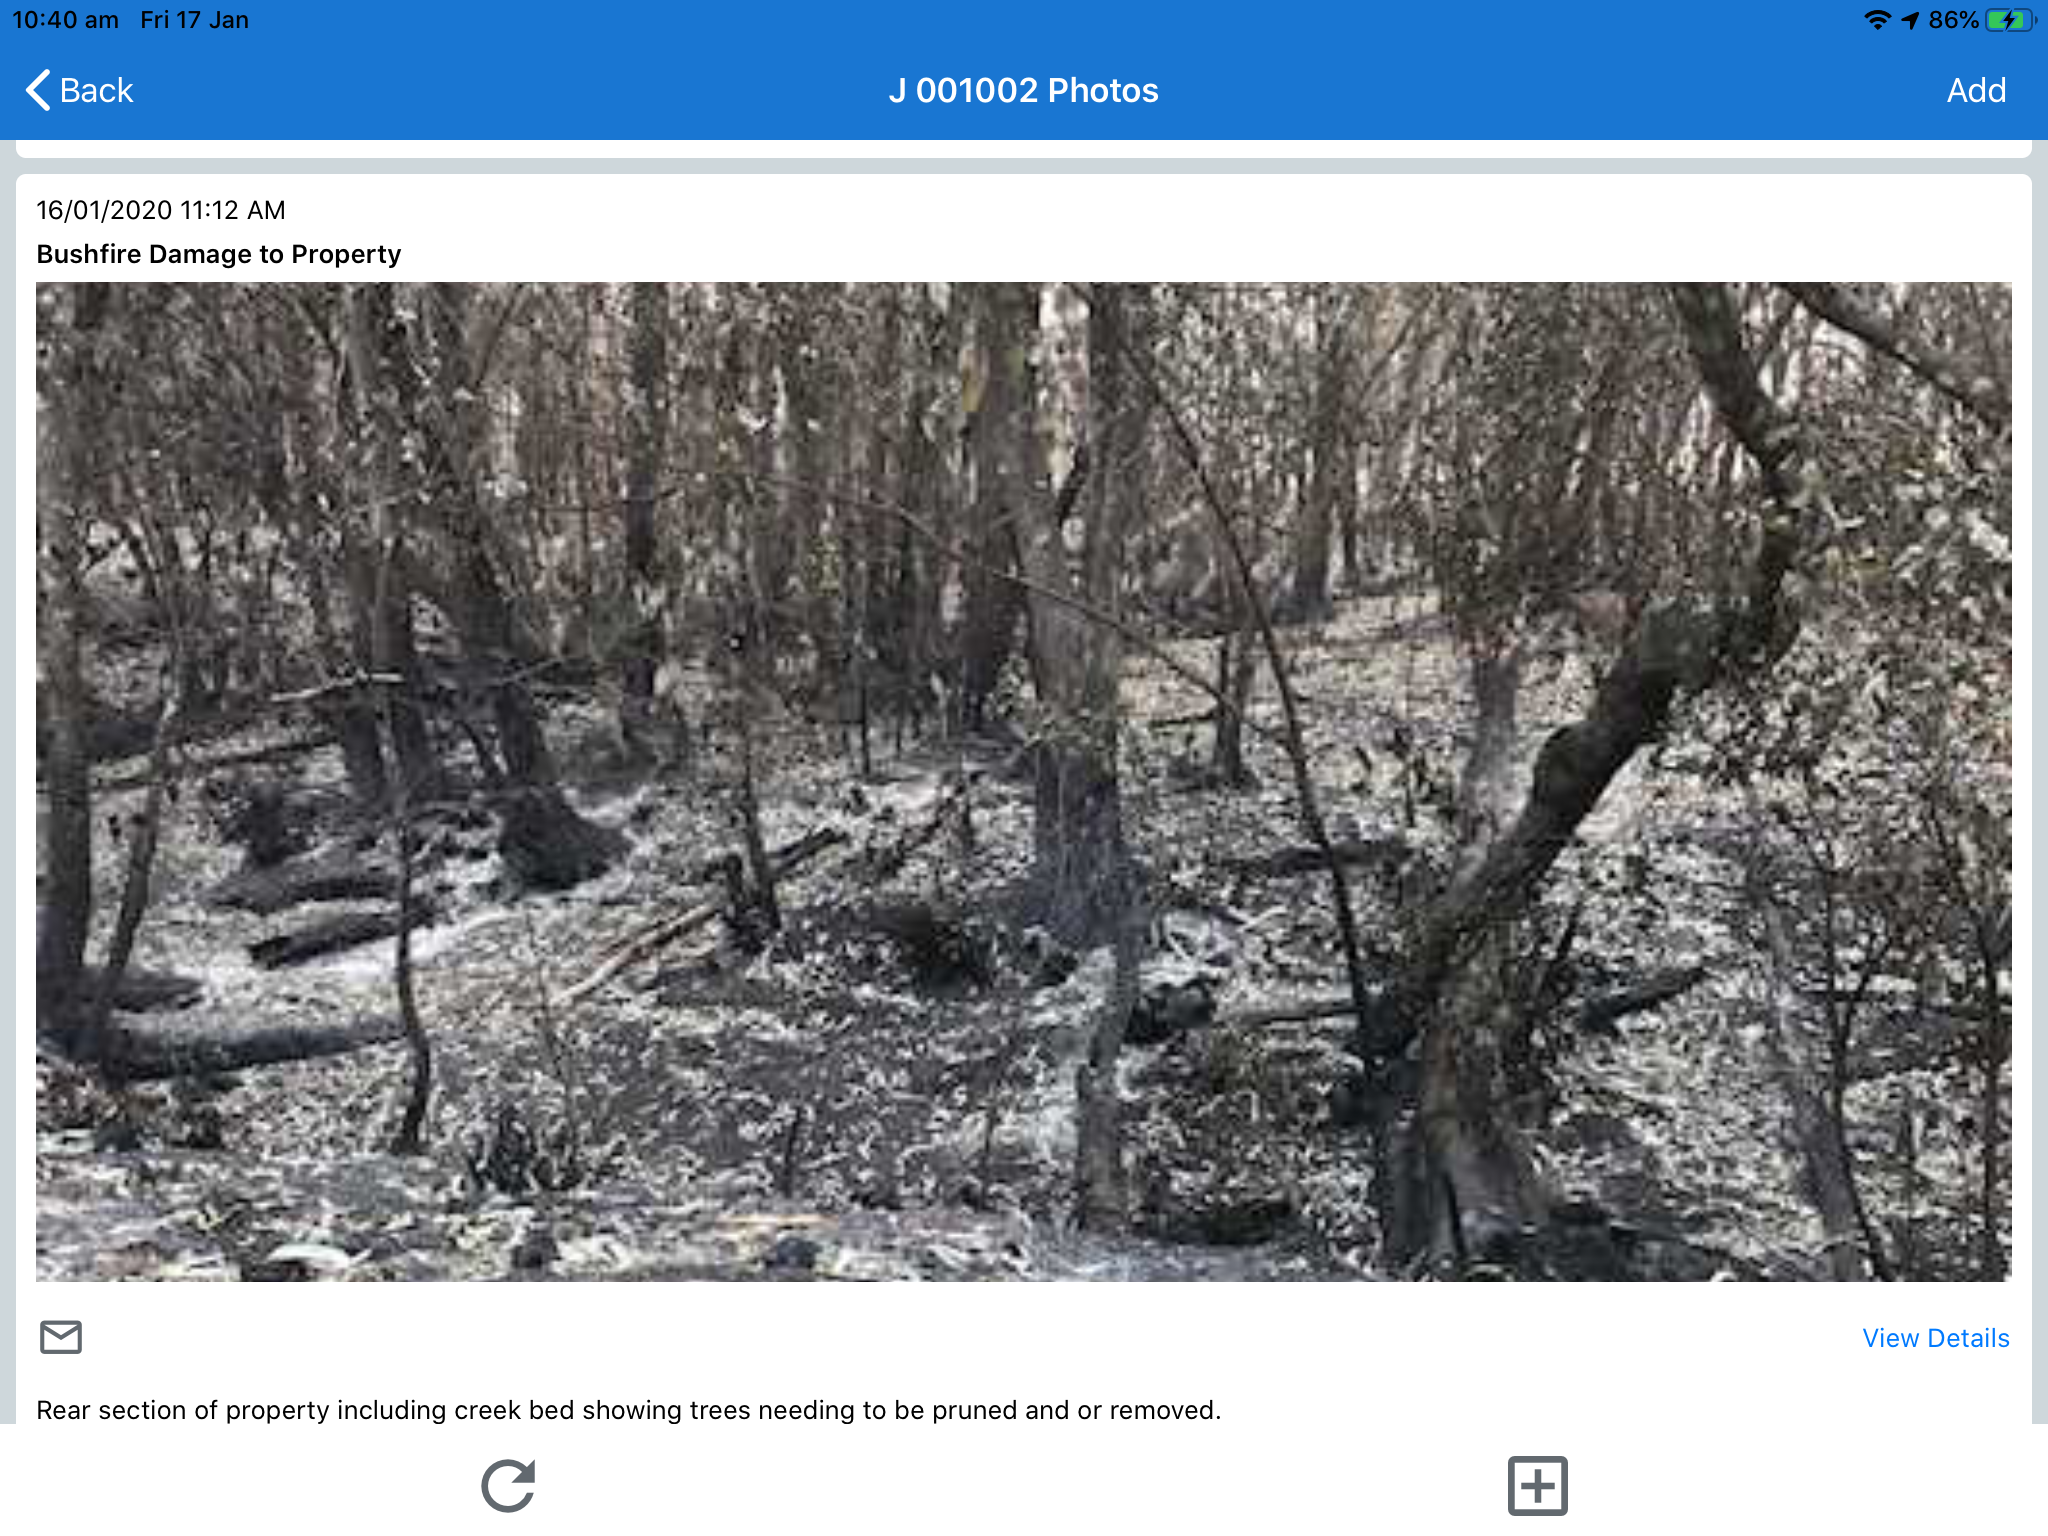
The Job Photos screen displays a list of existing photos for the job including the Date and Time the photo was added based on the viewing user’s Time Zone, the Photo Subject and the Photo Details. If there are additional Details not visible, tap View Details below the photo on the right hand side.
Tapping a photo will open the Photo in near full screen. The Photo is watermarked with the Date Uploaded, the User’s Vendor Code and the User Name who uploaded the photo, the Job Number, the Claim Number and where applicable the Scope of Work Reference.
Tap Back to exit the Viewer and Return to the Job Photos screen.
An option is provided to email an existing photo, by tapping the Email icon shown below the Photo on the left hand side of the screen. After tapping the Email icon for a Photo, the Email Photo menu is displayed, providing the option to email anyone or email the Job Supervisor.
To save loading time, the Tradie App displays cached data. If the most recent data needs to be viewed, use the refresh icon to refresh the data from the server.
Tap the + icon and the Job Add Photo Screen opens providing the option to load an existing photo or take a photo and upload it, in both cases with the option to add a caption and notes. After taking or selecting a photo, tap Save to upload it or Cancel to not upload.
Phone
Tap the Phone icon to open a Call Menu providing the option to call the Site Contact or the Job Supervisor.
When using the call menu selection, please note that iOS will display the Phone Number in a pop up, click on that pop up to make the call. After completing the call, the Job will be displayed in the Job screen.
Menu
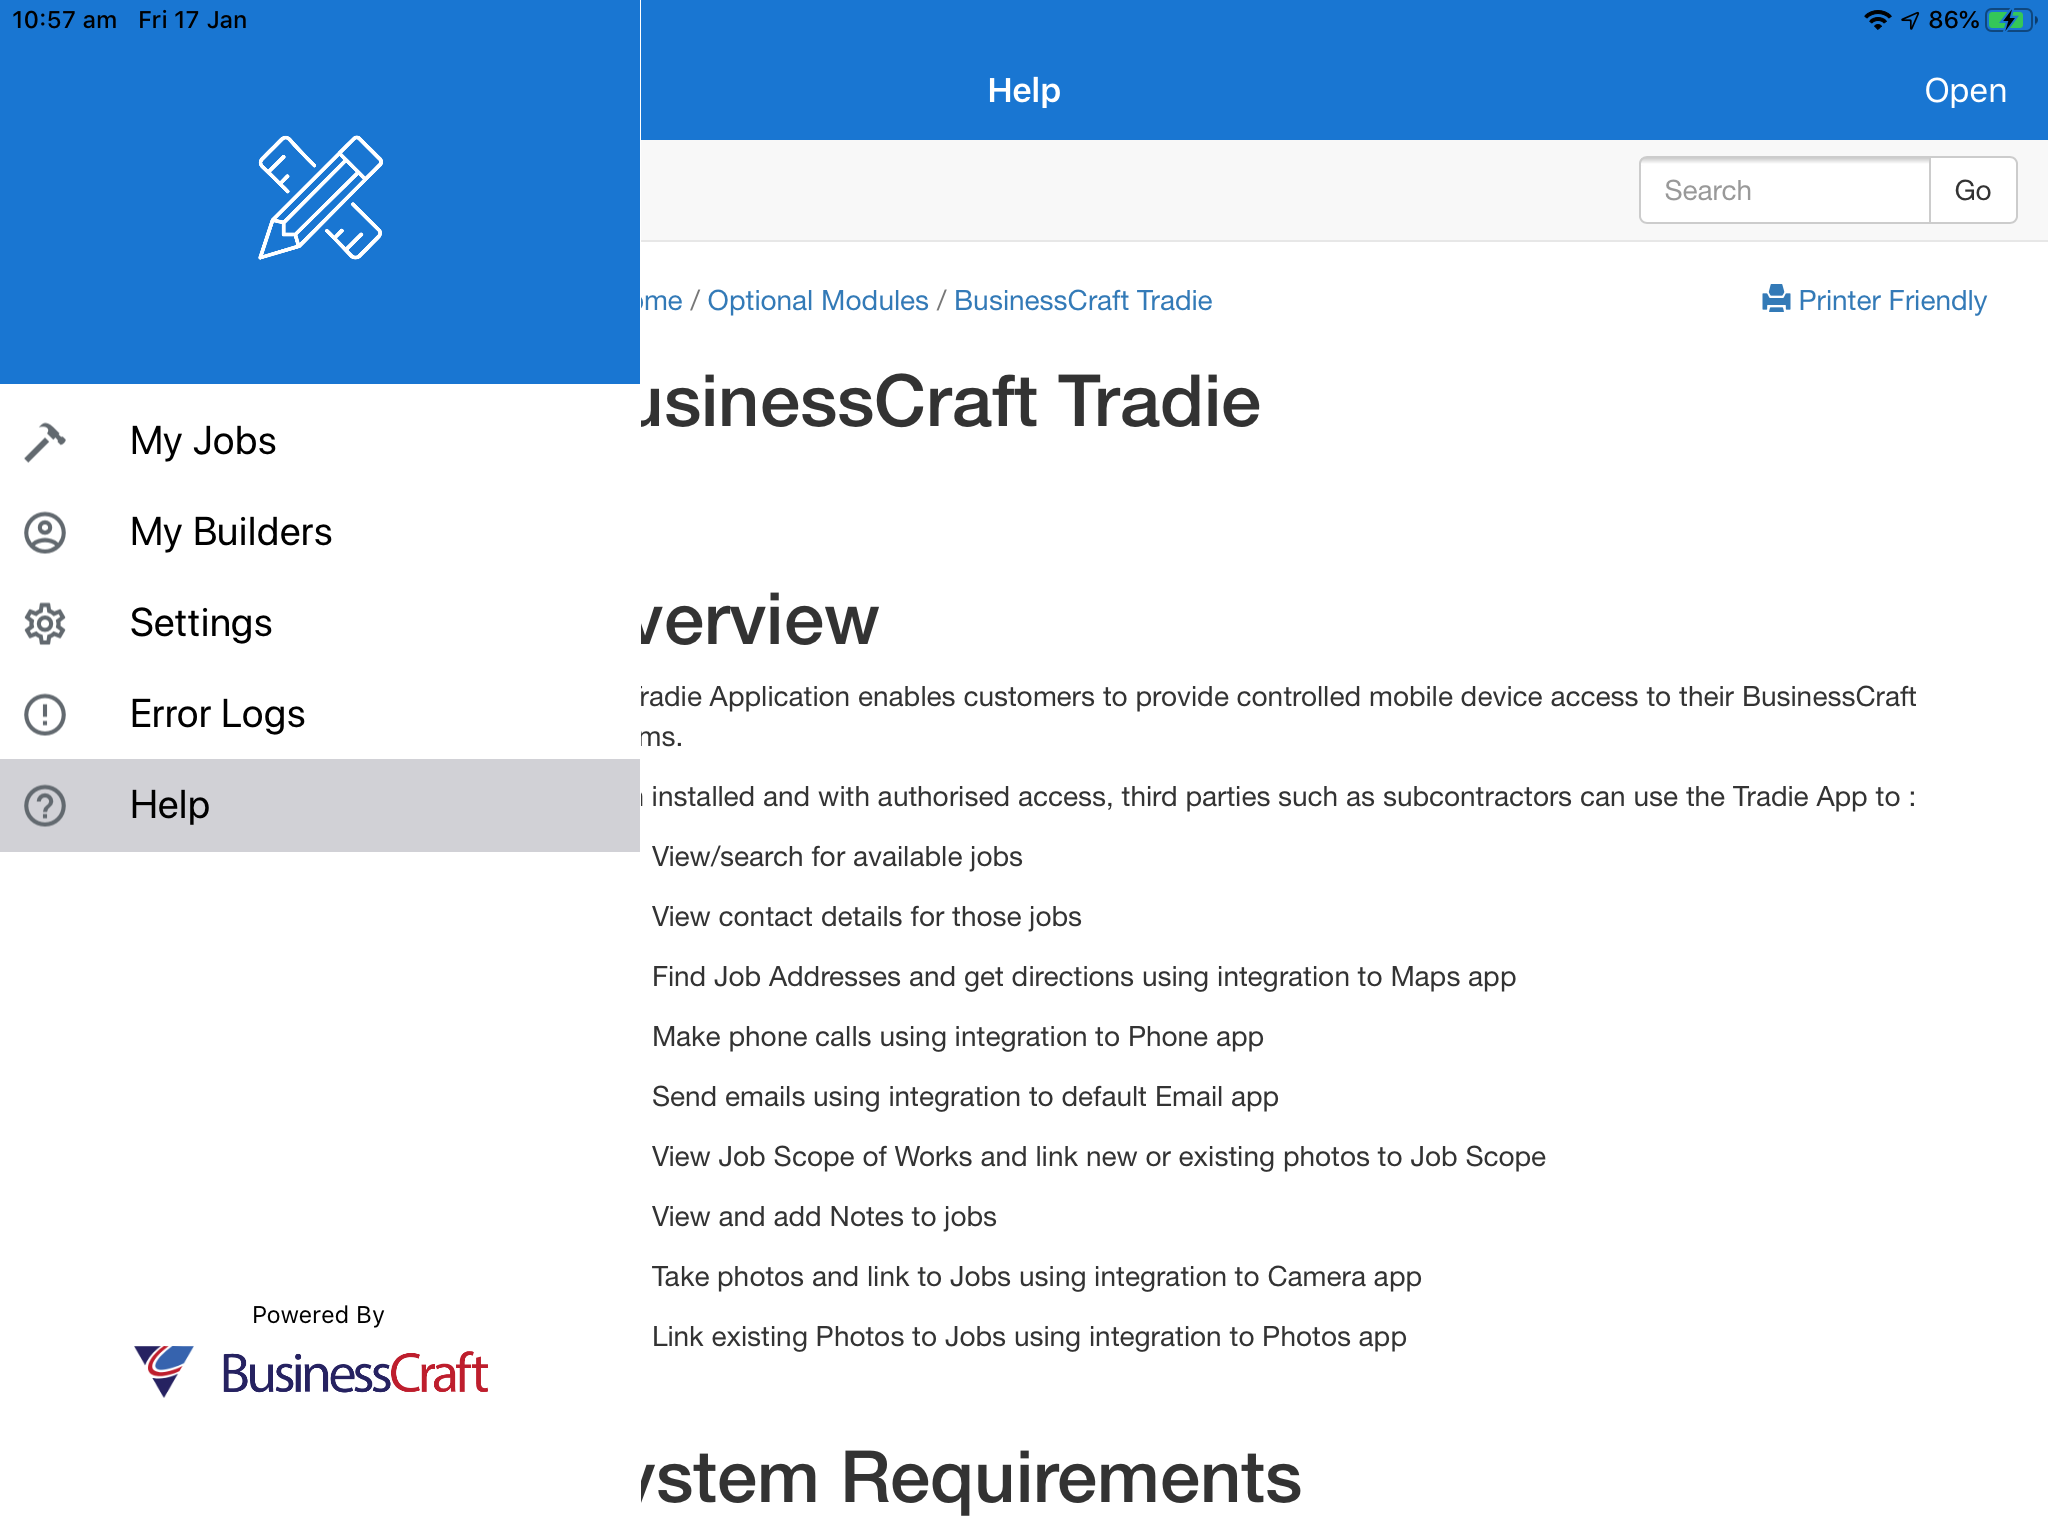
The Menu Sidebar provides access to My Jobs, My Builders, Settings, Error Logs and Help and can be accessed by using the Menu option in the top left hand corner from within any of those screens or by swiping from the left hand side of the screen from any screen:
The Menu Sidebar will appear over the current screen and can be hidden again by swiping from the right of the Menu Sidebar to the left or by tapping anywhere in the main screen displayed:
My Builders
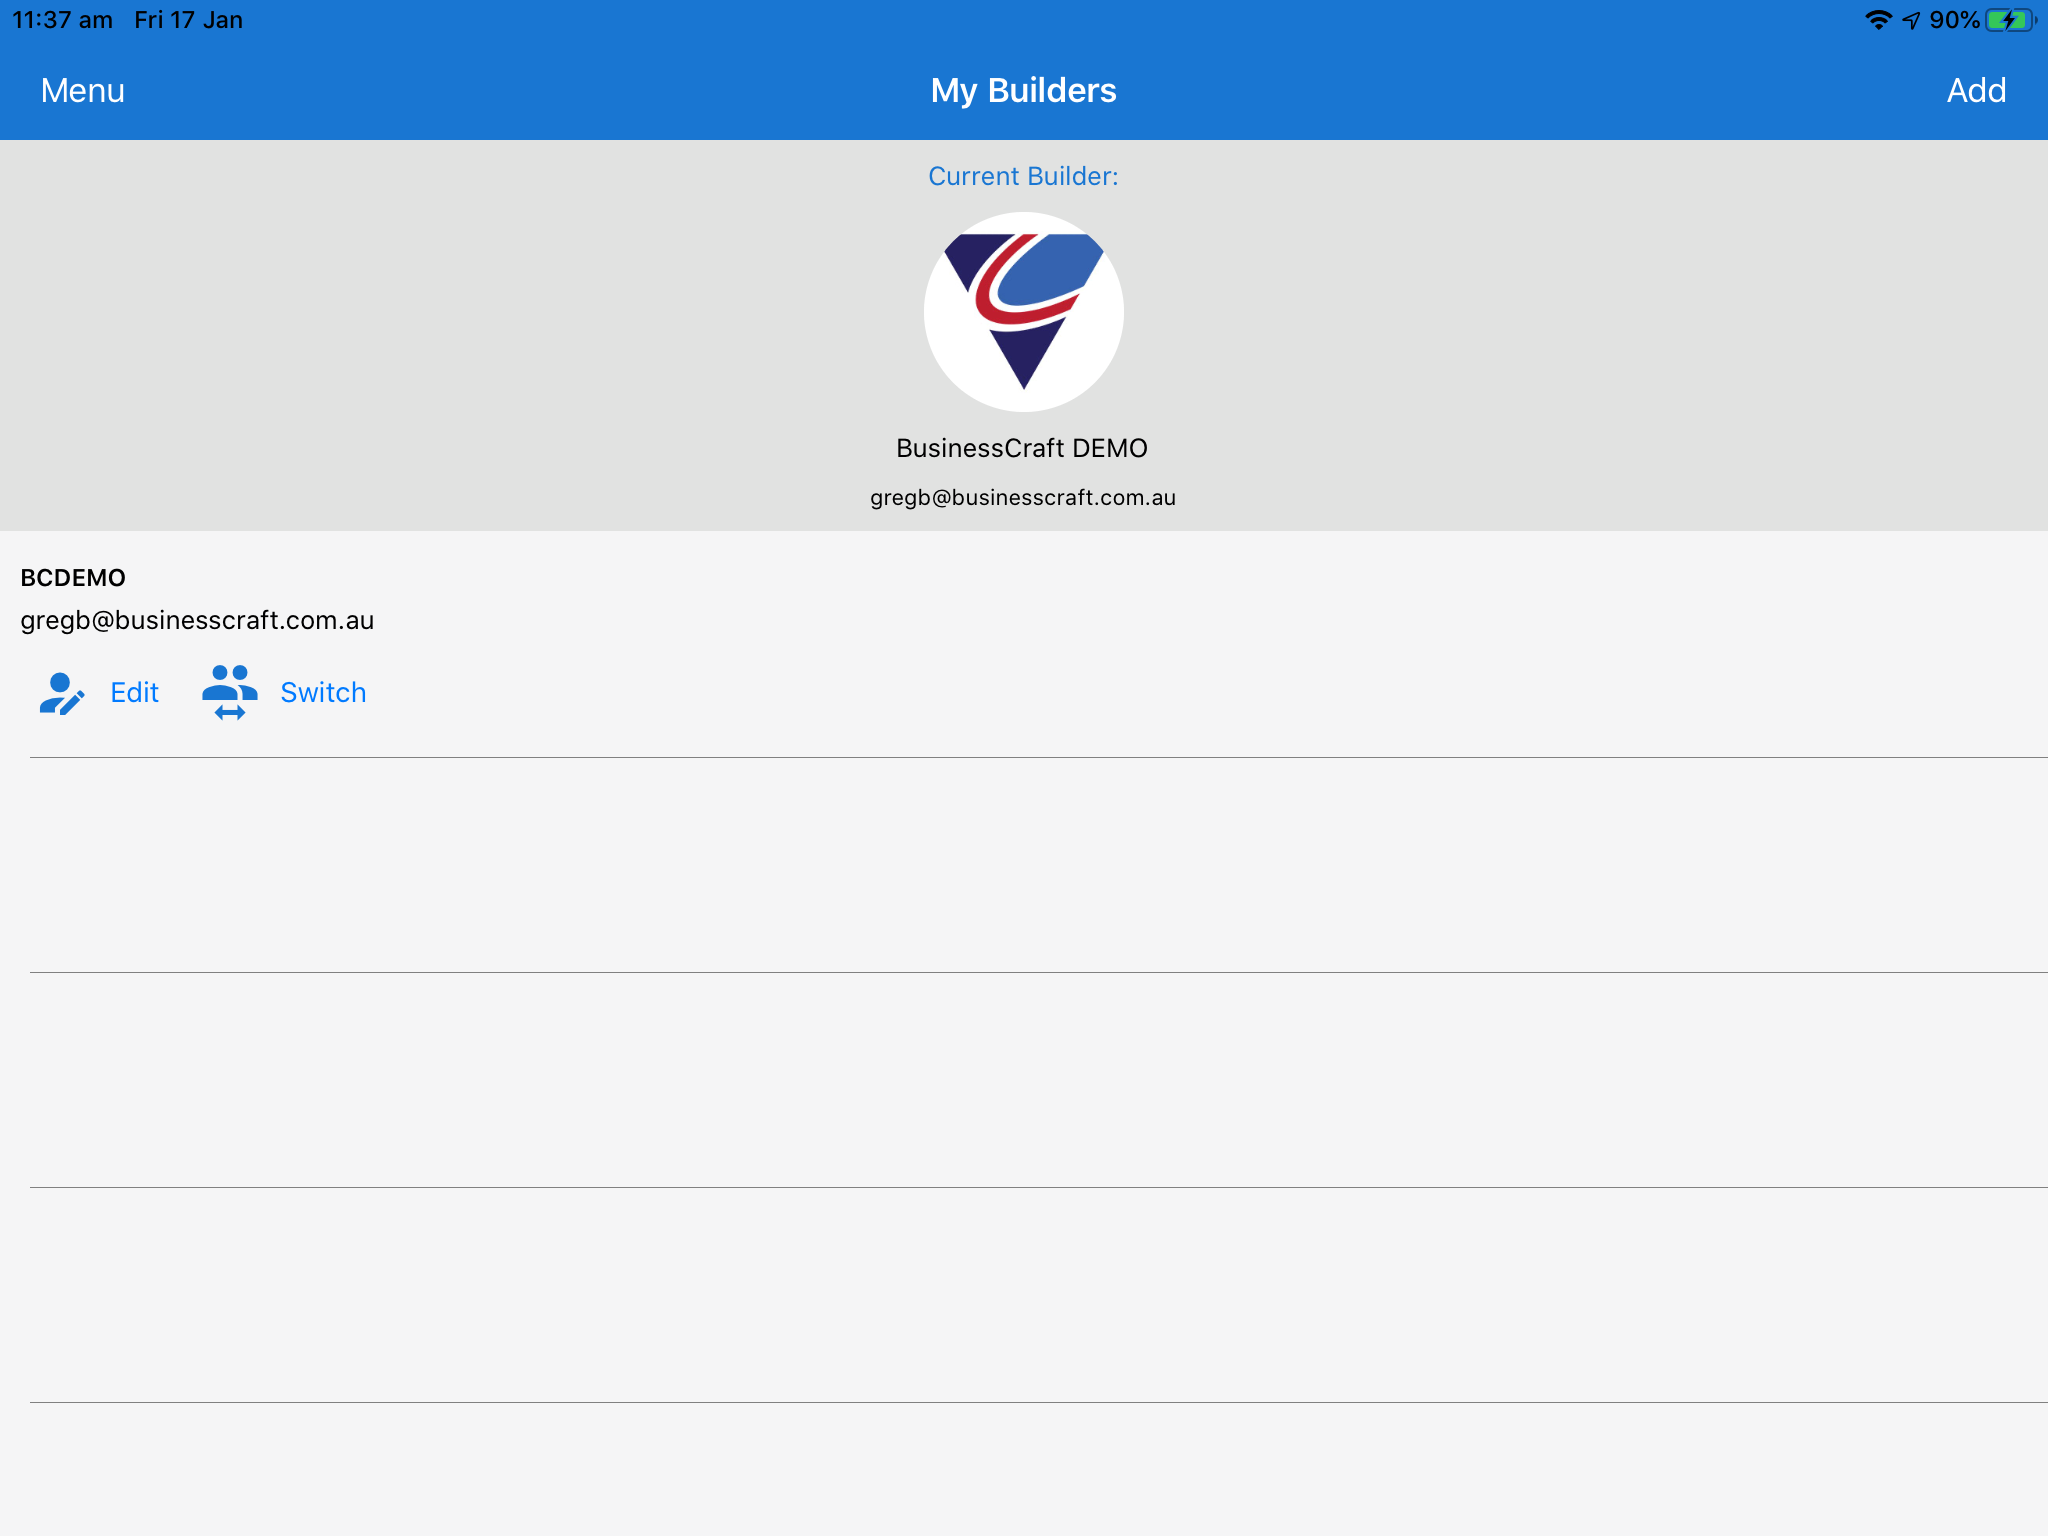
Tap on My Builders in the Menu Sidebar to open the My Builders screen displaying a list of the builder datasets that can be accessed. Options are provided to add additional datasets or if access to multiple datasets exist to switch between datasets as well as edit details for an existing dataset:
The screen banner provides access to the Menu Sidebar, shows the screen name and provides an Add option to add additional dataset connections.
Underneath the screen banner is a panel showing the current builder dataset logged into and the email address used for the login.
Below the panel is a list of available authorised datasets that can be accessed.
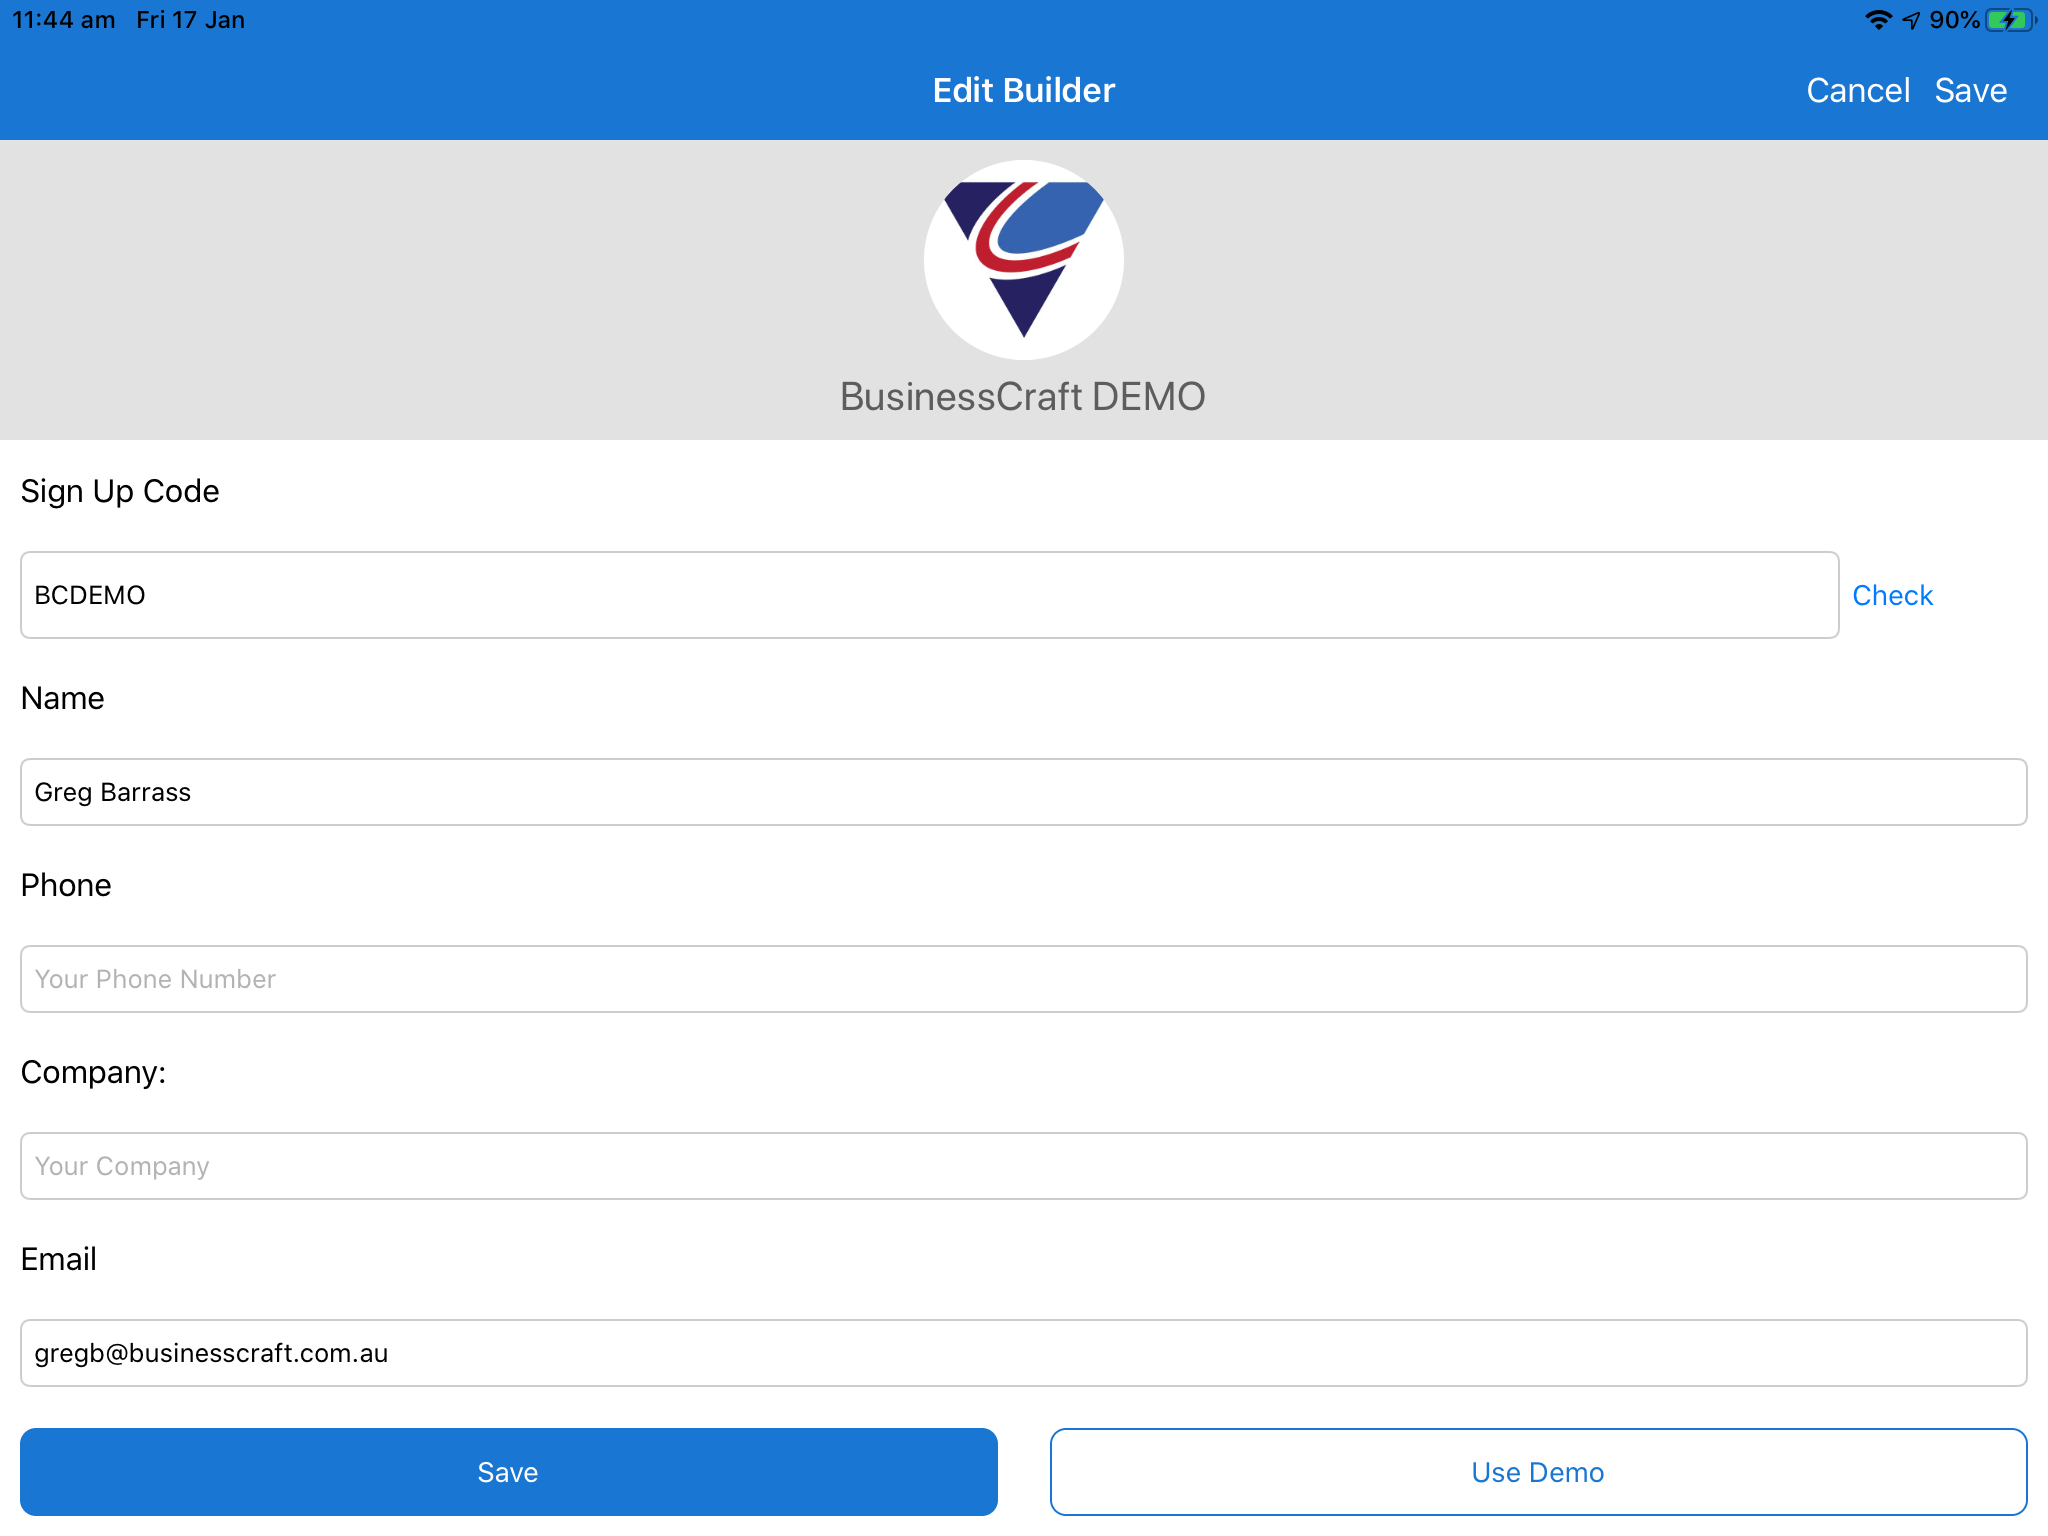
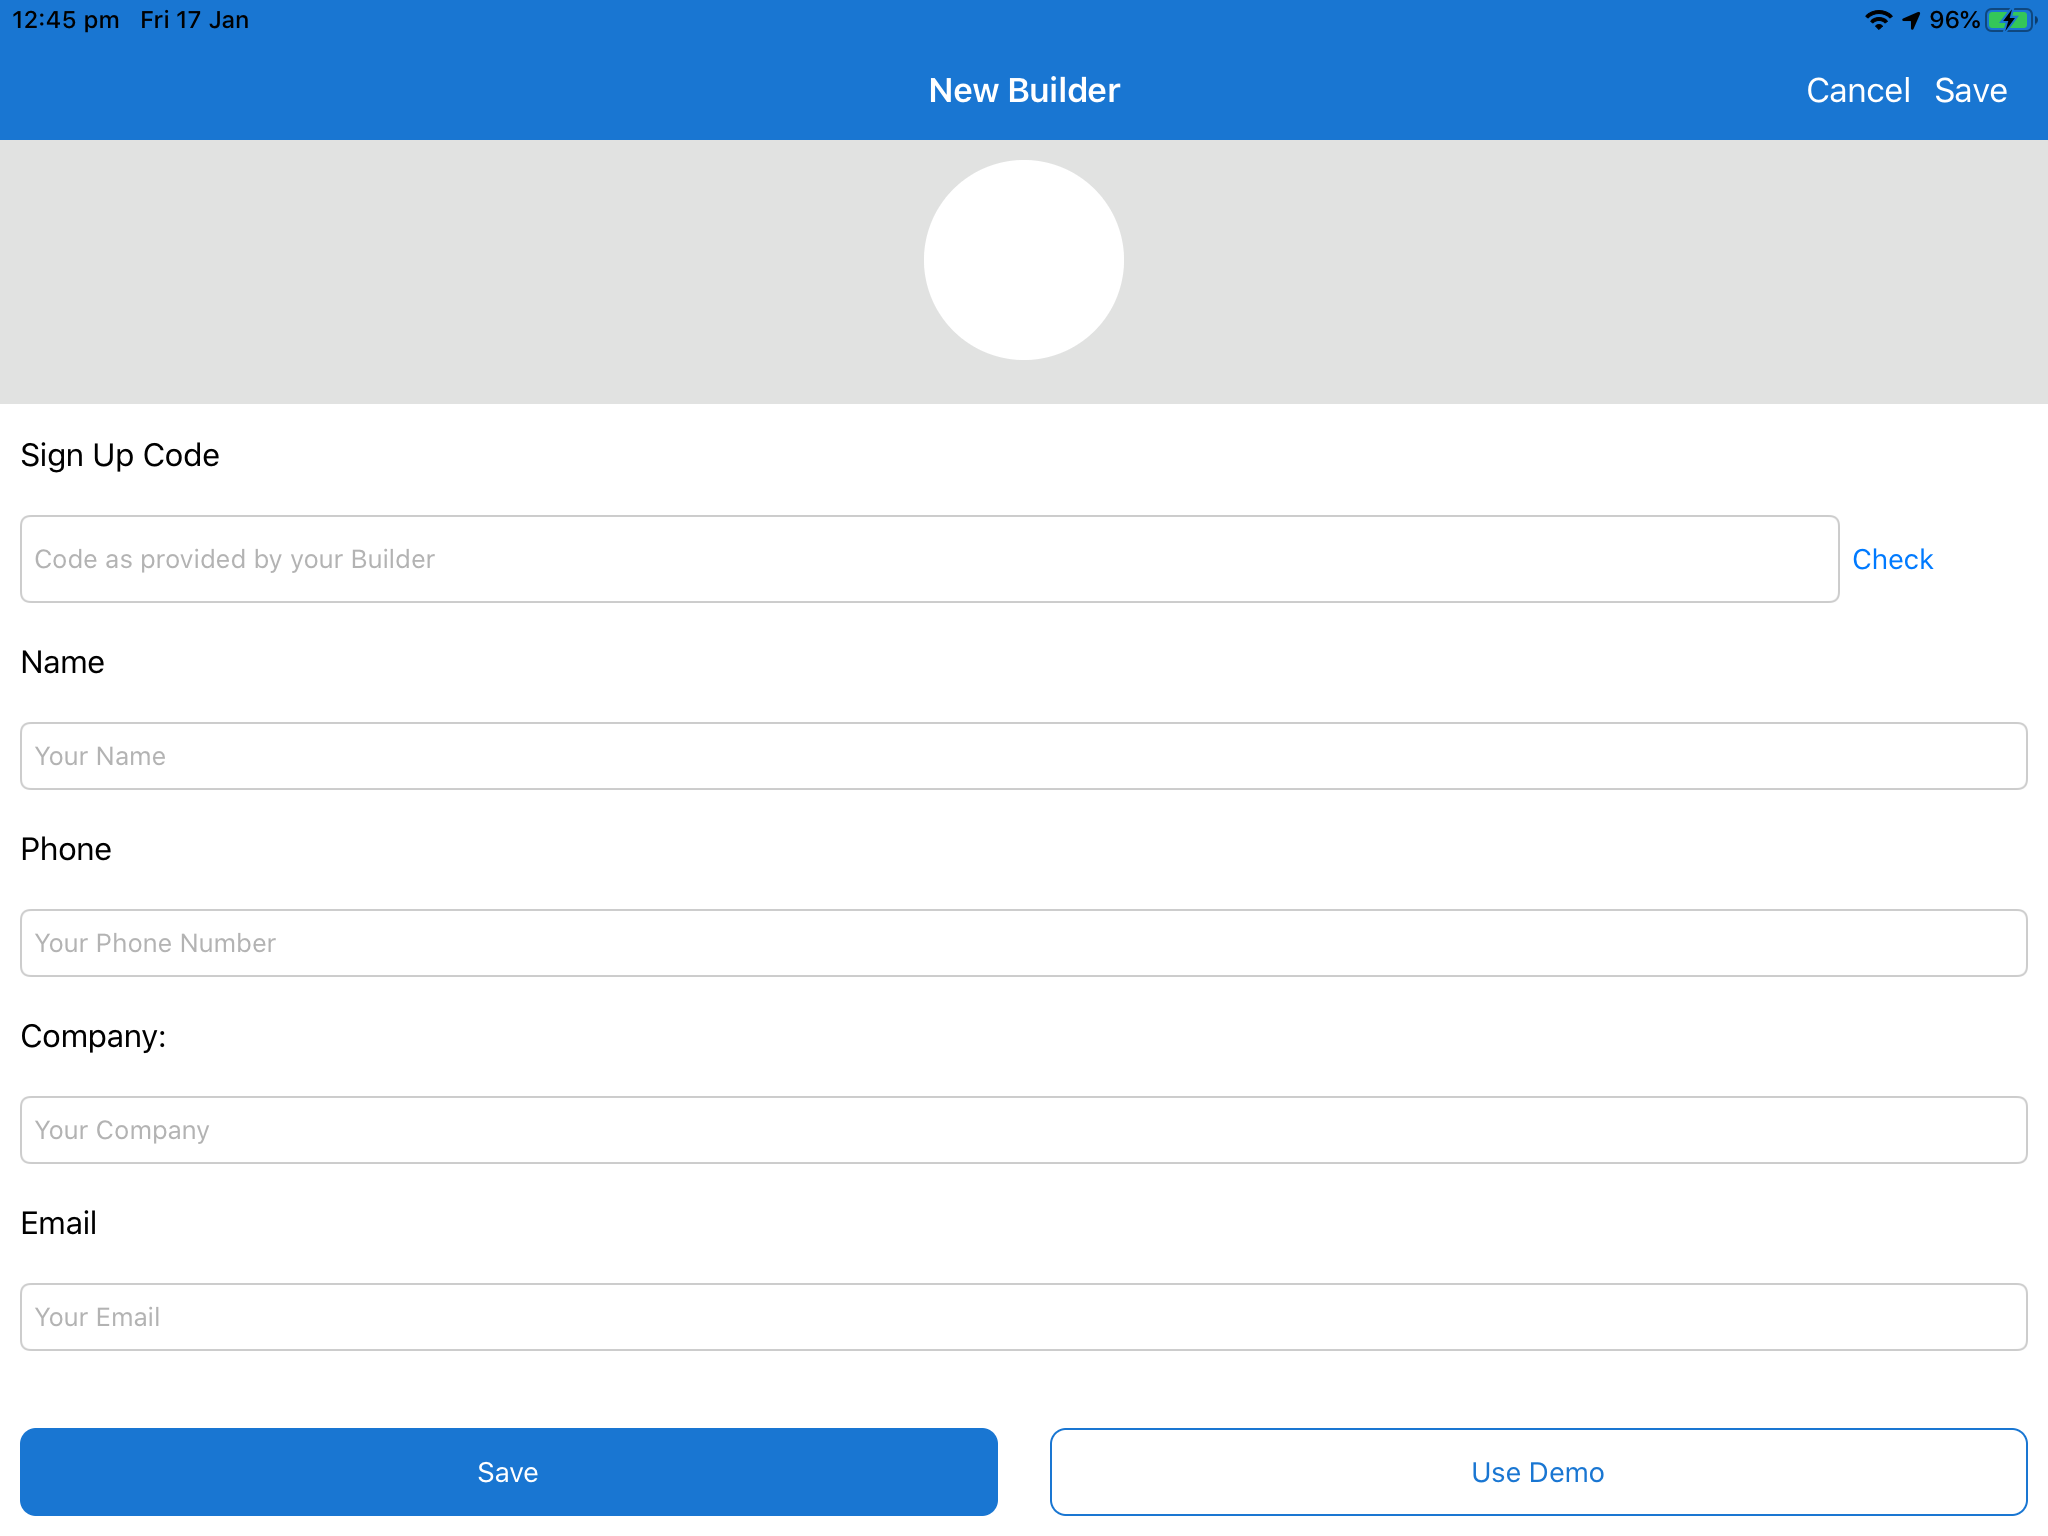
Tap Edit to open the Edit Builder screen to update any details:
If changing the Sign Up Code, click Check to ensure the Code is valid.
After making changes click Save to Save and Exit or Cancel to exit without saving changes.
An option is provided to use the Demo dataset.
Use the Add option in the top right hand corner of the screen to open the New Builder screen to add a new dataset to access. This should only be used if you have full details including Pin Code:
With multiple datasets, switch easily between datasets by tapping switch on the dataset to switch to.
Settings
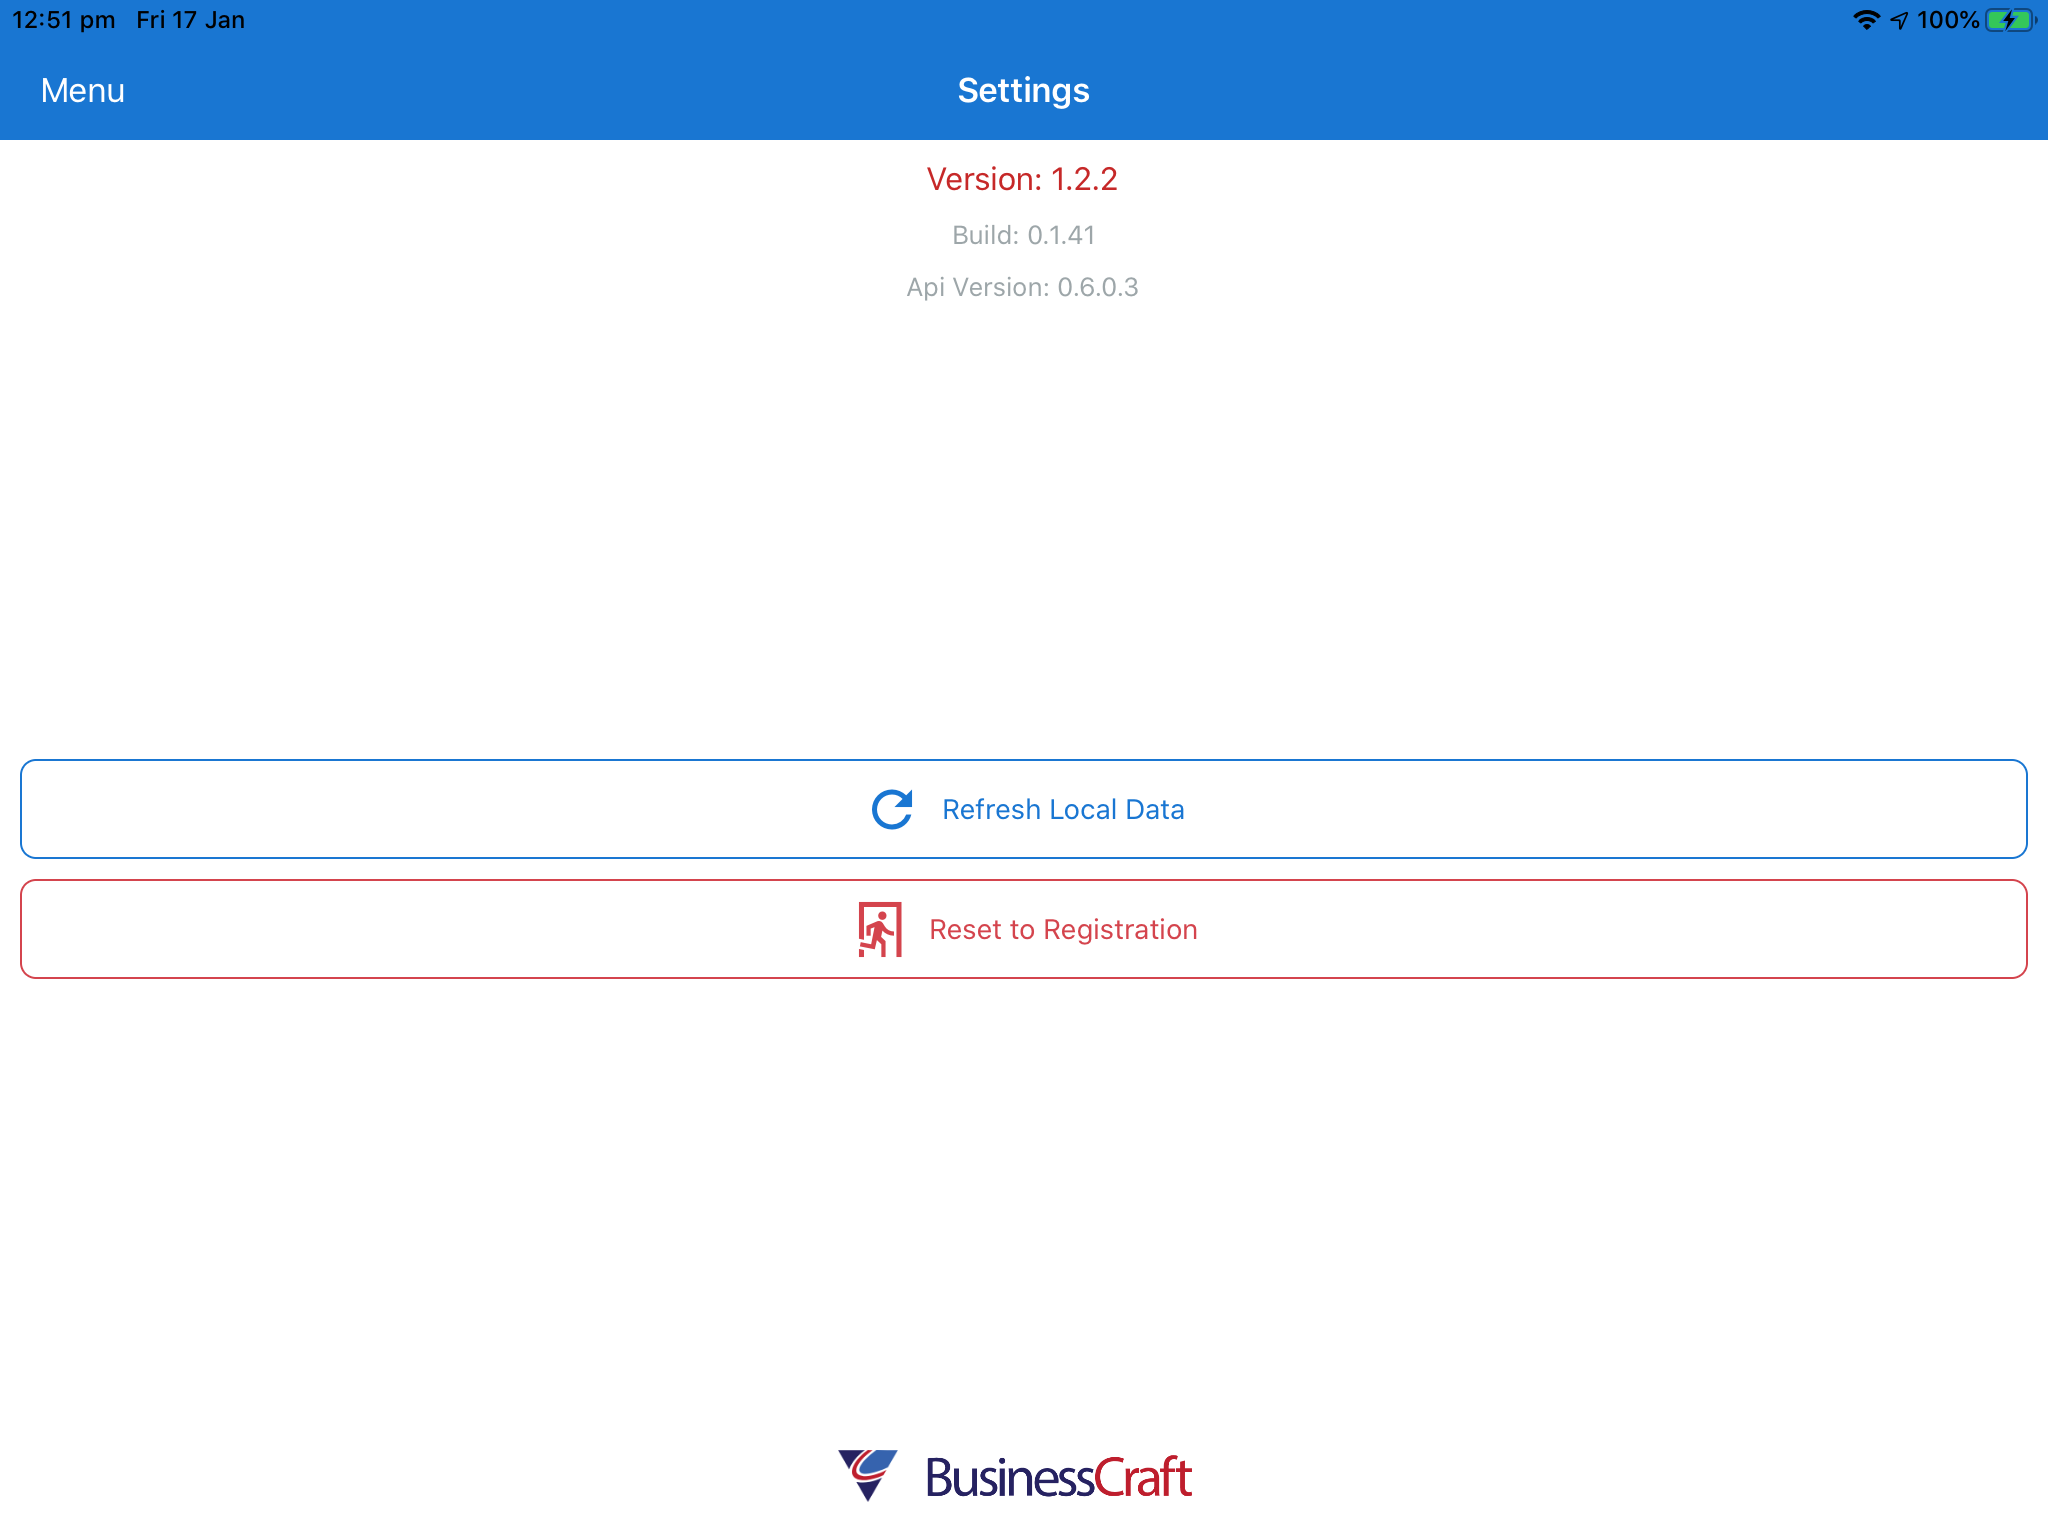
Tap on Settings in the Menu Sidebar to open the Settings screen displaying the BusinessCraft Tradie Product Version, Build Number and API Version:
Tap on Refresh Local Data to refresh data for all authorised datasets
Tap Reset to Registration to clear all existing Builders from the app
Tap the BusinessCraft Logo to go to the BusinessCraft Web Site.
Error Logs
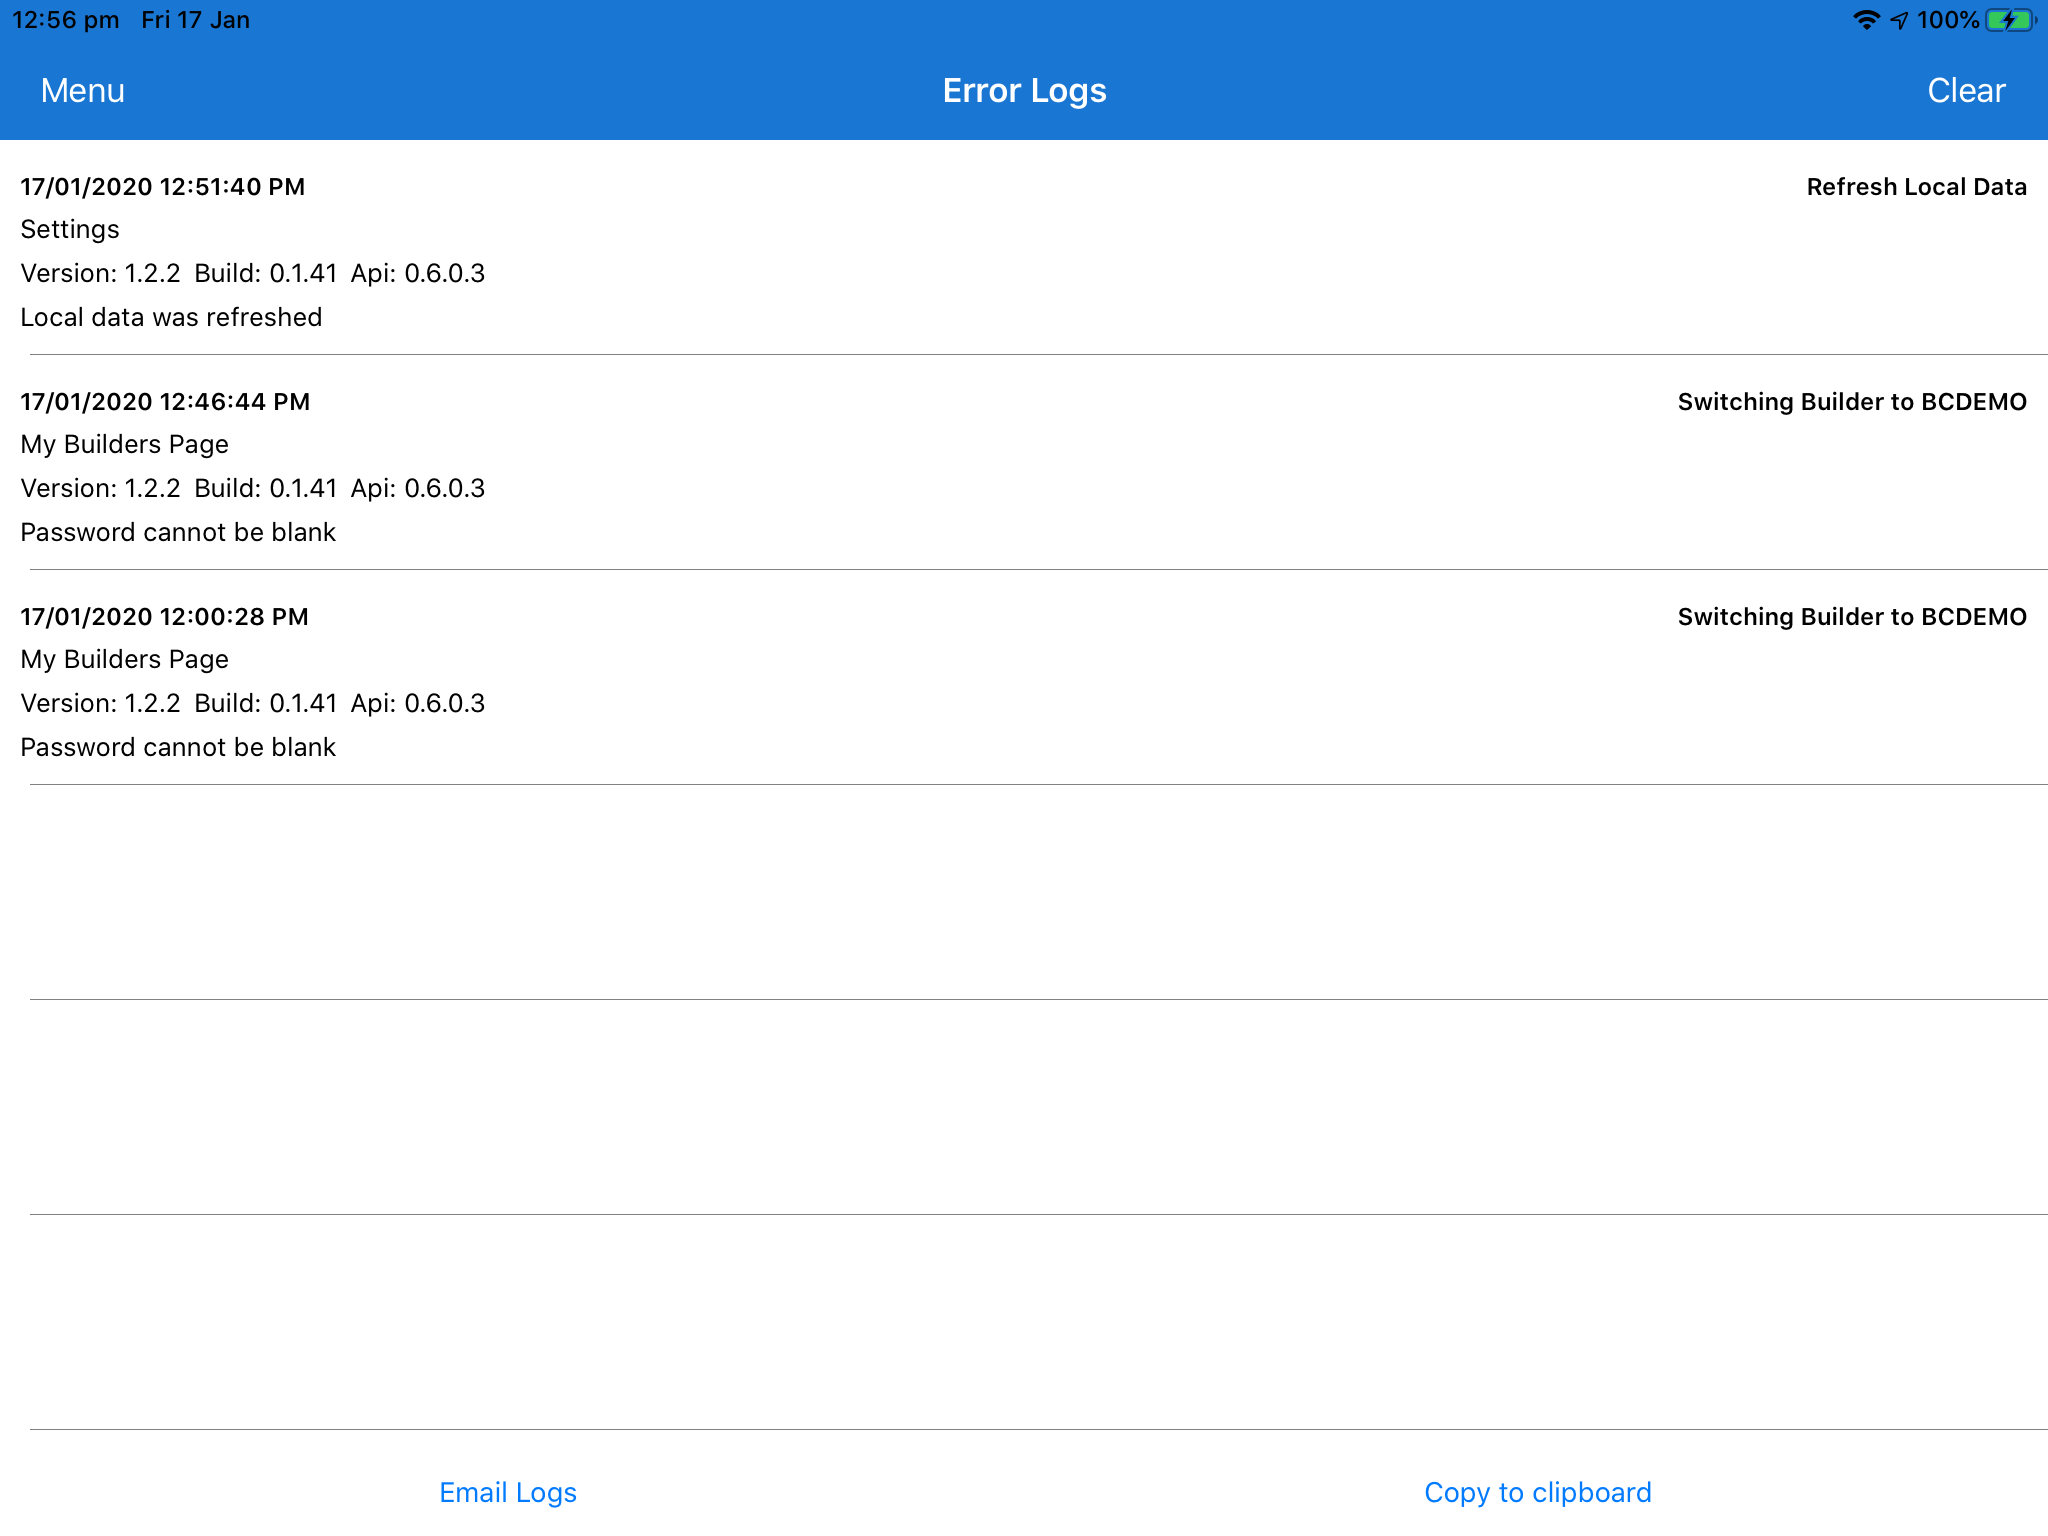
Tap on Error Logs in the Menu Sidebar to open the Error Logs screen displaying the Error Logs recorded for the application since the last time the Error Logs were cleared:
Tap Clear in the top right hand corner of the Error Logs screen to clear current Error Logs
Tap the Email Logs option in the Error Logs screen to Email all Error Log records and Copy to Clipboard to copy all Error Logs to the Clipboard.
Tap a specific Error Log to view the Error Log Details screen. Options are provided in the Error Log Details screen to Email the Error Log and Copy the Error Log to the Clipboard.
Help
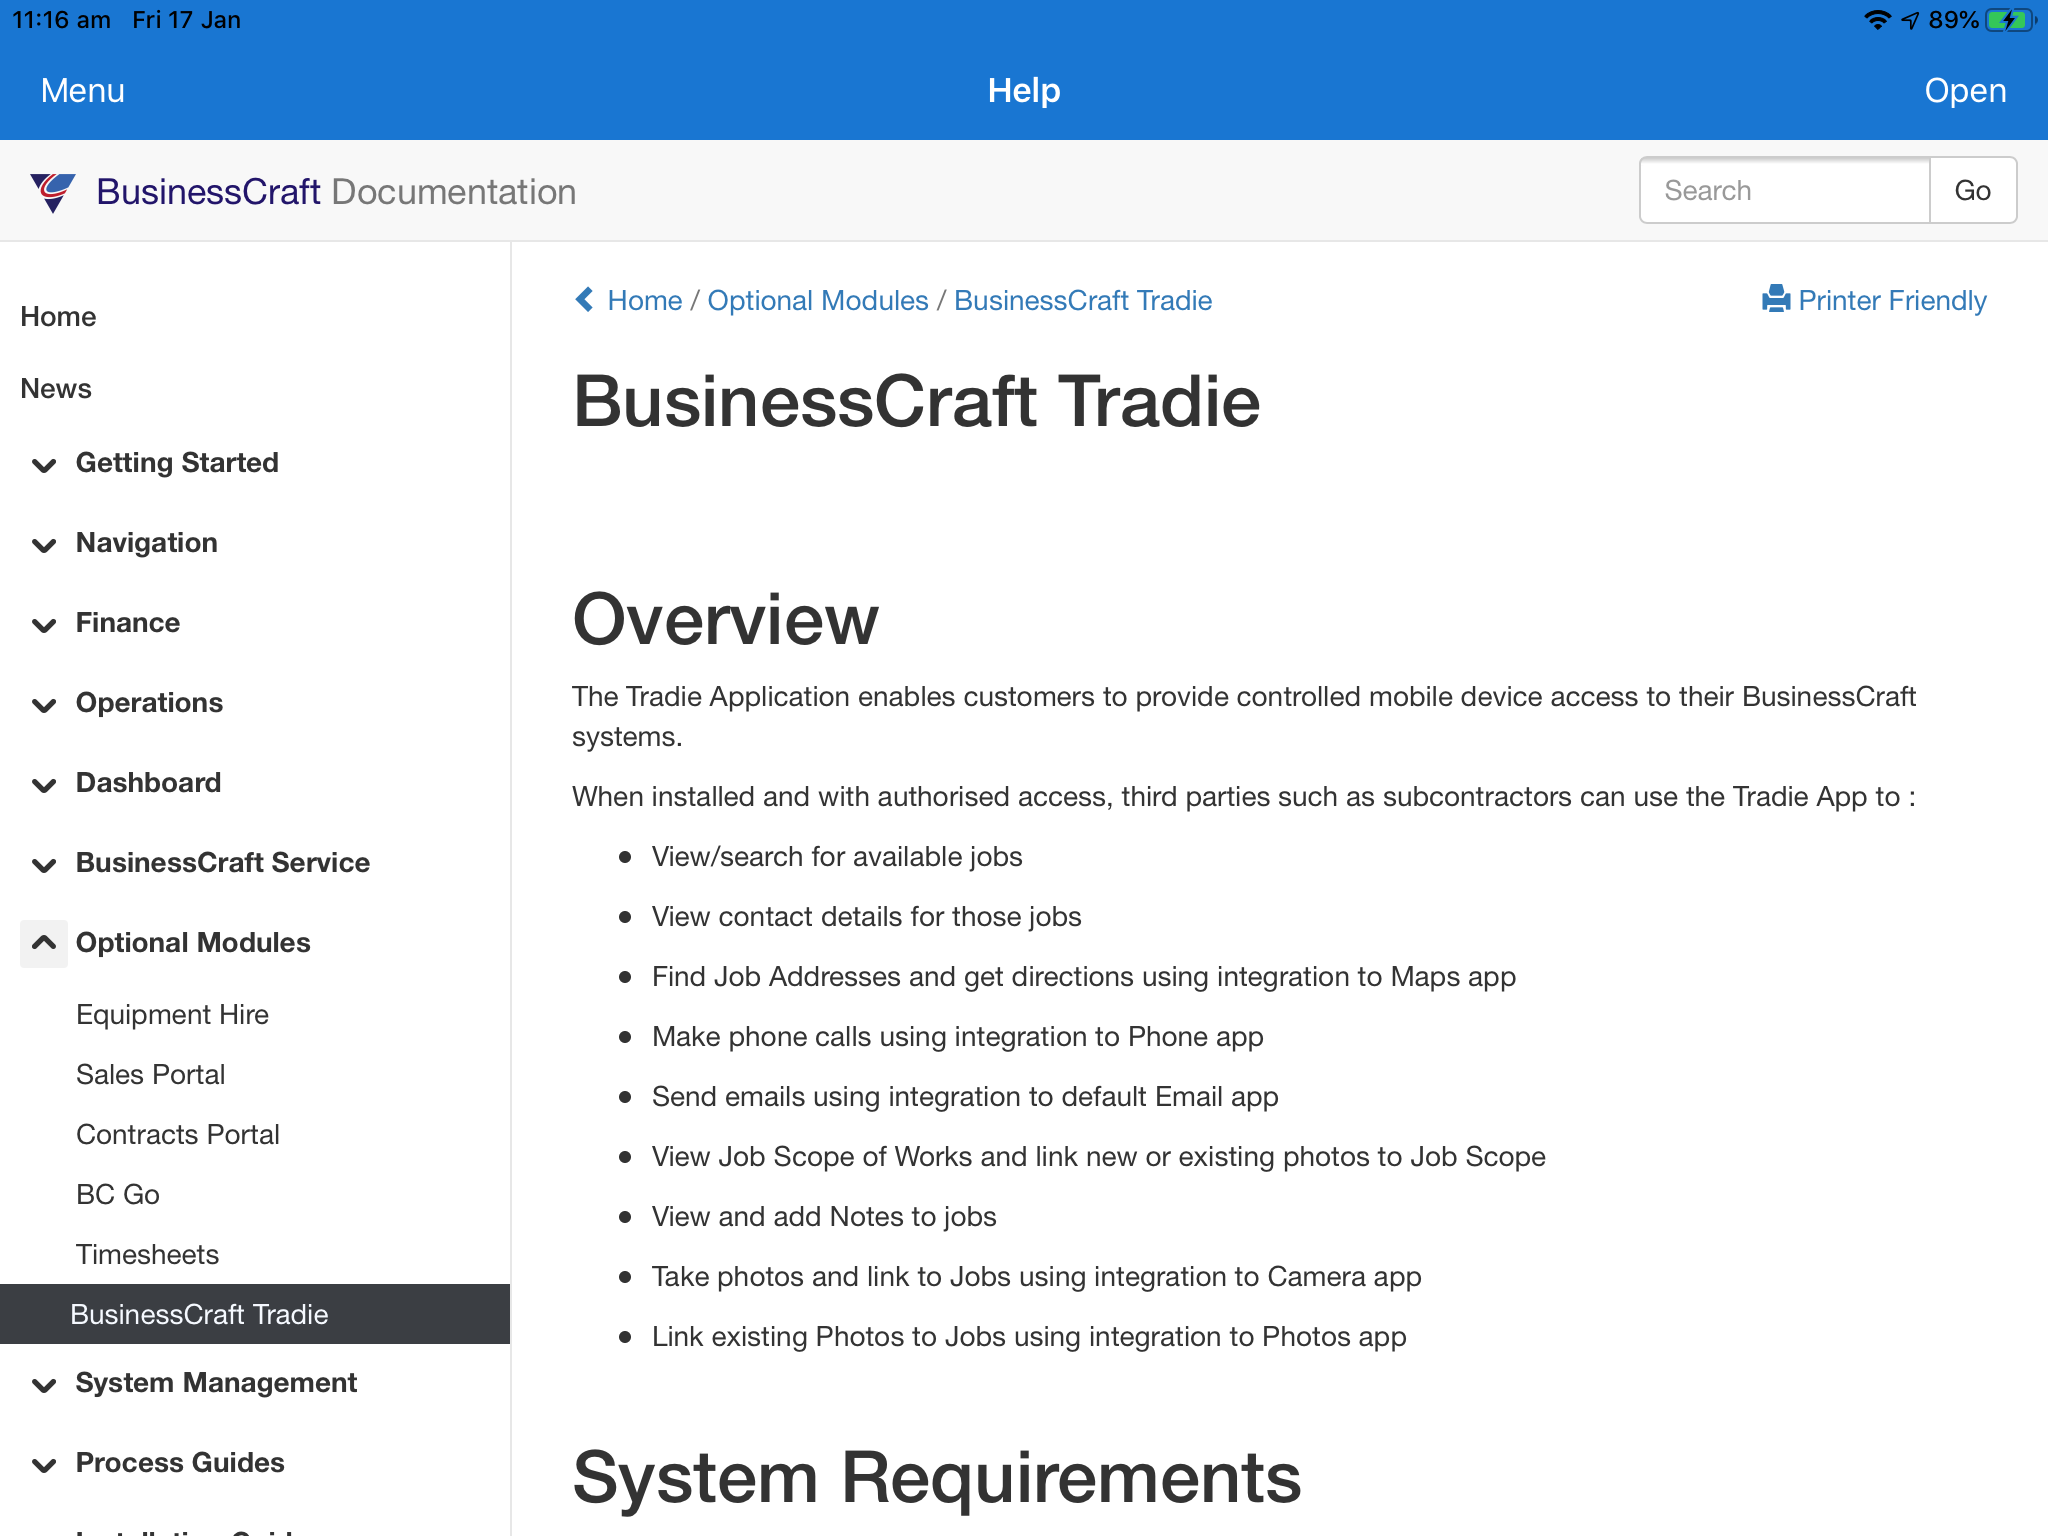
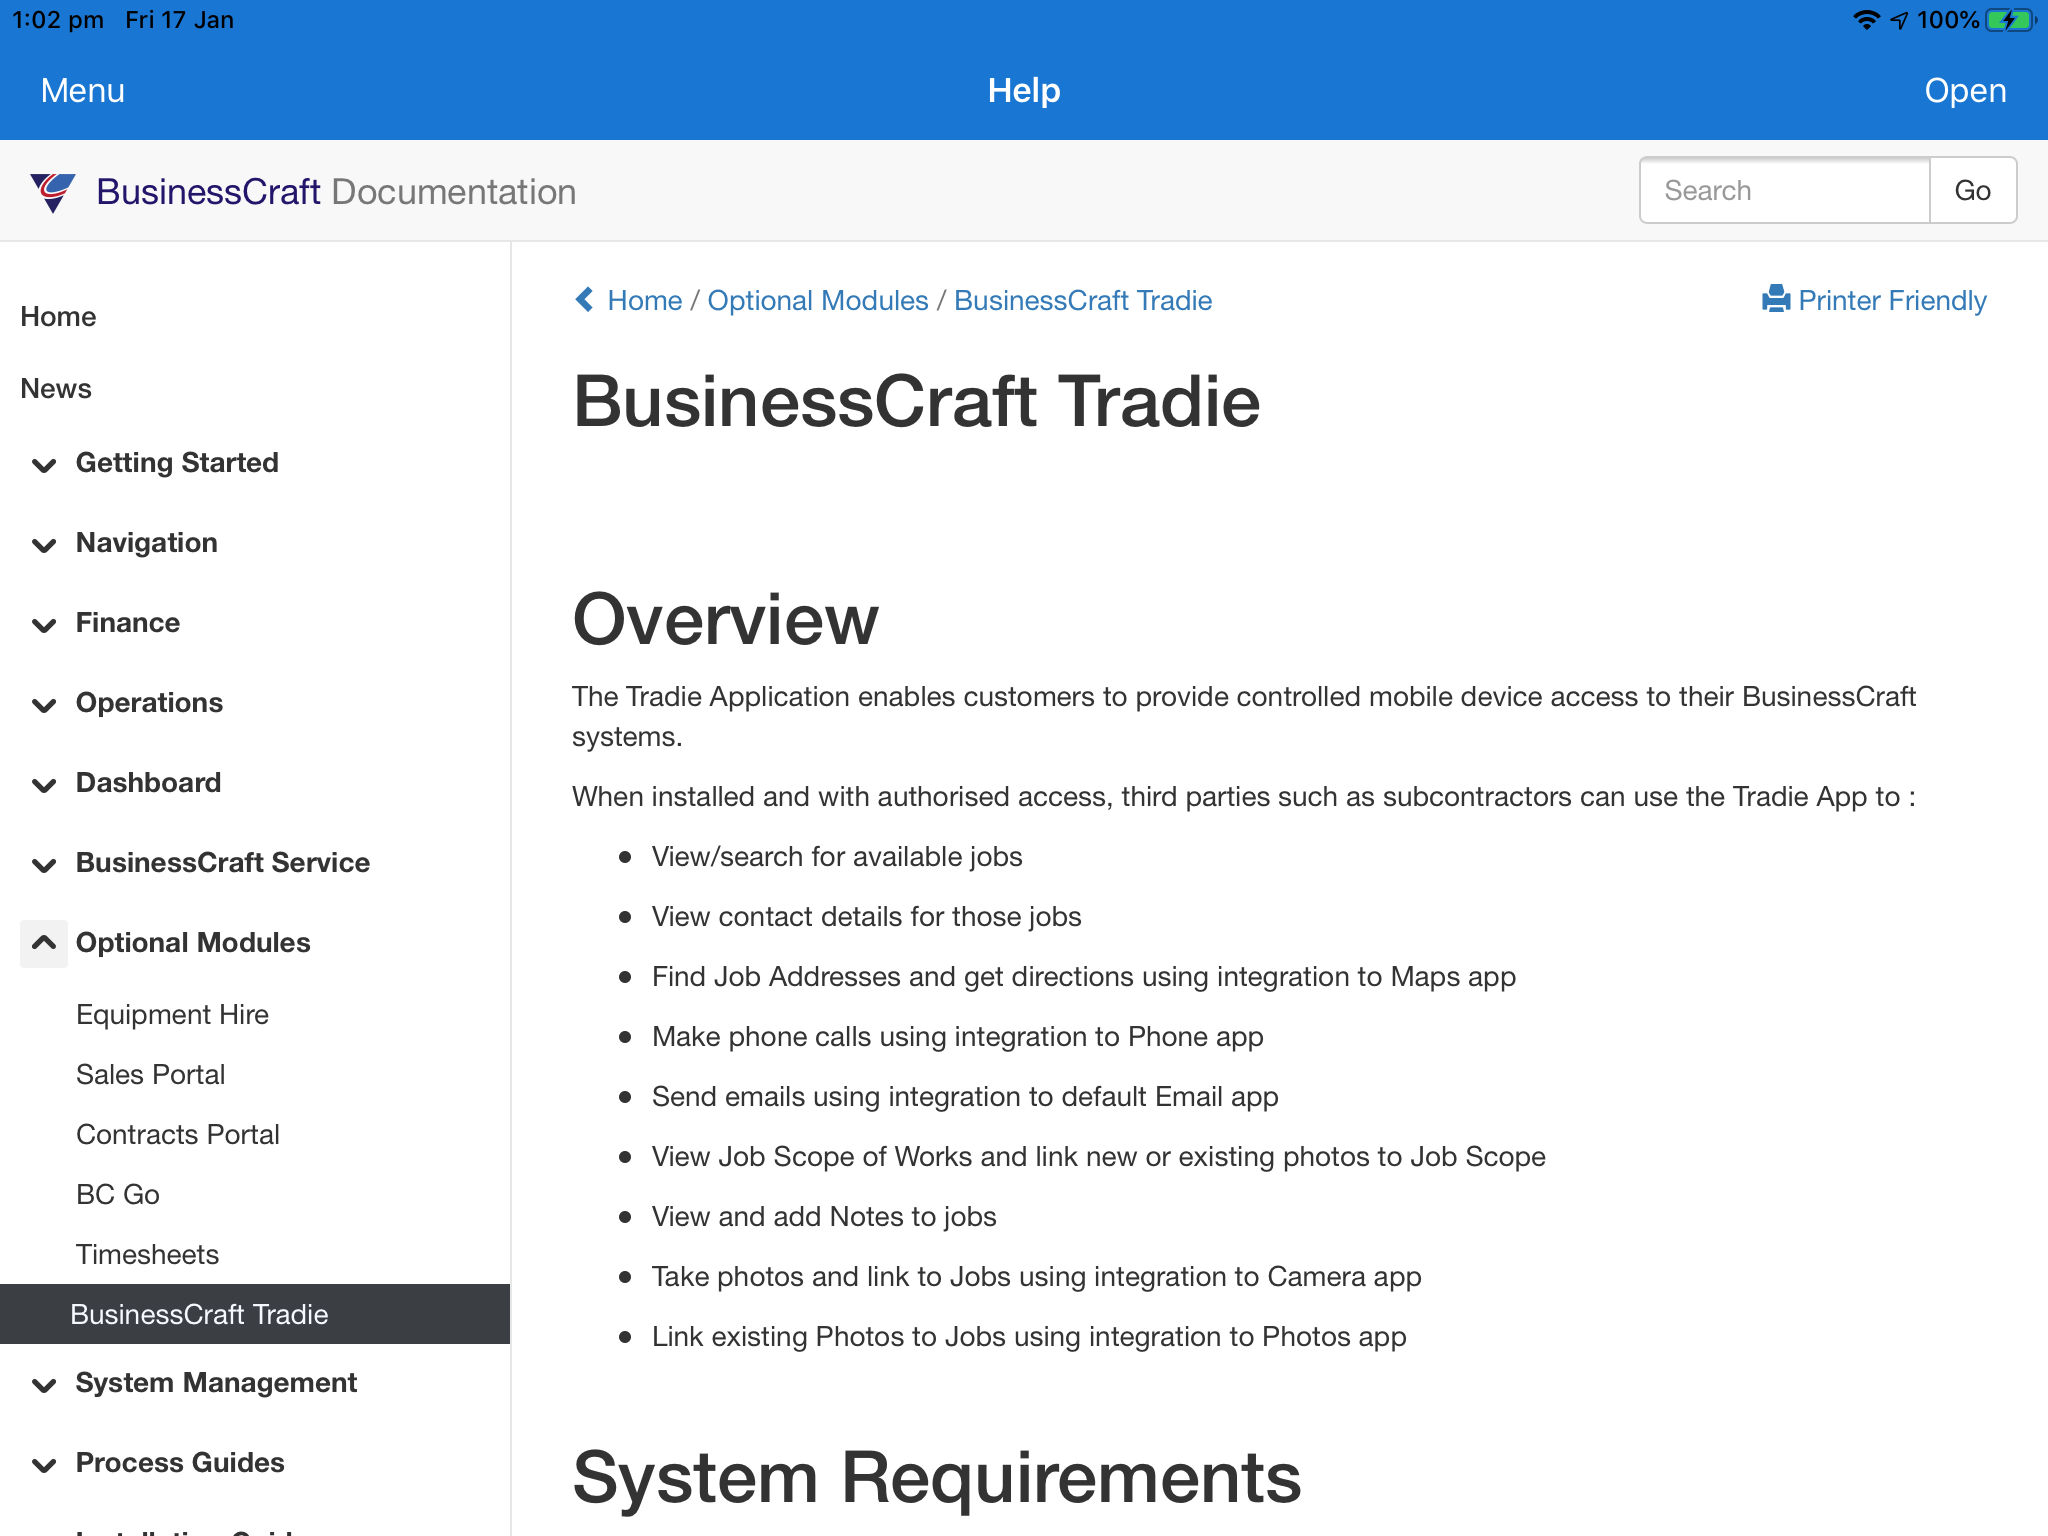
Tap on Help in the Menu Sidebar to open the BusinessCraft Documentation for the BusinessCraft Tradie app:
The documentation can be reviewed from within the BusinessCraft Tradie app or if required click Open in the Top right hand corner of the screen to open the documentation in the default browser for the device.
Access is provided to all BusinessCraft Documentation not just the BusinessCraft Tradie documentation.
Revision 1
17th January 2020
